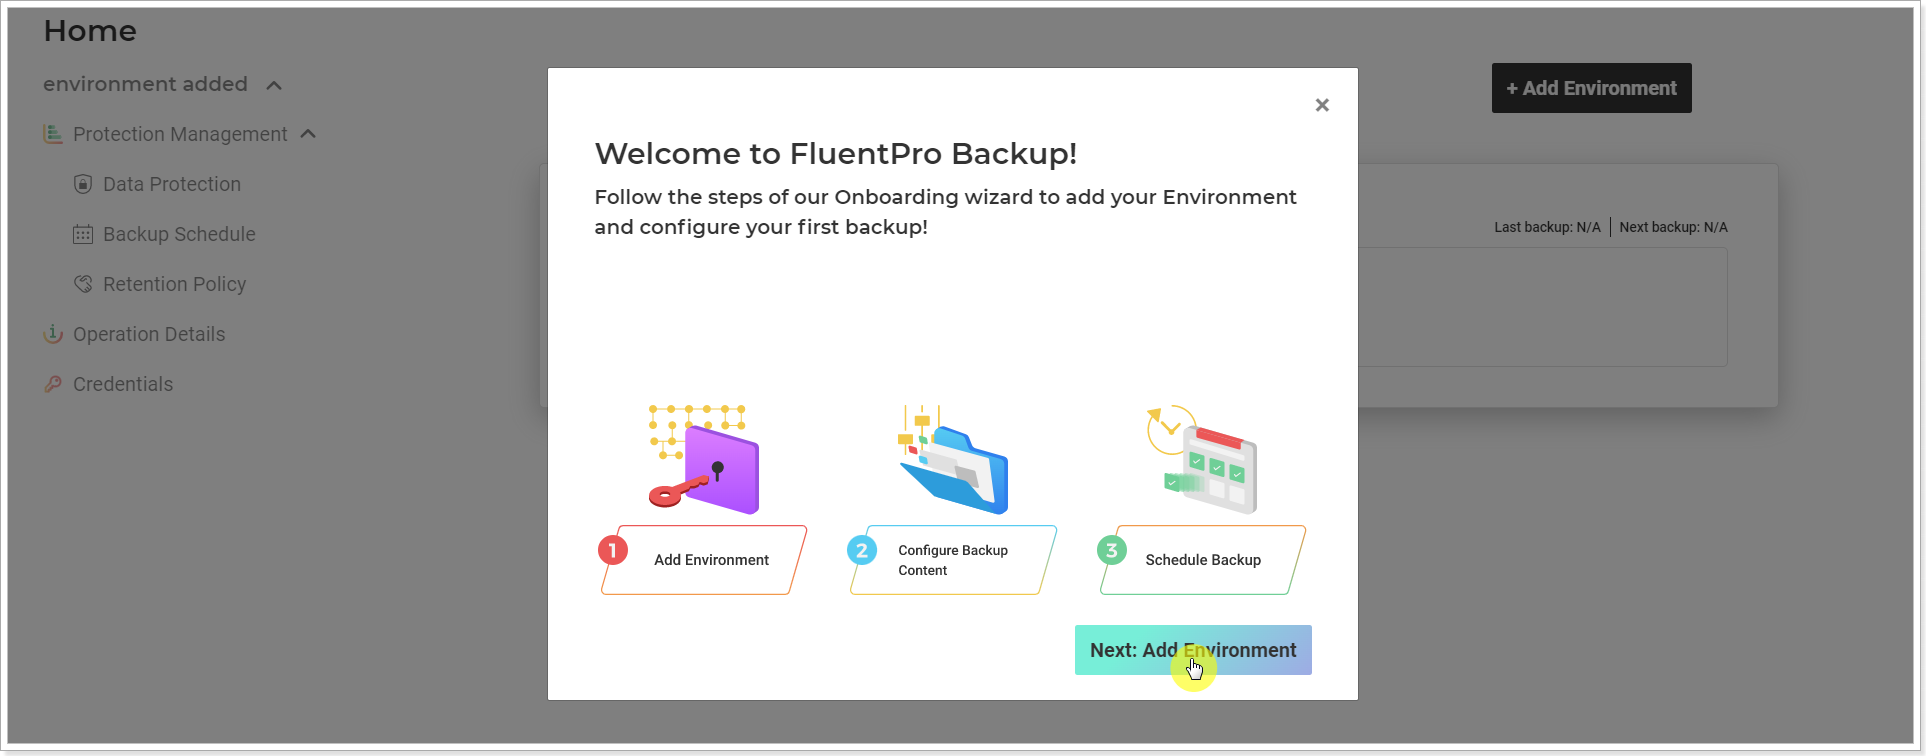
Once you signed-up to FluentPro Backup, the onboarding wizard will be opened immediately. This wizard walk you through adding your Smartsheet environment to FluentPro Backup and scheduling the regular backups.
If the onboarding wizard was skipped or you already added another environment, click the Add Environment button on the right.
On the first step, click the 'Add Environment' button.
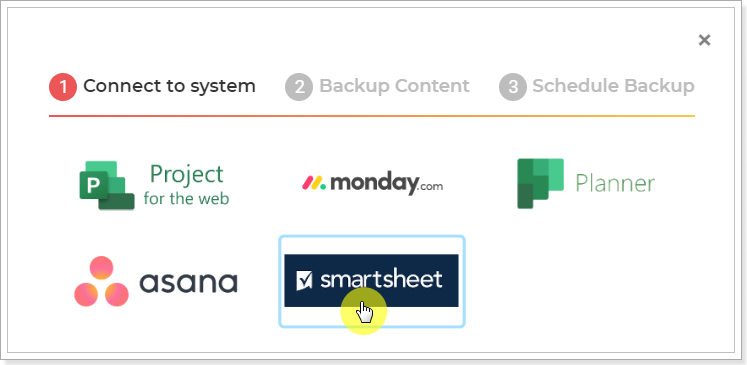
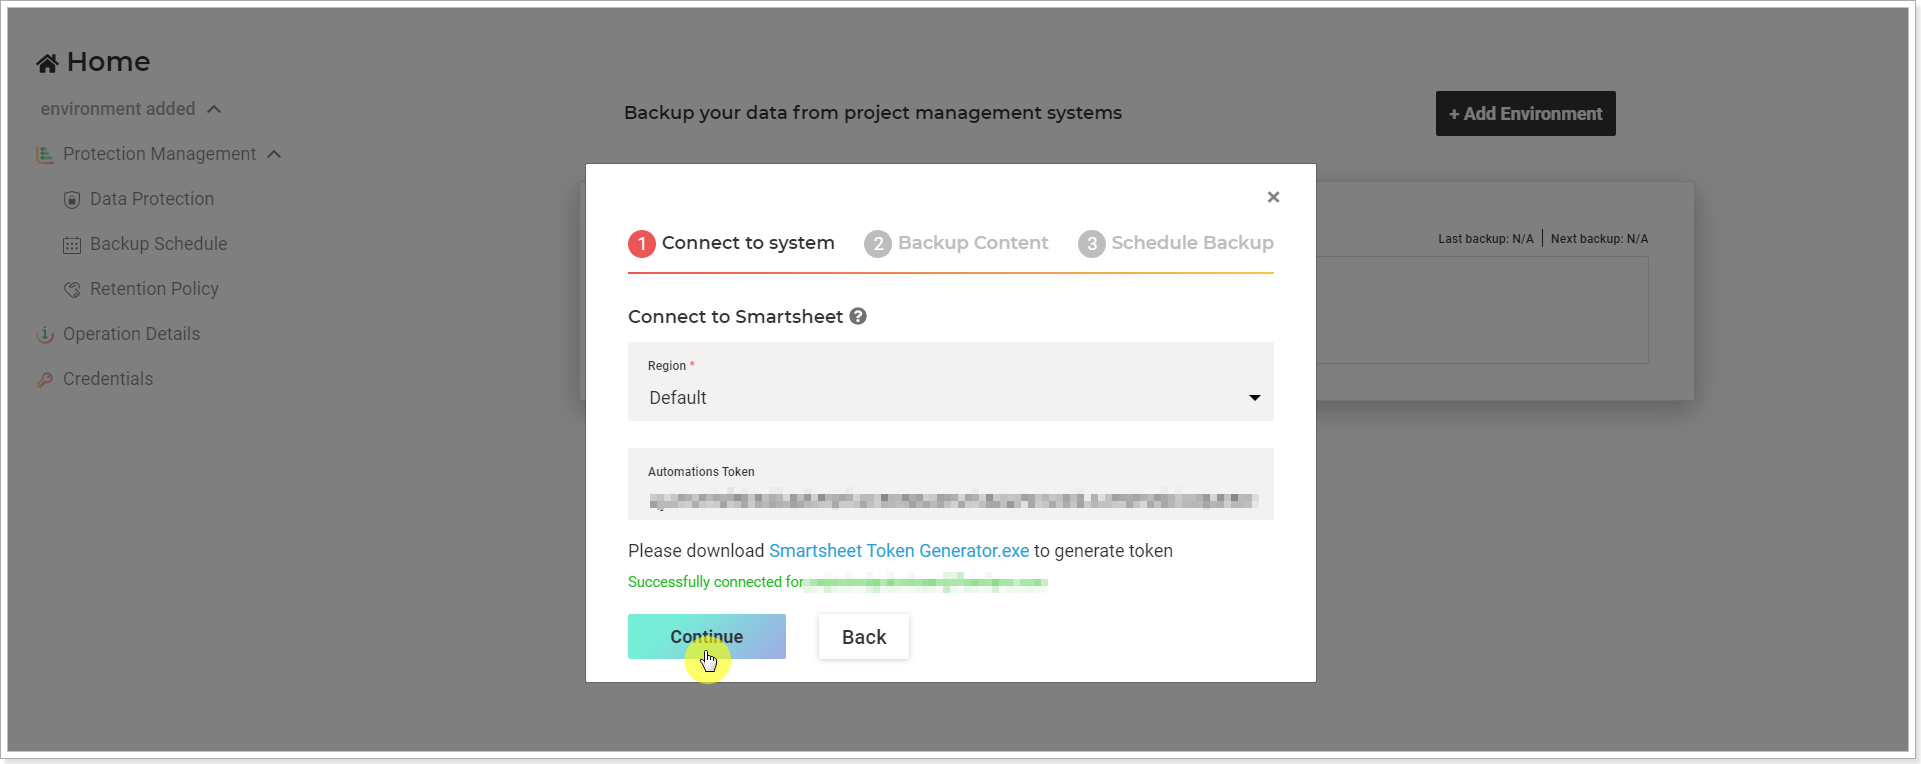
1. Connect to system
1. Select the Smartsheet system.
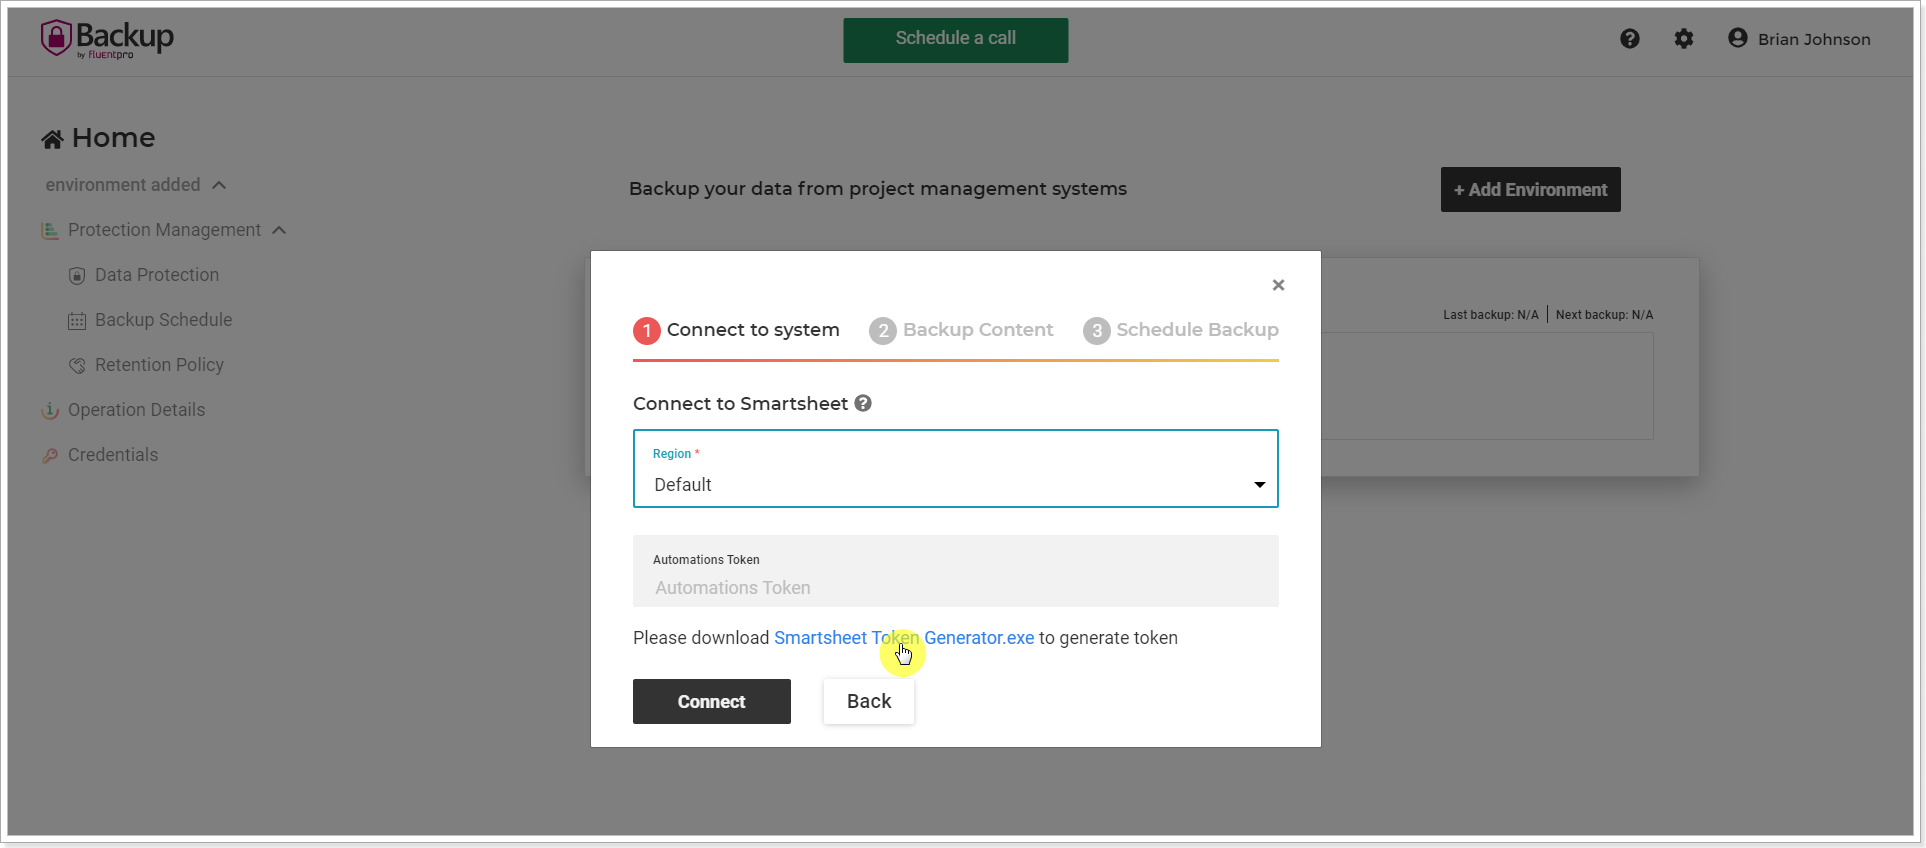
2. Select the Smartsheet region.
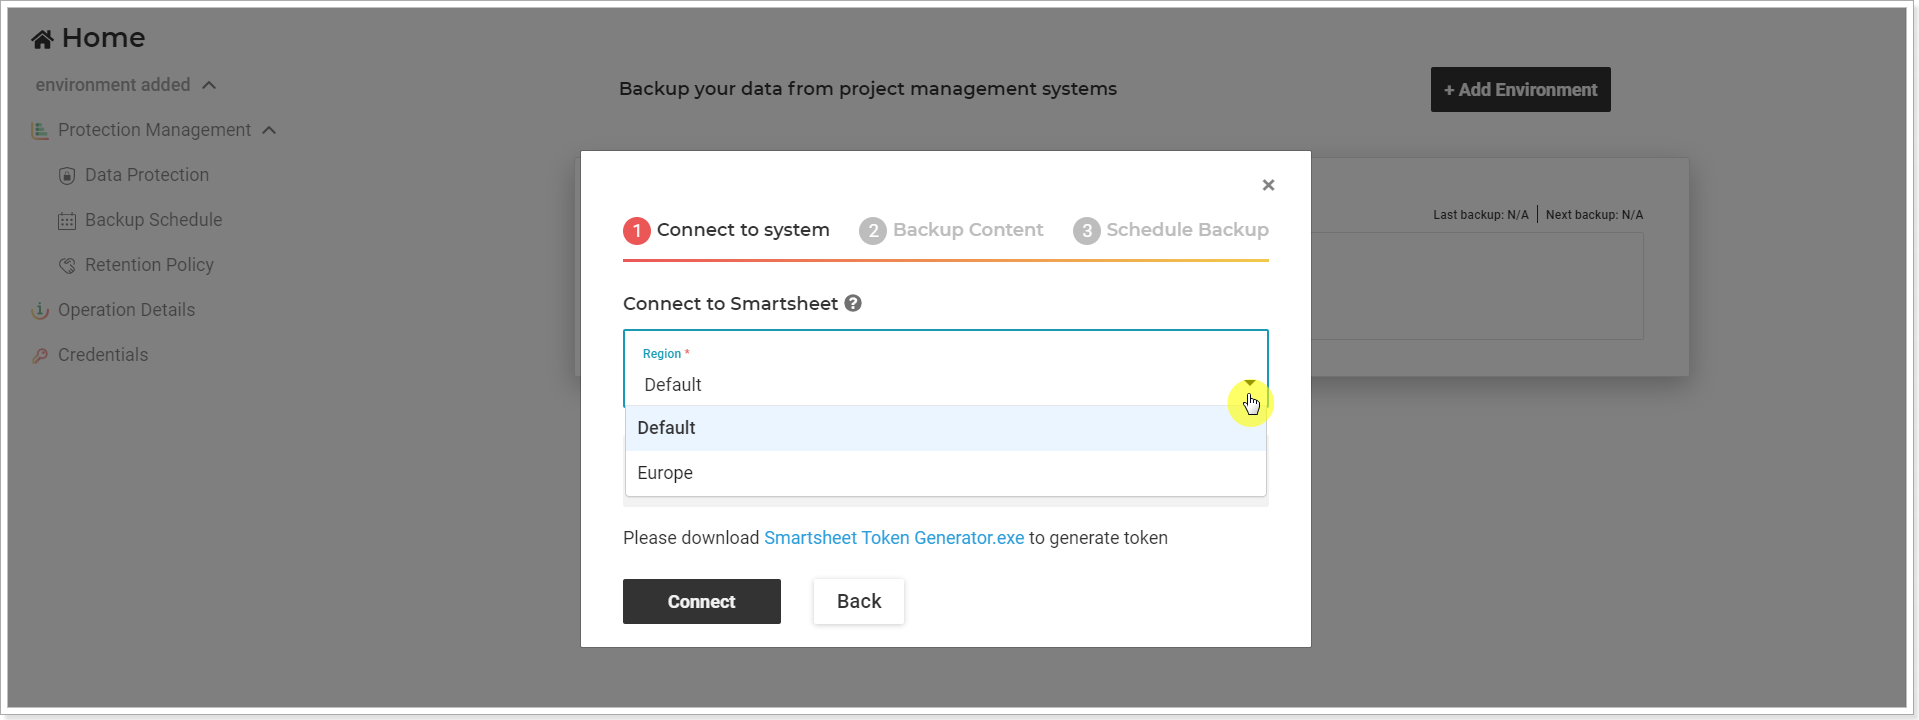
At this point, if you do not require the backup of Smartsheet Automations, you can go ahead and click Connect. This will take you to the Step 7 of this article.
However, if you plan on backing-up the Automation/Workflow Rules you would need to generate an access token at this step.
Click the Smartsheet Token Generator link.
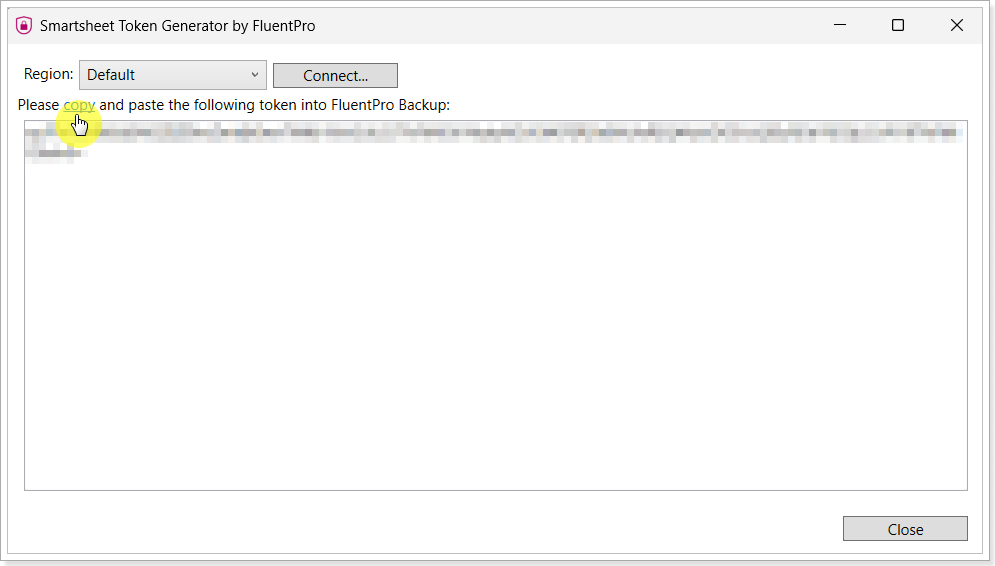
3. Open the downloaded file and click Connect.

4. Provide your credentials and log in to Smartsheet.

5. Copy the token.
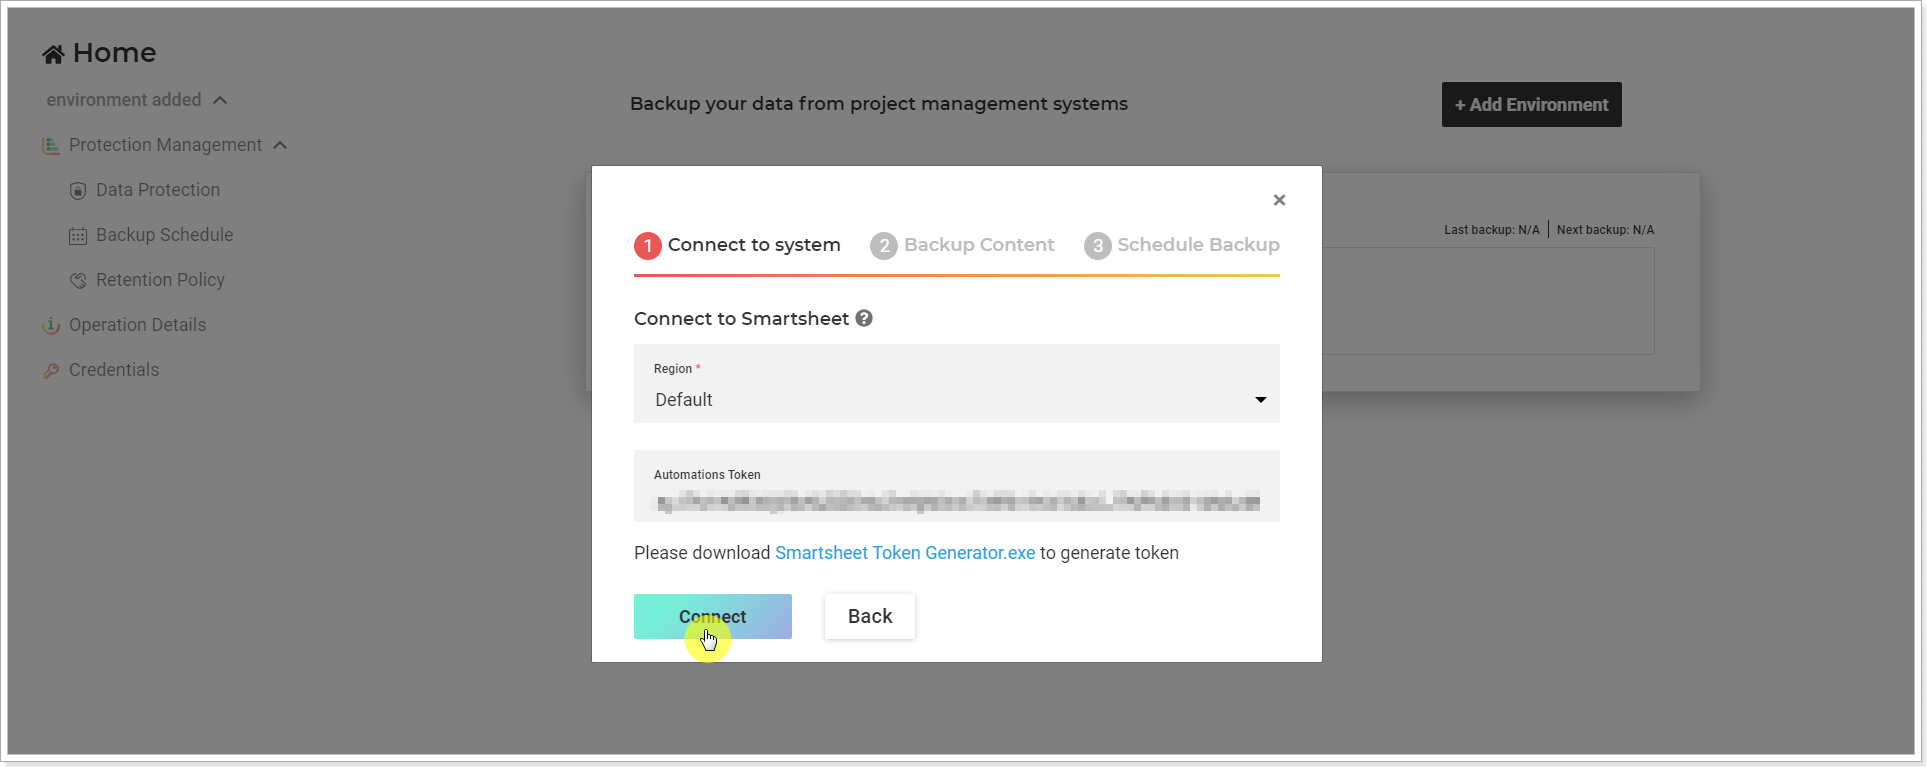
6. Paste the token to the 'Authentication Token' field and click Connect.
7. Provide your credentials and log in to Smartsheet.
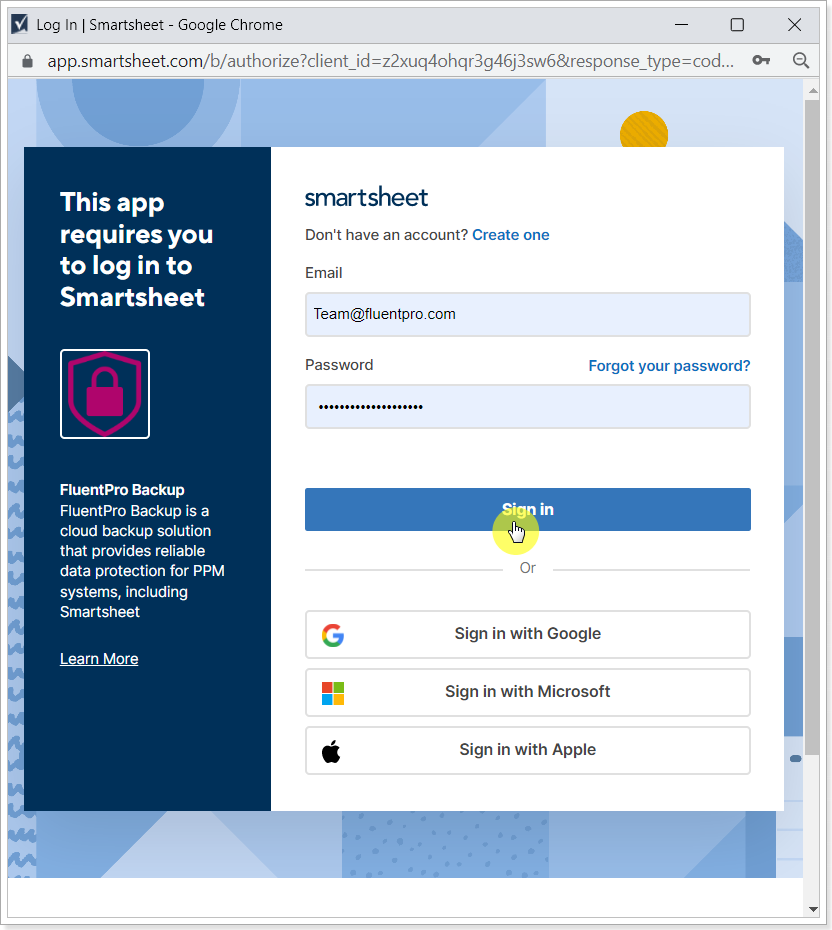
8. Click Allow to give access to your Smartsheet account.
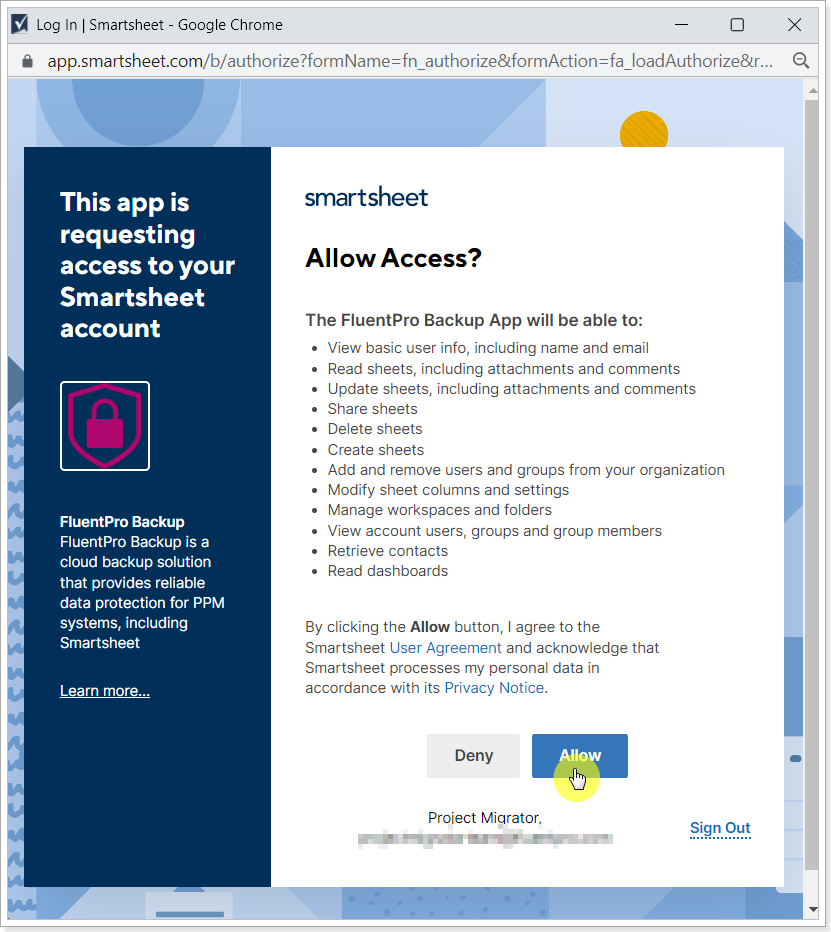
9. Click Continue.
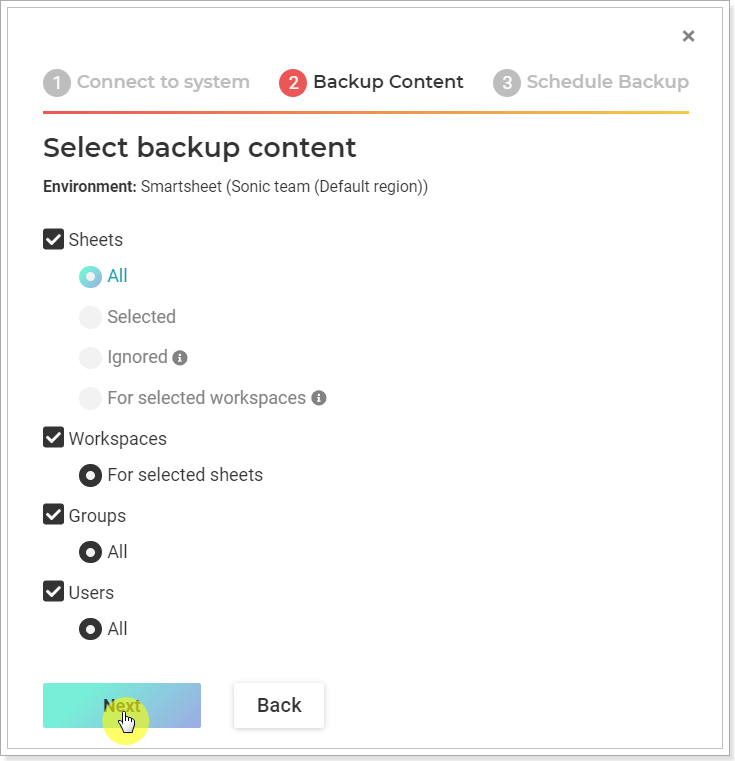
2. Backup Content
1. This part of the onboarding wizard requires you to select which Smartsheet data you would like to be regularly backed-up:
Sheets:
- All - will include each and every Sheet the connection account has access to.
- Selected - with this option you can manually select the specific sheets you'd need to be backed-up.
- Ignored - if you use this option, you can manually choose which Sheets will be ignored during the backup runs. All other Sheets you did not choose to ignore, as well as newly created sheets, will be backed up.
- For Selected Workspaces - use this option to include or ignore all sheets of the selected workspaces in the backup schedule. If this option is selected, the Selected and Ignored option will appear under the Workspaces section and you can select the workspaces where you need to backup all the sheets or ignore the workspaces where you don't need to backup the sheets.
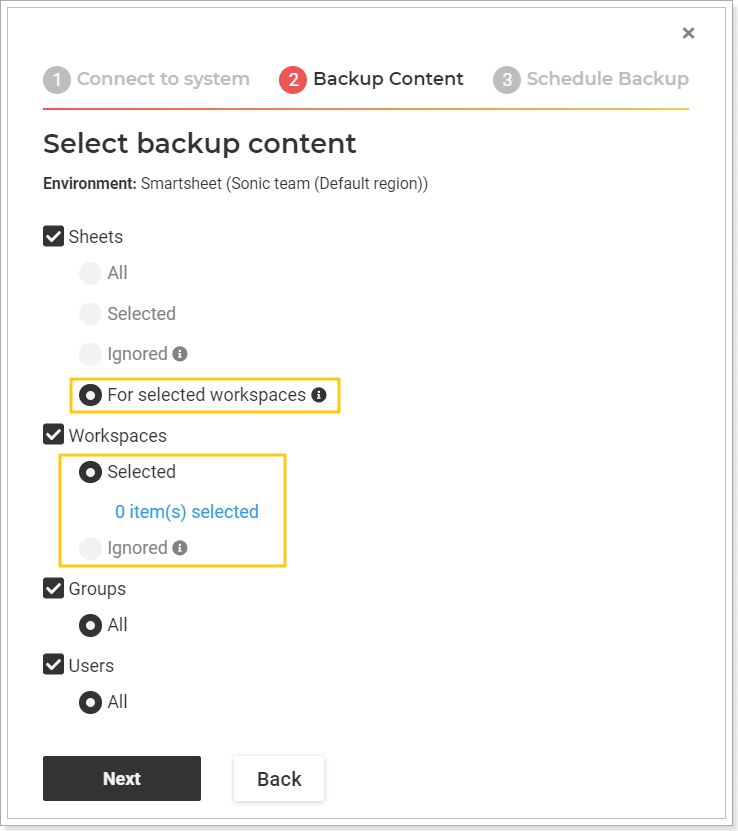
Workspaces (depending on the Sheet selection):
- For selected sheets - if All, Selected, Ignored option is chosen for the sheets.
- Selected or Ignored - becomes available if the 'For selected workspaces' option is chosen for the sheets. In this case, all sheets of the selected workspaces will be included in the backup schedule. If the Ignored option is used to exclude some of the workspaces from the backup schedule, their sheets will be ignored as well.
Groups: All only.
Users: All only.
Using 'Selected' option
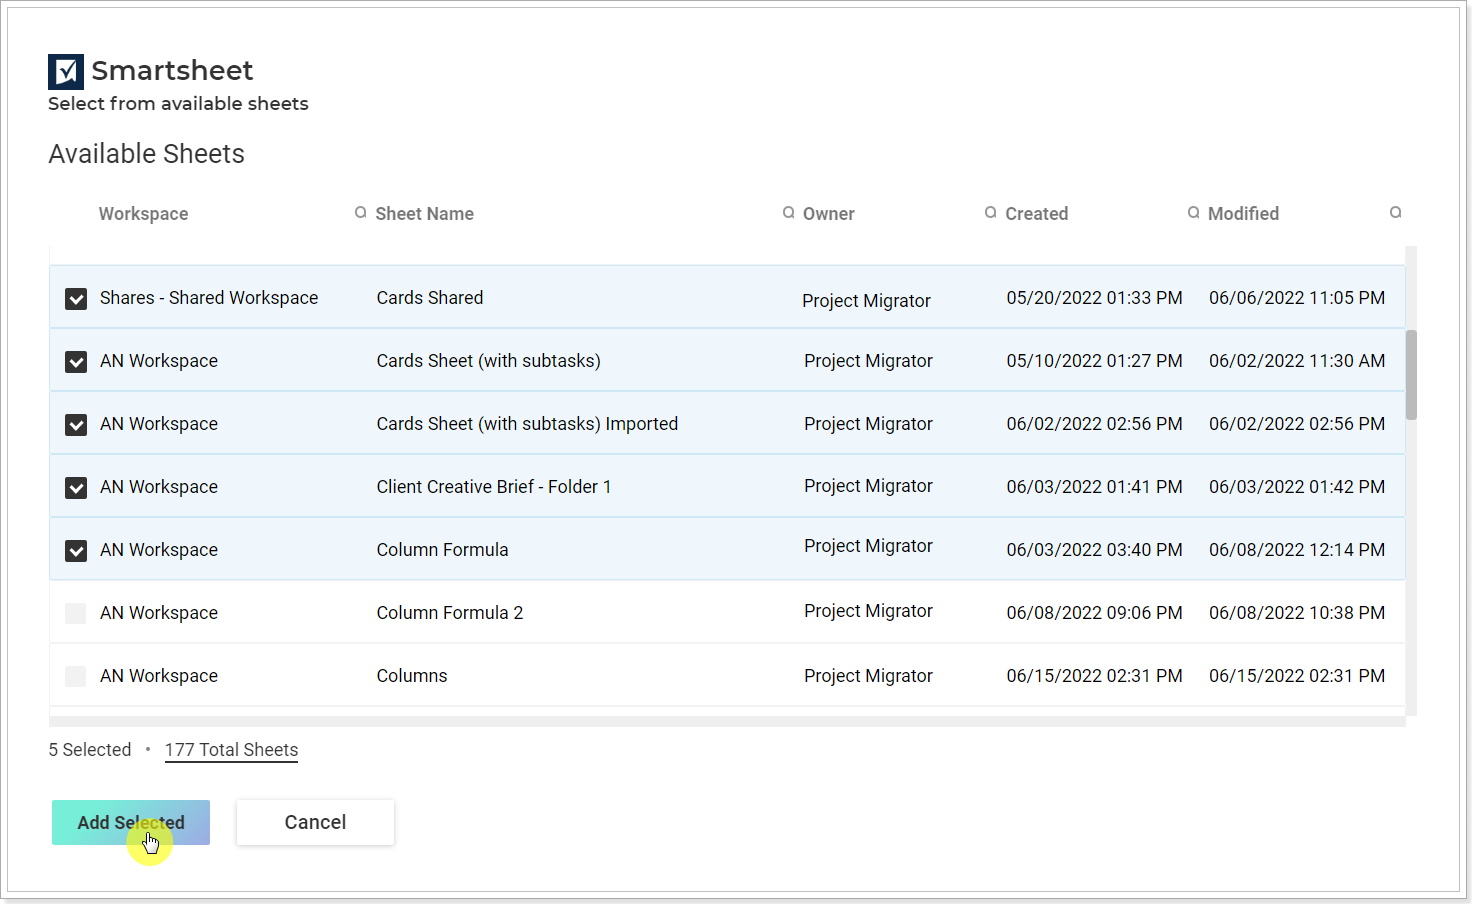
If you need to backup specific Sheets rather than all of them, once you pick the Selected button a new dialogue will show.
On the Available Sheets page, select the required sheets. You can sort the Sheets list by clicking on the names of the columns. Filtering will be available if you click on the 'Search' icon in the end of the column name.
When you are ready with the selection, click the 'Add Selected' button.
2. Click Next.
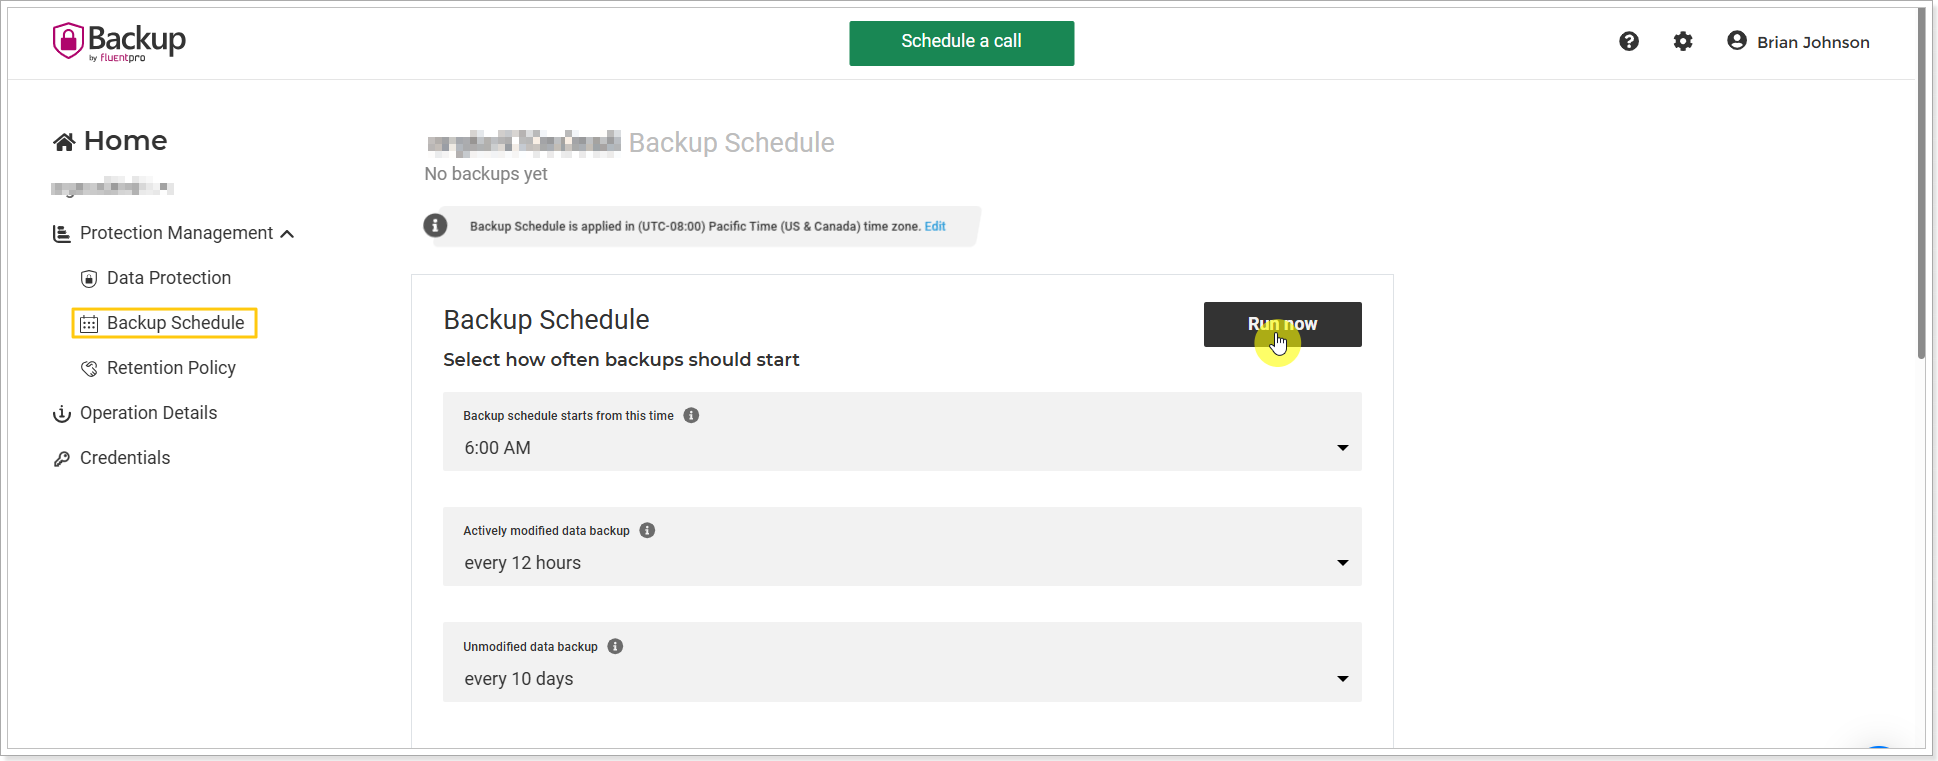
3. Schedule Backup
1. Now you need to select how often backups should run and click Save.
First, select the backup start time. This defines the time of day when the first backup will run and serves as the reference point for calculating all subsequent scheduled backups.
To change the settings for how often the backup starts for modified entities, click the 'Actively modified backup data' option and select the required option from the list.
In the 'Unmodified data backup' field, you get to select how often a backup starts for all selected unmodified entities.

If you select the 'Don't check data modification' option under 'Actively modified backup data', backups will run for all selected entities, regardless of any changes.

Also, under 'Unmodified data backup', you can select the 'Don't run force protection' option if needed. This option is available only if “Don’t check modification date” is not selected in the 'Actively modified data backup'.
As soon as you hit 'Save', the very first data backup will be launched.
You can then go to the Operation Details page, track the backup progress and review its status.
All further backups will be running automatically per your created schedule.
Your schedule is now available in the Backup Schedule page. You can visit this page anytime, if you want to review or update your schedule and/or run the backup on demand.