Compare SharePoint Sites wizard is designed to assist with comparing SharePoint Sites between two Project Server or Project Online URLs or between FluentBooks workspace files.
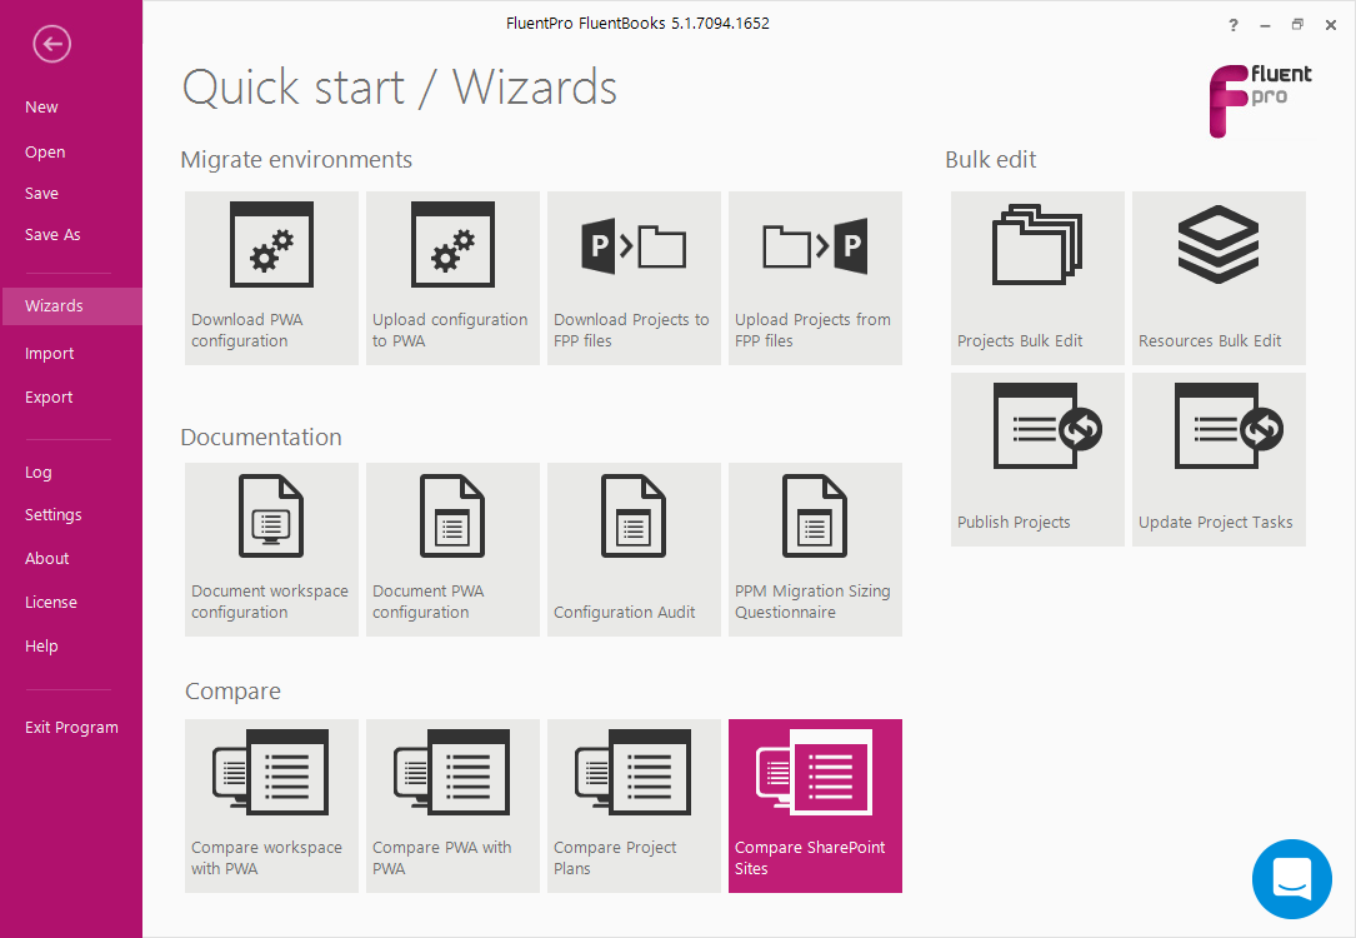
To start the wizard click File → Wizards → Compare SharePoint Sites.
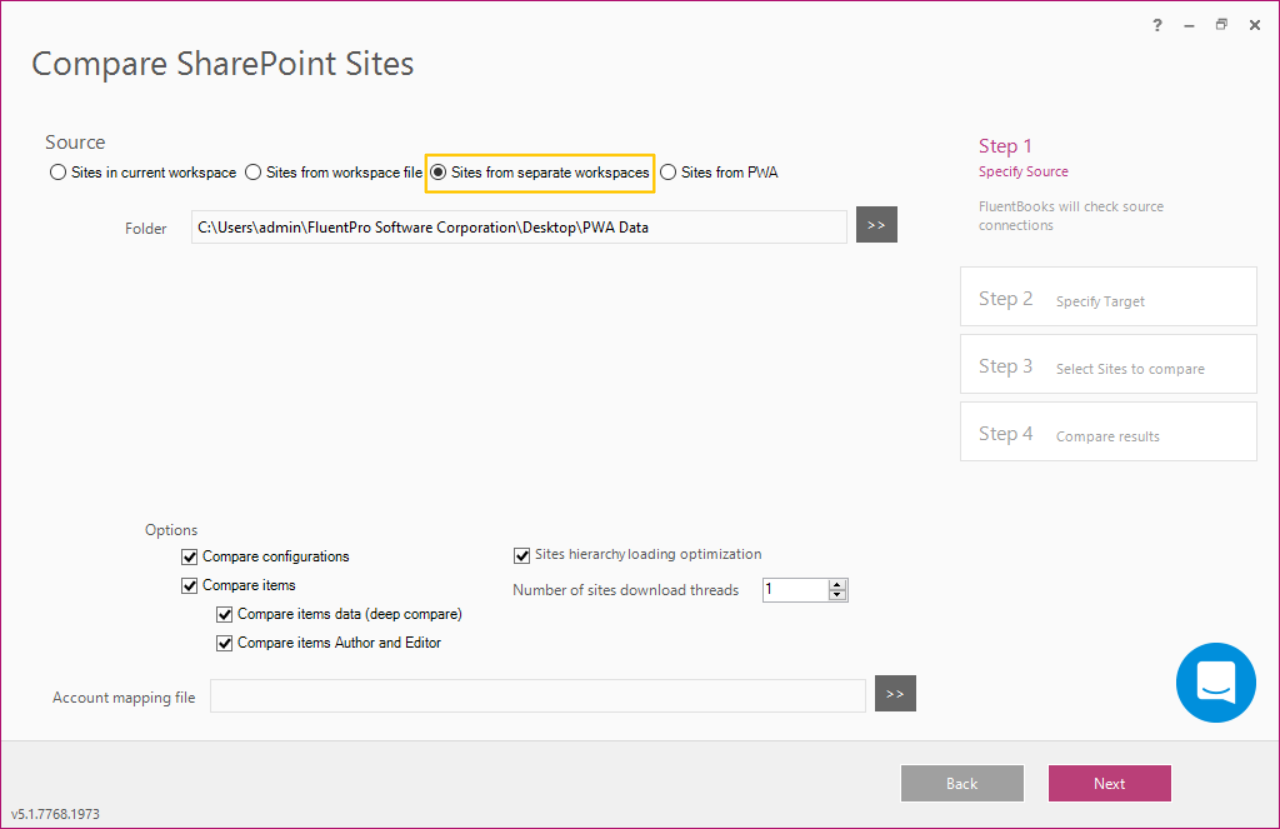
STEP 1 - Choose source of compare
1. Compare Sites in current workspace
This option allows comparing Sites, located in the currently opened workspace file.
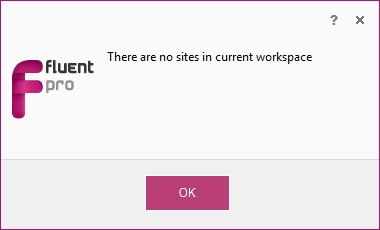
Please note, in case no Sites are present in the workspace, FluentBooks will display a warning message: There are no sites in current workspace.
To download Sites to the current workspace use the Download SharePoint Sites wizard in FluentBooks.

2. Sites from workspace file
This option allows comparing Sites, located in the previously saved workspace file located in the machine, where FluentBooks is running.
In the Workspace, the file field specify the path to a folder, where the workspace is located.
To generate such a file, use the Download SharePoint Sites wizard and be sure to save the workspace file on your machine.

3. Sites from separate workspaces
In the 'Folder' field specify the path to a folder, where separate workspace files are located.
4. Sites from PWA
Selecting this option you will need to provide PWA URL and credentials. FluentBooks will download source sites for comparison directly from the specified URL.
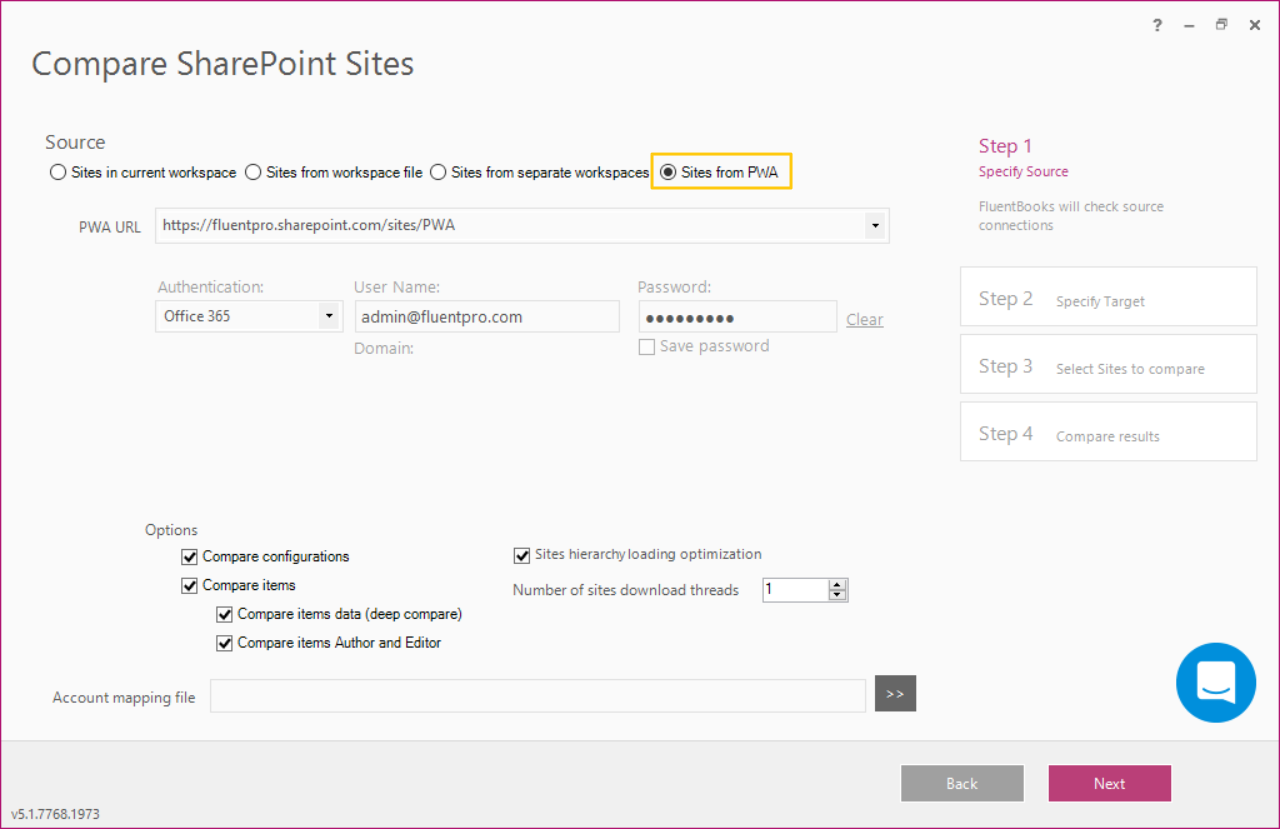
Options:
Compare Configurations: when this checkbox is checked, FluentBooks will compare Sites Configurations, including site list columns, views, content types etc.. If the checkbox is not selected, FluentBooks will not include Sites Configurations in the comparison report.
Compare Items: when this checkbox is checked, FluentBooks will check what site items exist on the source and target PWAs and will show which ones are missing from the target environment. If the checkbox is not selected, FluentBooks will not include items in the comparison report.
Compare Items Data (deep compare): when this checkbox is checked, FluentBooks will not only show what items are missing from the target environment but will also compare items field values and will show what items are different and how they differ exactly. If the checkbox is not selected, FluentBooks will not include this data in the comparison report.
Compare Items Author and Editor: when this checkbox is checked, FluentBooks will compare the Author (Created By) and Editor (Modified By) fields. If the checkbox is not selected, FluentBooks will not include these fields in the comparison report.
Sites Hierarchy Loading Optimization: check this checkbox to optimize the loading of sites hierarchy, this setting allows the creation of multiple download threads to speed up the process.
Number of sites download threads: by default, the number of threads is set to 1. This number can be increased to speed up the process. When comparing the sites from Project Server 2010/2013/2016 (On-Premises) PWAs, or from the workspace files, the number of threads can be increased up to 5 threads. When comparing the sites from Project Online, the number of threads can be increased up to 3 threads (recommended setting is 2 threads). Please note: increasing the number of threads will also elevate memory usage, especially for large sites.
Account Mapping: this setting allows to map source and target user accounts while comparing user fields. If the path to a mapping file is specified, FluentBooks will use the information provided in the mapping file to compare user field values (values in the Author field, Editor field, etc.).
If the checkbox is unchecked, Account Mapping will be skipped. User fields will be still compared, but the values for these fields will be shown as different in the comparison report if the user accounts are different on the source and target PWAs.
Please note: we recommend using the same mapping file that was generated and carefully verified/corrected during the migration process.
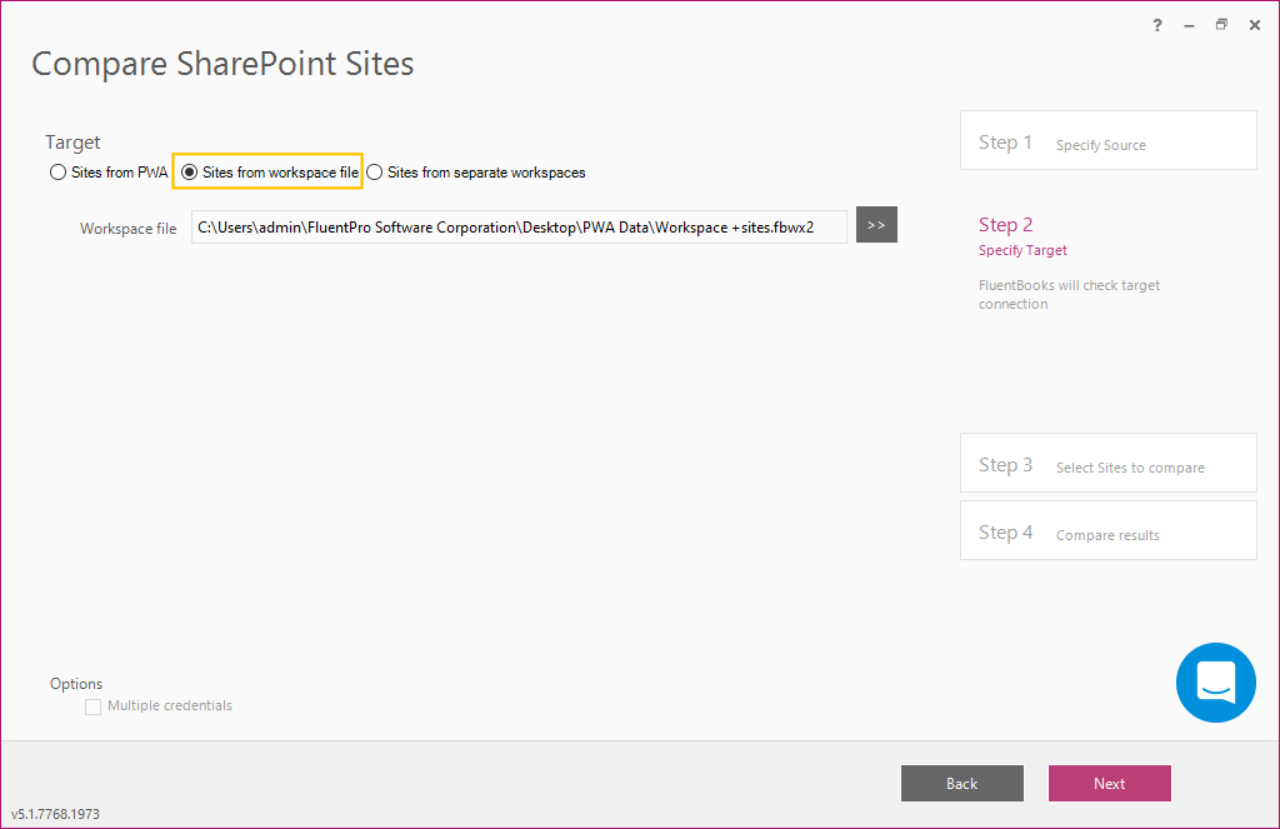
STEP 2 - Choose target of compare
1. Sites from PWA
Selecting this option you will need to provide PWA URL and credentials. FluentBooks will download target sites for comparison directly from the specified URL.

2. Sites from workspace file
This option allows comparing Sites, located in the previously saved workspace file located in the machine, where FluentBooks is running.
In the Workspace, the file field specify the path to a folder, where the workspace is located.
To generate such a file, use the Download SharePoint Sites wizard and be sure to save the workspace file on your machine.
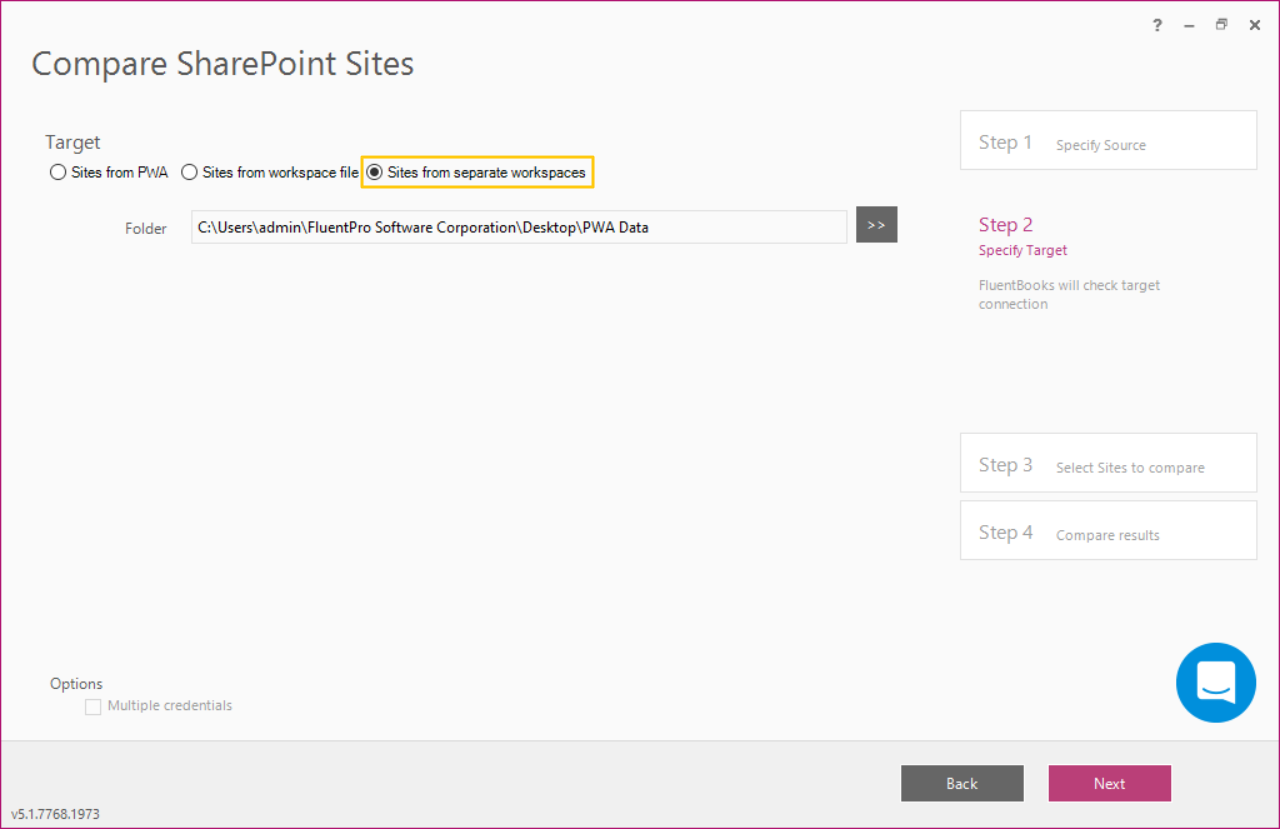
3. Sites from separate workspaces
Select this radio-button if using the Download SharePoint Sites wizard you enabled the option "Save each site into separate workspace file".
In the 'Folder' field specify the path to a folder, where separate workspace files are located.
Options:
Multiple credentials -check this checkbox if you have a big number of SharePoint Sites to download (100 and more and each site has a lot of information) and you have several accounts with the required permissions that can be used to download SharePoint Sites in several threads.
When the checkbox is checked, you can add 4 more accounts with the required permissions that will be used to log in to the source PWA and download the sites. Each account will be used to download 6 sites (max), and all the accounts will be used simultaneously. As a result, if you provide 4 additional accounts, 30 (max) sites will be downloaded at once.
Additional threads will be added automatically. You can set the required number of download threads. If you add 4 more accounts then 30 is a maximum number of threads. If you add fewer accounts, provide the number of threads accordingly (6 threads for each account max). This option helps to avoid throttling while downloading a large number of SharePoint sites.
STEP 4 - Select Share Point Sites
In this step, FluentBooks will load the Source sites hierarchy and will open the screen where the SharePoint Sites can be selected for comparison.  All sites can be selected at one go using the All button in the right upper corner. Press the None button to deselect all sites at one go.
As the sites are selected, click Next to select sites data to compare. In this step, it is possible to select what lists and libraries from each site will be taken for comparison.

Click the Expand All button to expand all sites and their items for selection in one go. Click the Collapse All button to collapse all sites and their items in one go.
All site items can be selected at one go using the All button in the right upper corner. Press the None button to deselect all site items in one go.
STEP 5 - Compare Summary
The Summary screen displayed at the end will show a short summary of the comparison process:
The Site Name area displays the list of compared SharePoint Sites. The names highlighted in yellow have differences in source and target versions.
Site Compare Status area displays the list of Site items, which have different values in the source and target versions for the currently selected site.
Lists displays the list of sites lists. The names of the lists which have differences in source and target versions will be highlighted in yellow.
Lists Status will display the list of items which values differ in the source and target for the currently selected list.

Export to Excel option allows saving the compare summary to the Excel file.
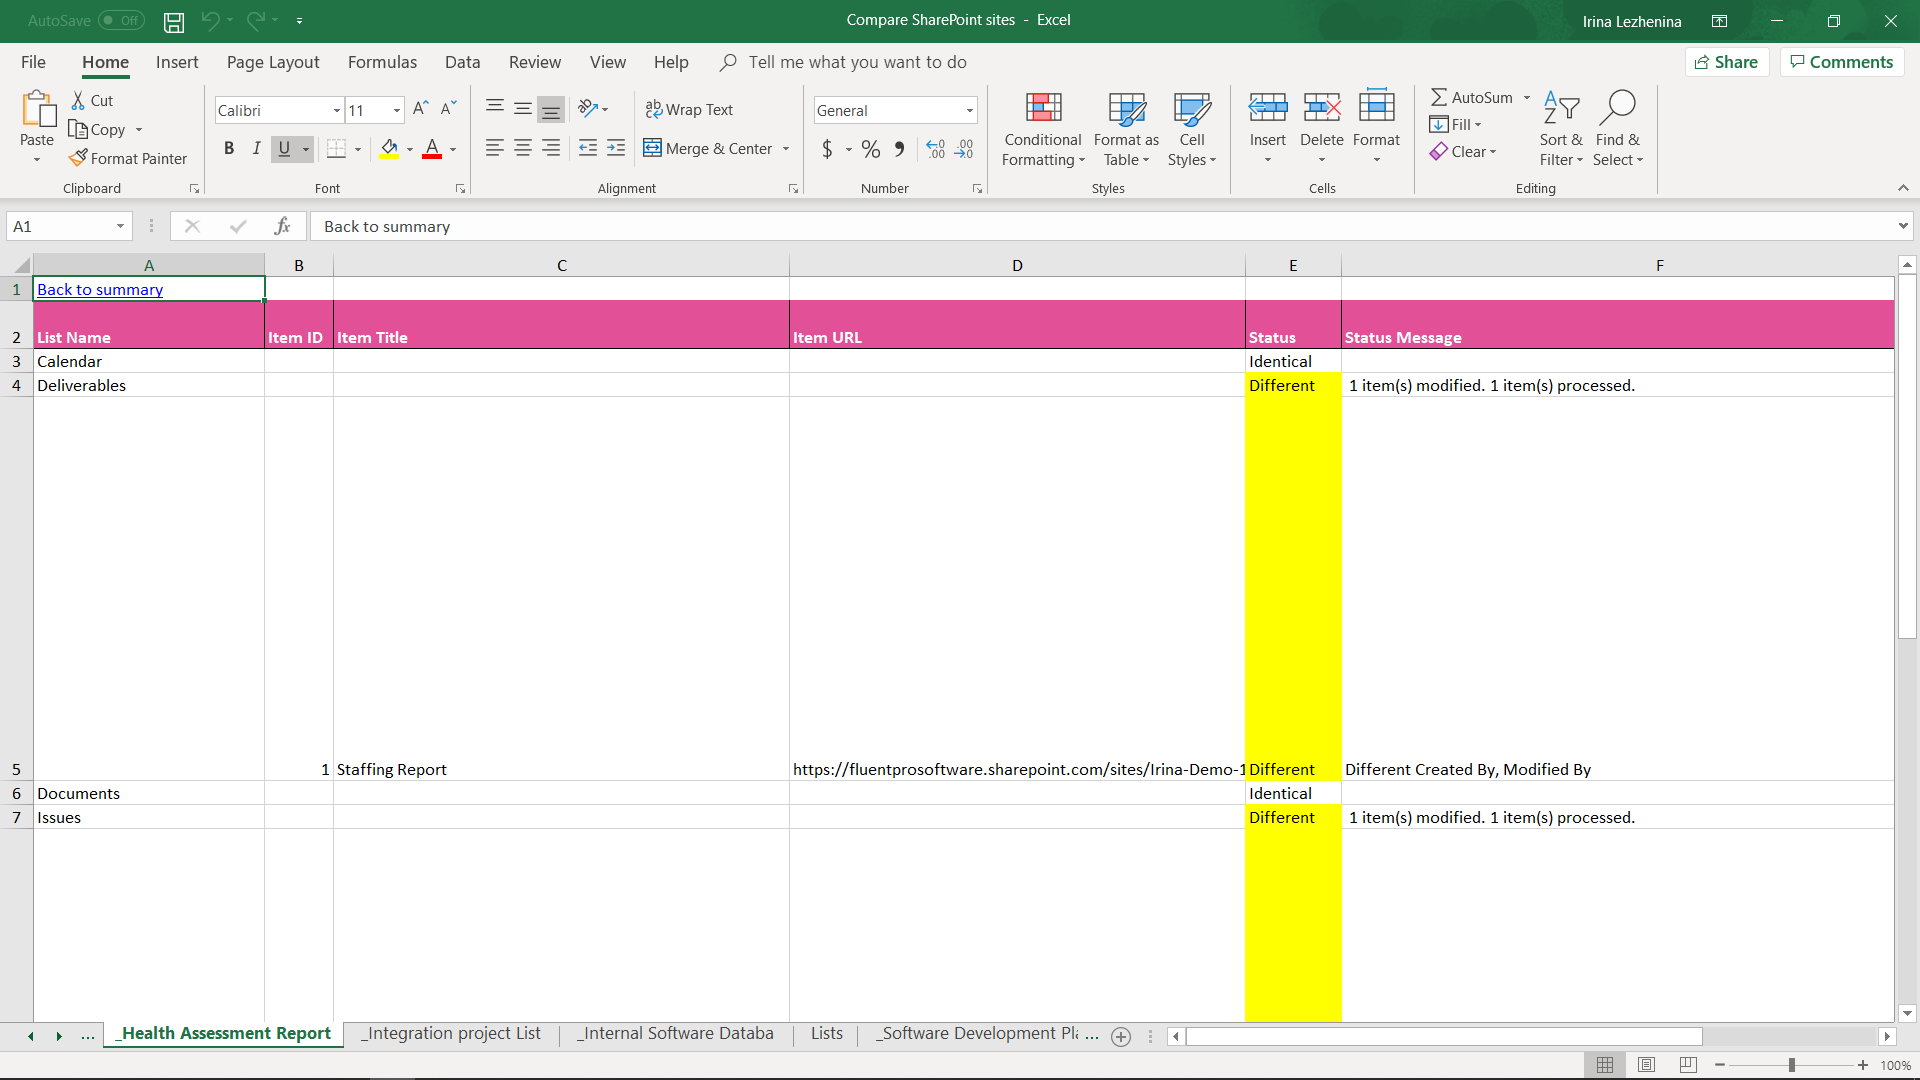
Comparison Report
Comparison Report file consists of several sheets: Summary and separate sheets for each of the compared SharePoint Sites:
1. In the Summary it is possible to review the list of the compared SharePoint Sites and the status of the Sites lists, which values were compared: Different, Identical, or Missing.
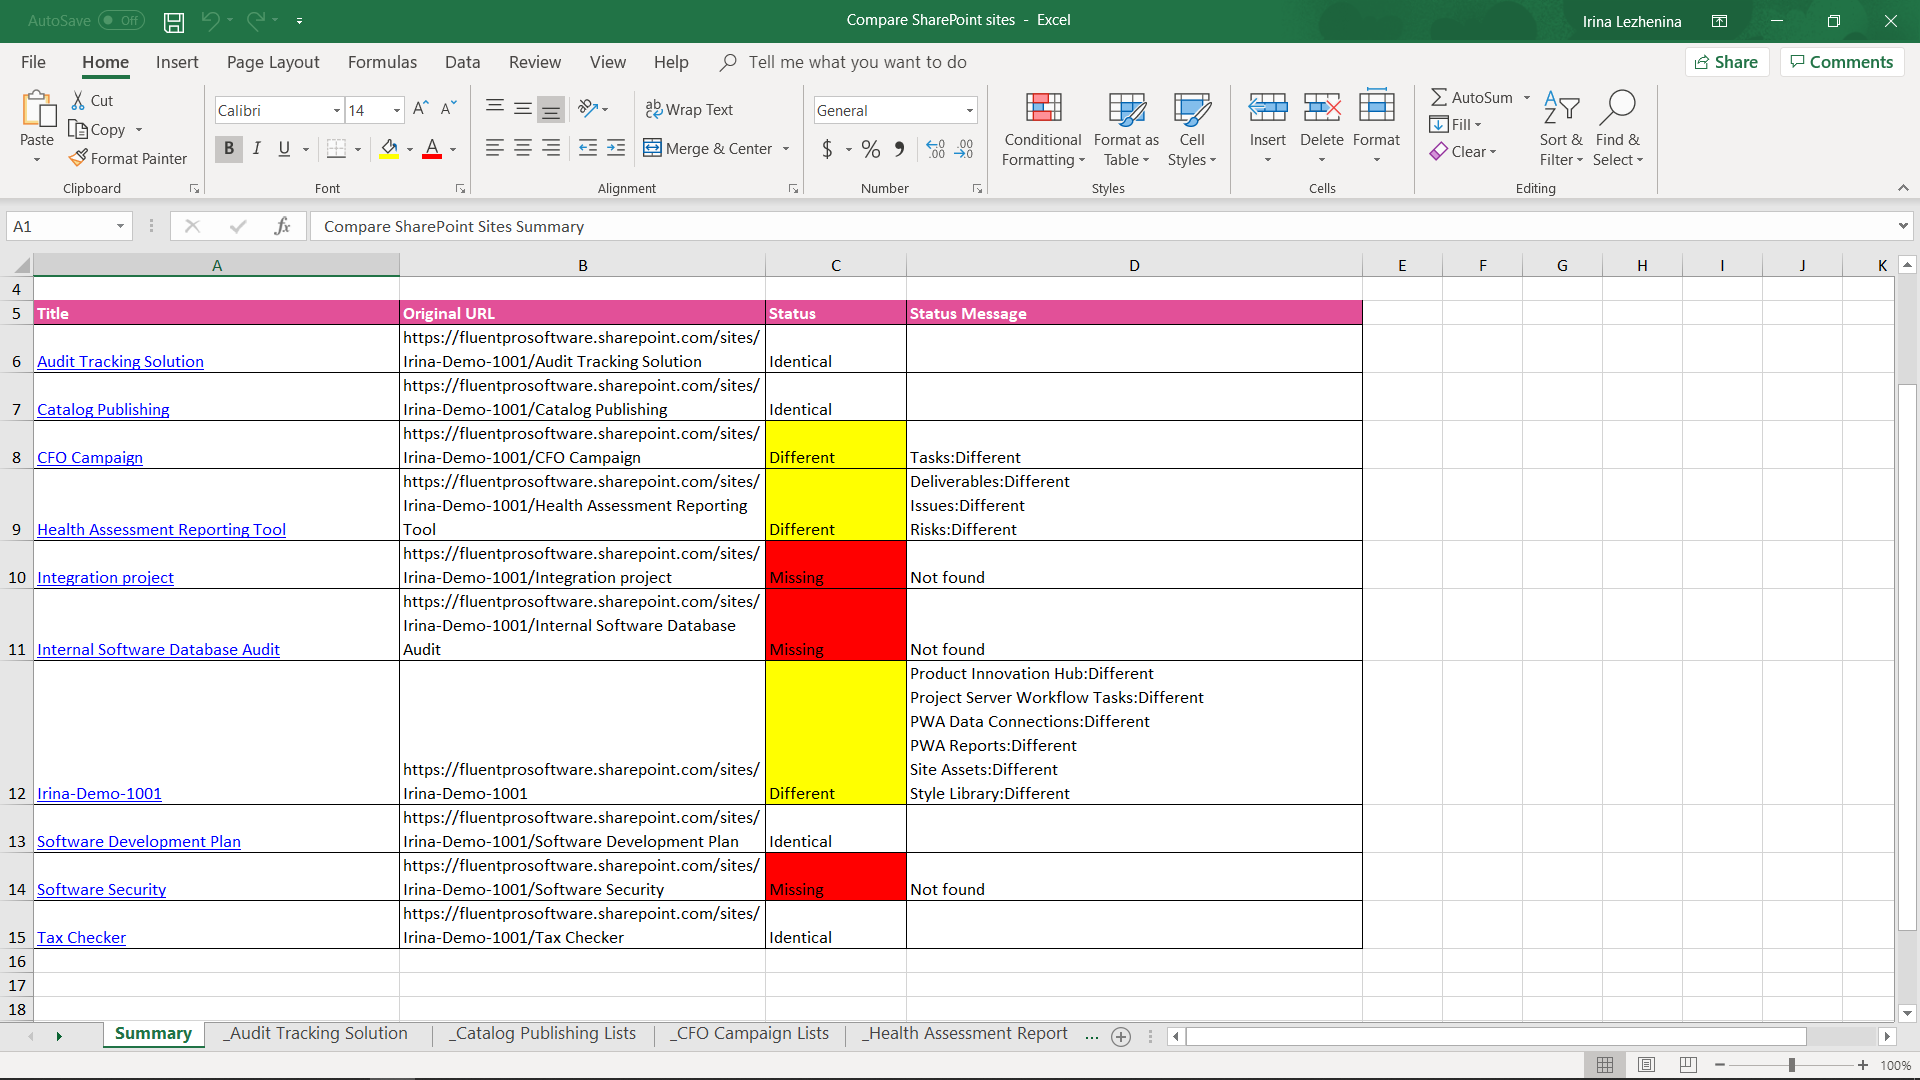
2. For each compared site there will be a sheet created, that displays the comparison status for sites lists.