
The very first step of the Upload part of the migration is the upload of the root PWA Site Settings and Content without the Subsites.
When uploading Subsites to the target Project Server PWA, it is possible to apply a custom site template (solution) when creating new sites; however, only site templates that already exist on the target PWA can be applied.
Also, when uploading Enterprise Project Types, Solutions should already exist in the target PWA, in order for the correct custom Project Site Templates to be set in EPTs.
Therefore, migration of SharePoint content is divided into 2 stages:
- upload of root Site Settings (including Solutions) and Contents;
- upload the Subsites.
Migration of Site Templates (Solutions) for Project Online -> Project Server migrations is not supported as some features available in Project Online are not supported in Project Server. Uncheck 'Solutions' checkbox at this step.
However, Solutions (Site Templates) must be created at this step on the target PWA for further upload of project sites. Solutions from Project Online need to be recreated on the target Project Server PWA.
It is possible to recreate the site templates manually or use the work-around described in the following article to transfer solutions to the destination PWA - How to migrate Solutions (Site Templates) from Project Online to Project Server
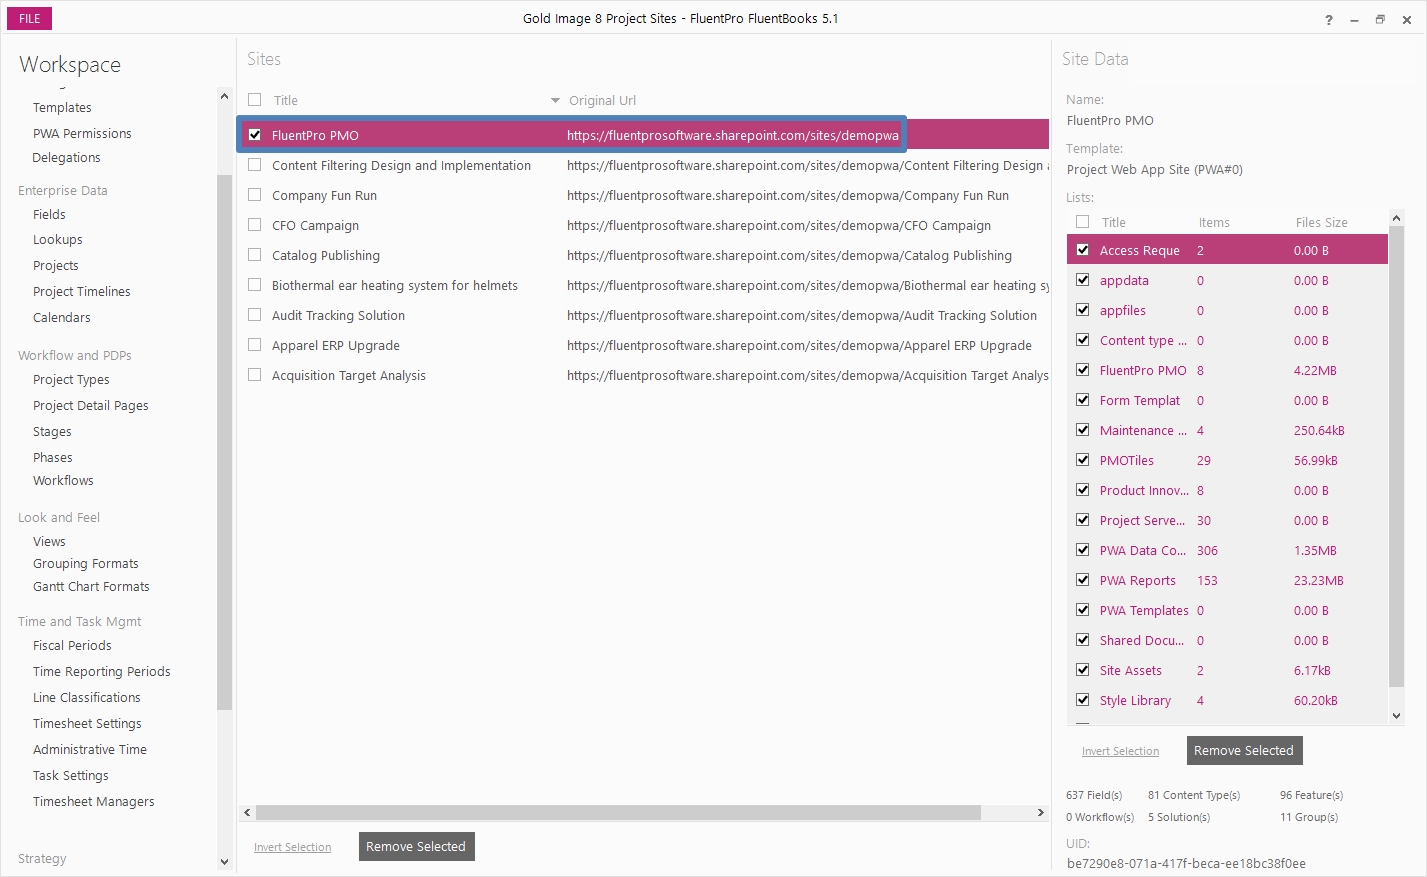
1. In the workspace to which SharePoint Sites were downloaded, check only the checkbox of the root PWA Site.
All Subsites will be transferred later in the migration. Please leave their checkboxes unchecked at this point
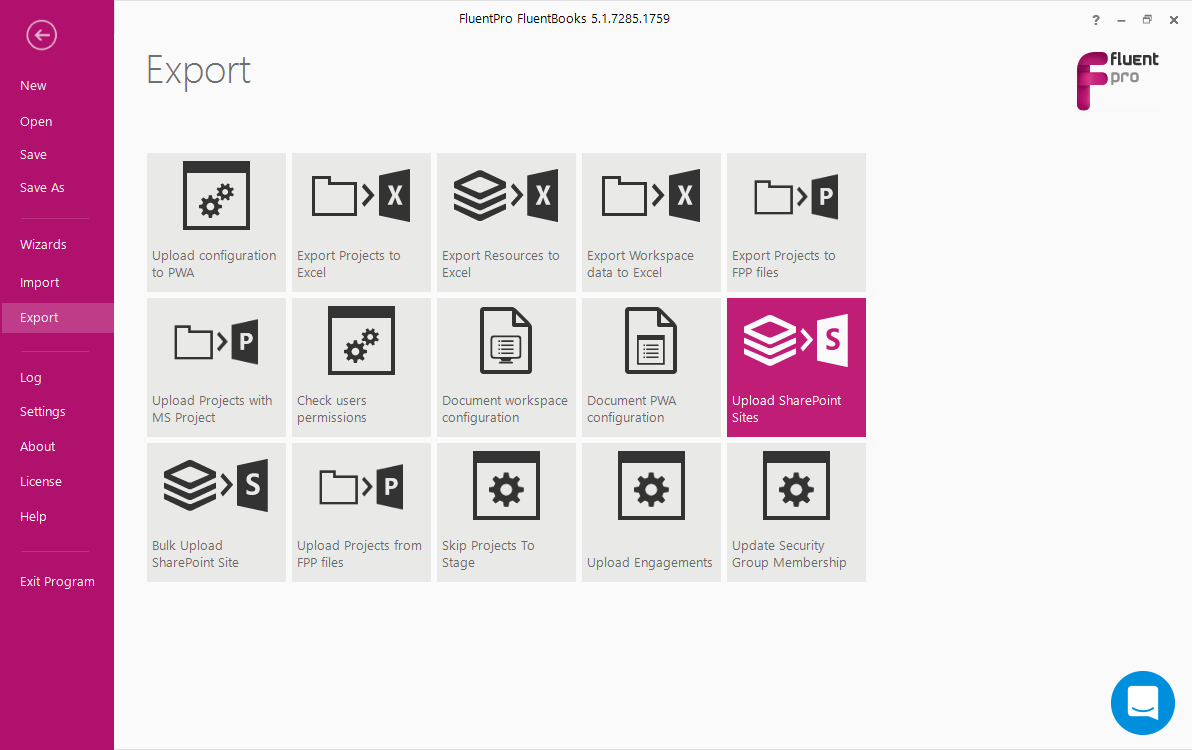
2. Select an Export option from the File menu and then ‘Upload SharePoint Sites’ wizard:
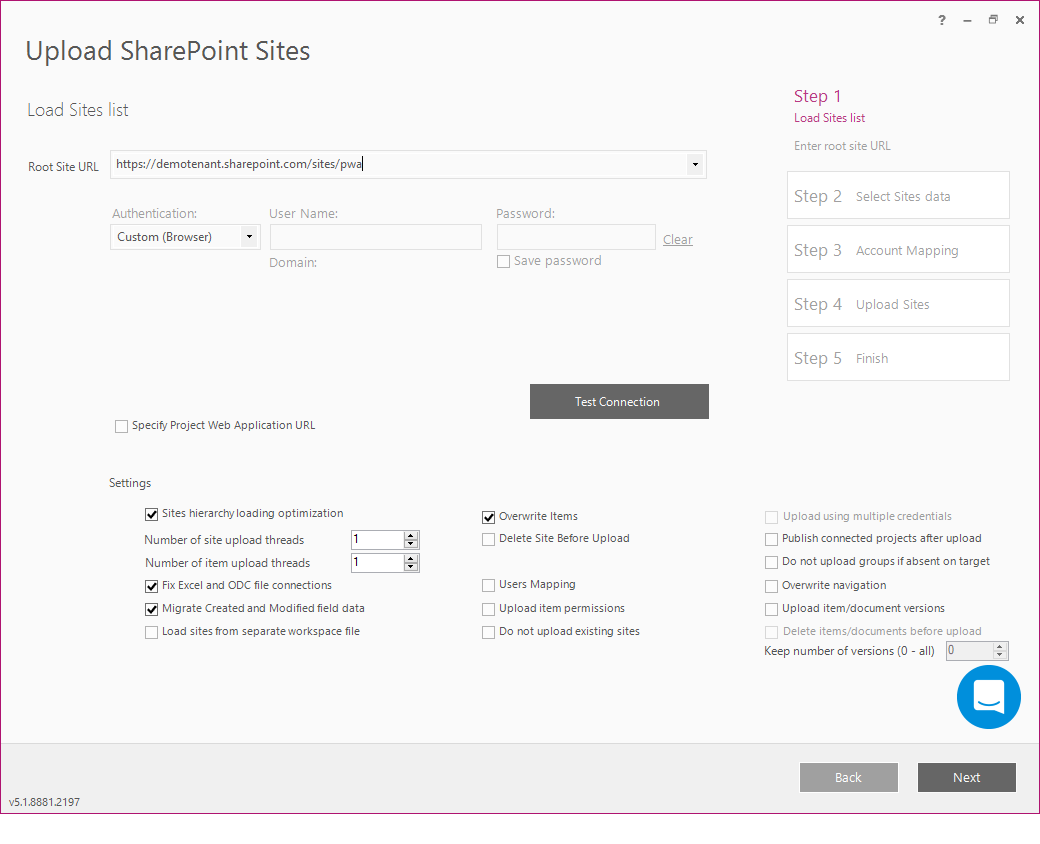
3. Specify the Root Site URL of the target PWA and login credentials.
Please note: It is crucial to make a decision on the enablement or disablement of the "Do not upload groups if absent in target" checkbox during the upload of the Root PWA Site. The decision you make as for this setting during the Root PWA Site upload will then affect the upload of the project sites. Once the Root Site has been uploaded, and you proceed to the Project Sites upload, this setting whether enabled or disabled at the step of Project Sites upload is ignored.
If the checkbox is not checked, then while uploading the Root PWA Site to the target PWA, all groups from the workspace will be created/updated on the target PWA. In such a case, when later the subsites are uploaded to the target PWA, a duplicate group of the corresponding type will be created for each site.
If the checkbox is checked, FluentBooks will skip the groups that do not yet exist in your target instance. Any groups that already exist will be updated. Later, during the subsites upload, duplicate groups will not be created on the target PWA.
Click Next to load the Sites list.
4. In Step 2 of the wizard, select all checkboxes to transfer the root Site Settings and Content.
Uncheck 'Solutions' checkbox.

5. If User Mapping is turned OFF, you will go straight to the Sites Upload step, where you will be able to check that the URLs and Site Templates are correct.
6. If User Mapping is turned ON, FluentBooks will load accounts from the source PWA.
Please refer to the User Account Mapping article to find information on why Account Mapping is required.
Save - you can use this option to save the mapping results for future migrations. The file will be saved in the XLSX extension.
Load - If you have previously saved a user mapping file, select this option to load it.
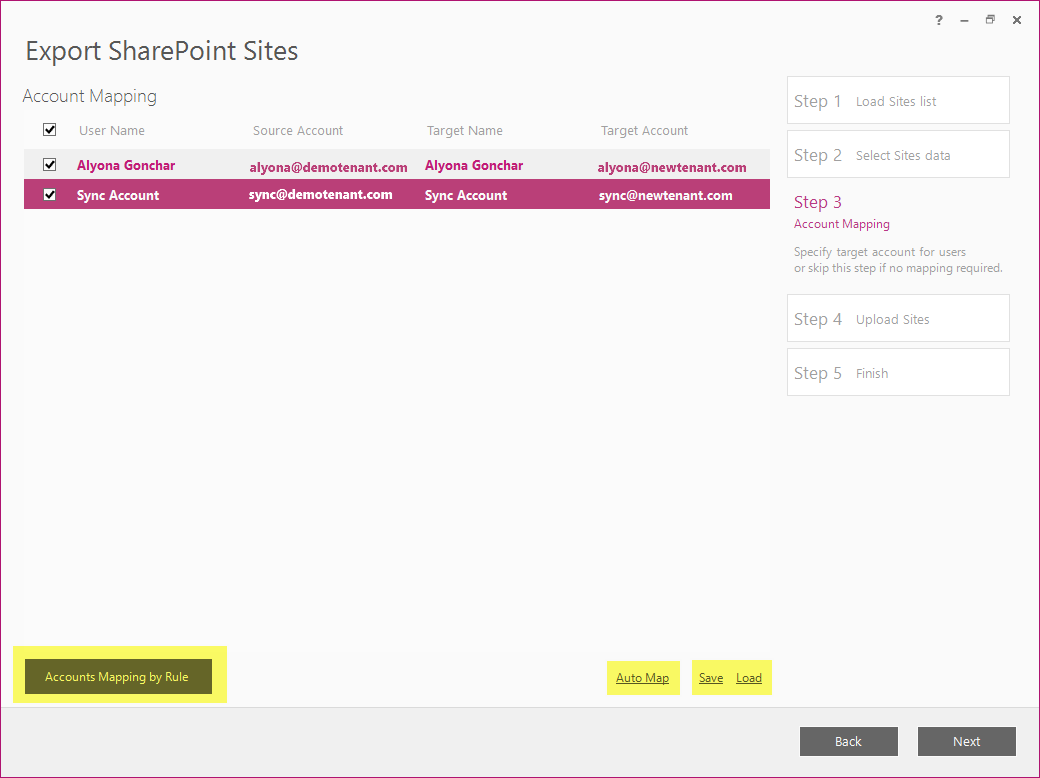
FluentBooks provides two other ways to map accounts:
1 - Accounts Mapping by Rule.
This option allows to perform a bulk update of the target accounts and to set either ‘Target domain’ or ‘Target Office 365 tenant’ login type for all target accounts at one go.
Click the “Accounts Mapping by Rule” button, select either of the rules, and provide the domain or Office 365 tenant.


The preview section will show what the accounts will look like after the rule is applied.
Click OK to apply the selected rule.
2 - Auto Map.
If you choose this option, FluentBooks will load the target users and attempt to map them automatically by name.
Update the mapping if needed.
Target account can be edited manually, to do this double-click the target account name, and it will become editable, click Enter key to confirm the changes. If there is no corresponding user on the target PWA, then the line with such a user will be left blank.
Click Next after you finish user mapping to proceed with site upload.

7) Step 4 of the wizard allows checking the URL and Site Template before the upload.
Click Next to proceed:

8) The Progress Bar window will display the process of root site upload.

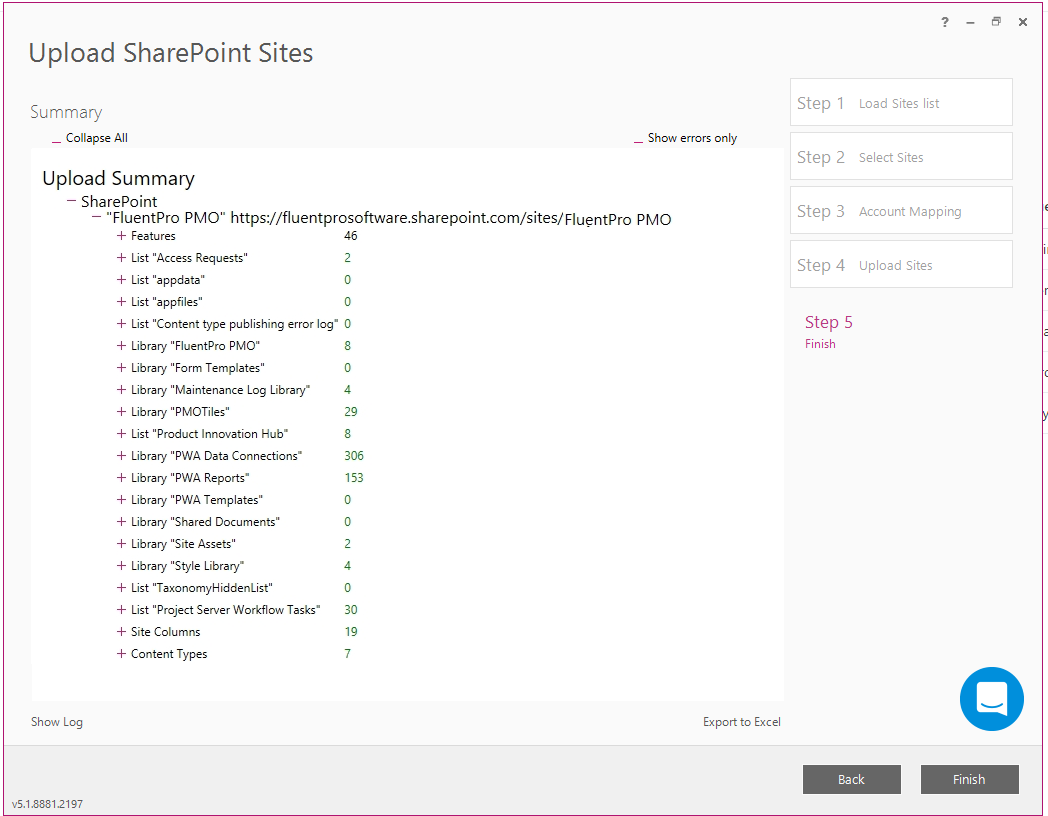
9) The summary screen will be displayed as the upload finishes.
Click the Finish button to close the wizard.
Proceed to the next step of migration: Upload PWA Configuration.