
In this article, we will review the possible solutions to the case when the tasks are not synchronized from the source system to the target.
We will review this issue in the example of the Project Online <> Planner two-way integration scenario, but these solutions will work for other scenarios as well.
Solution 1
Project Online is not configured correctly.
Check if Project Online is configured correctly:
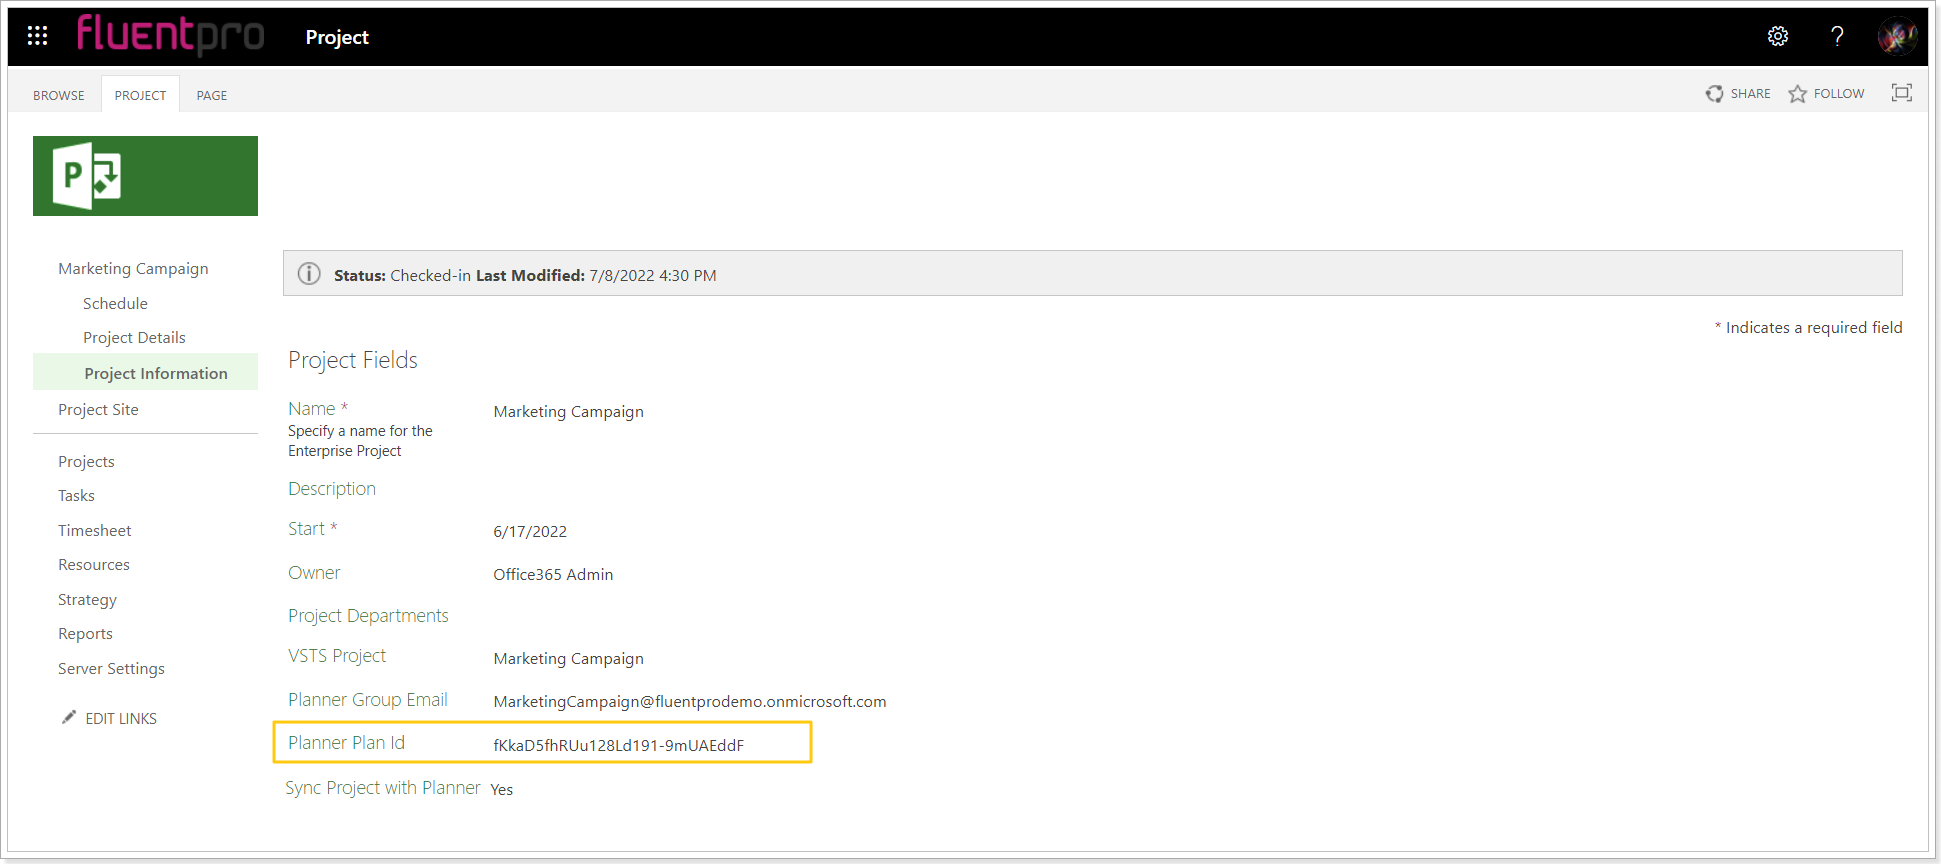
1. Open the project selected for the synchronization in Project Online on the Project Details or Project Information PDP.
2. Make sure that the 'Sync Project with Planner' field is set to YES.
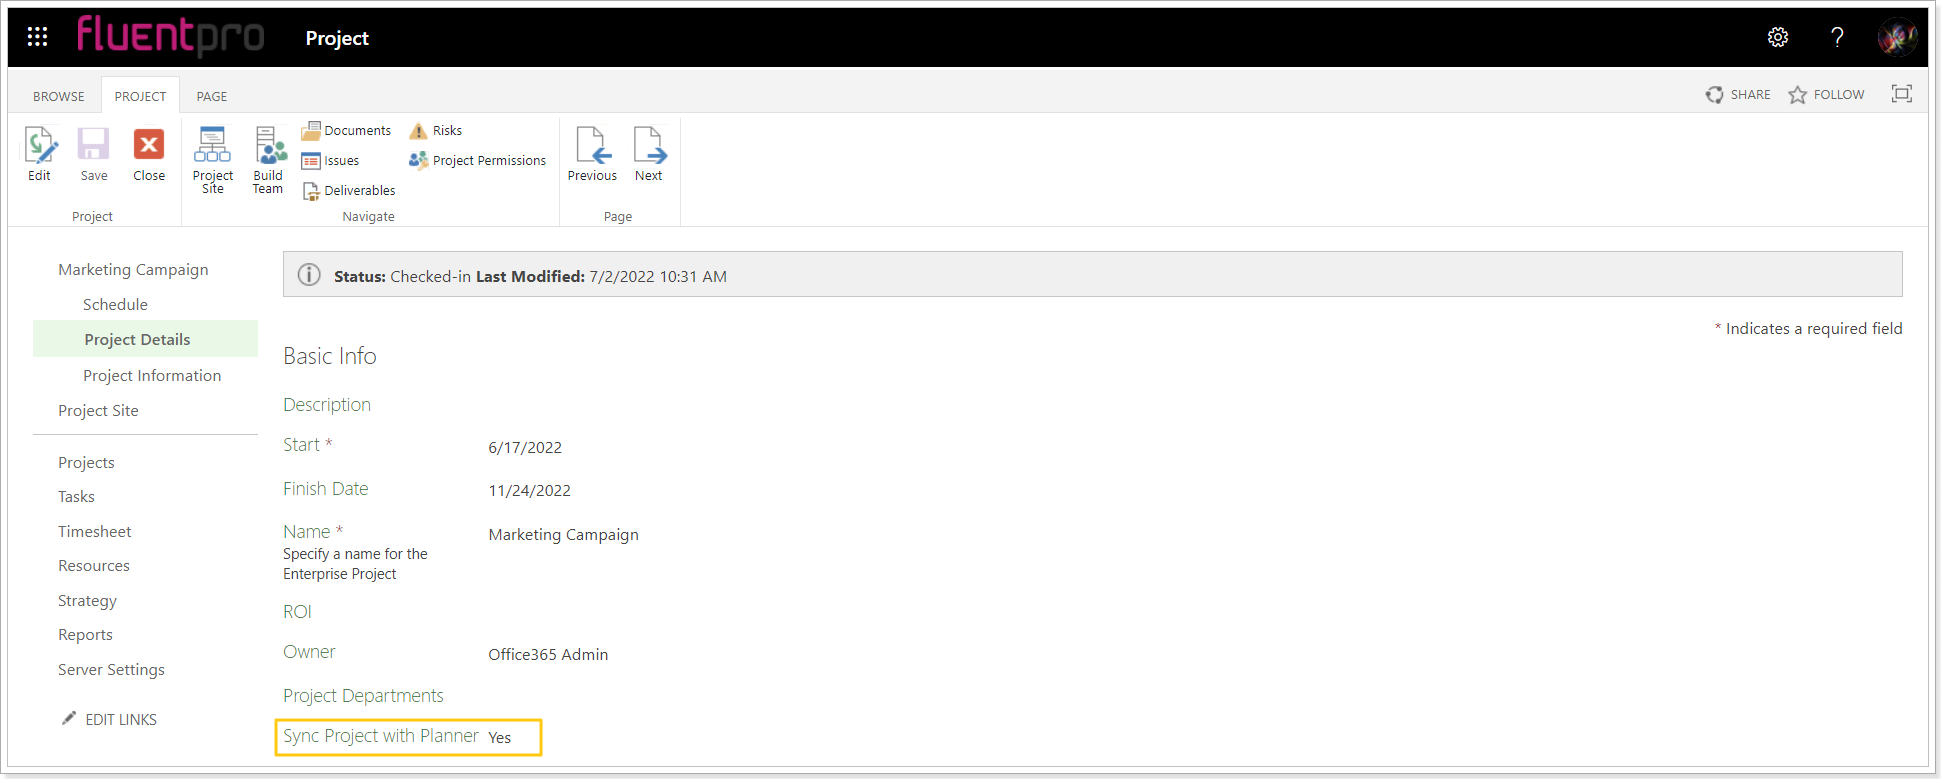
3. Open the project schedule. Make sure that the 'Sync with Planner' field is set to yes for all tasks selected for synchronization.

If you cannot find these fields in your project, it means that Project Online was not configured correctly. Please perform the steps described in this article to configure Project Online.
Solution 2
The synchronization account does not have the required set of permissions for the synchronization to run correctly.
If the tasks are not synchronized from Project Online to Planner, please make sure that the account you are using for running integration has all the required permissions described in this article.
If the tasks are not synchronized from Planner to Project Online, please make sure that the account you are using for running integration is added to the Office 365 groups of the plans selected for synchronization. Also, the synchronization account should be added as a member to the plans selected for integration.
Solution 3
There were no updates/changes to the project tasks marked for synchronization in the source system.
Integration Hub synchronizes newly created tasks or the changes that were made to certain task fields from the source system to the target. Integration Hub uses its cache on every data synchronization and checks if there are any new changes made to the tasks (or new tasks created).
Please find the list of the supported tasks fields for synchronization in this article.
Open the project in the source system and edit any of the supported fields for an existing task(s) or create a new task to check if the synchronization runs successfully.
For a test synchronization from Project Online to Planner perform the following:
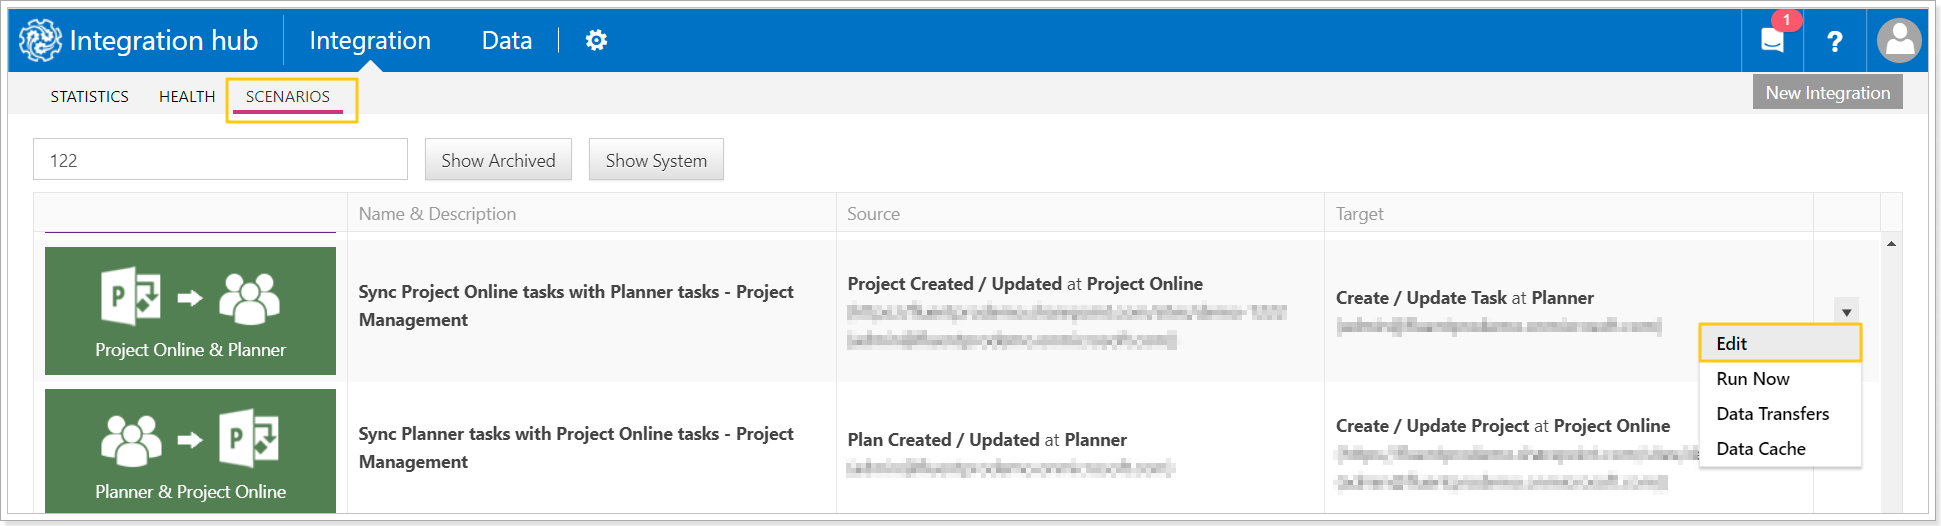
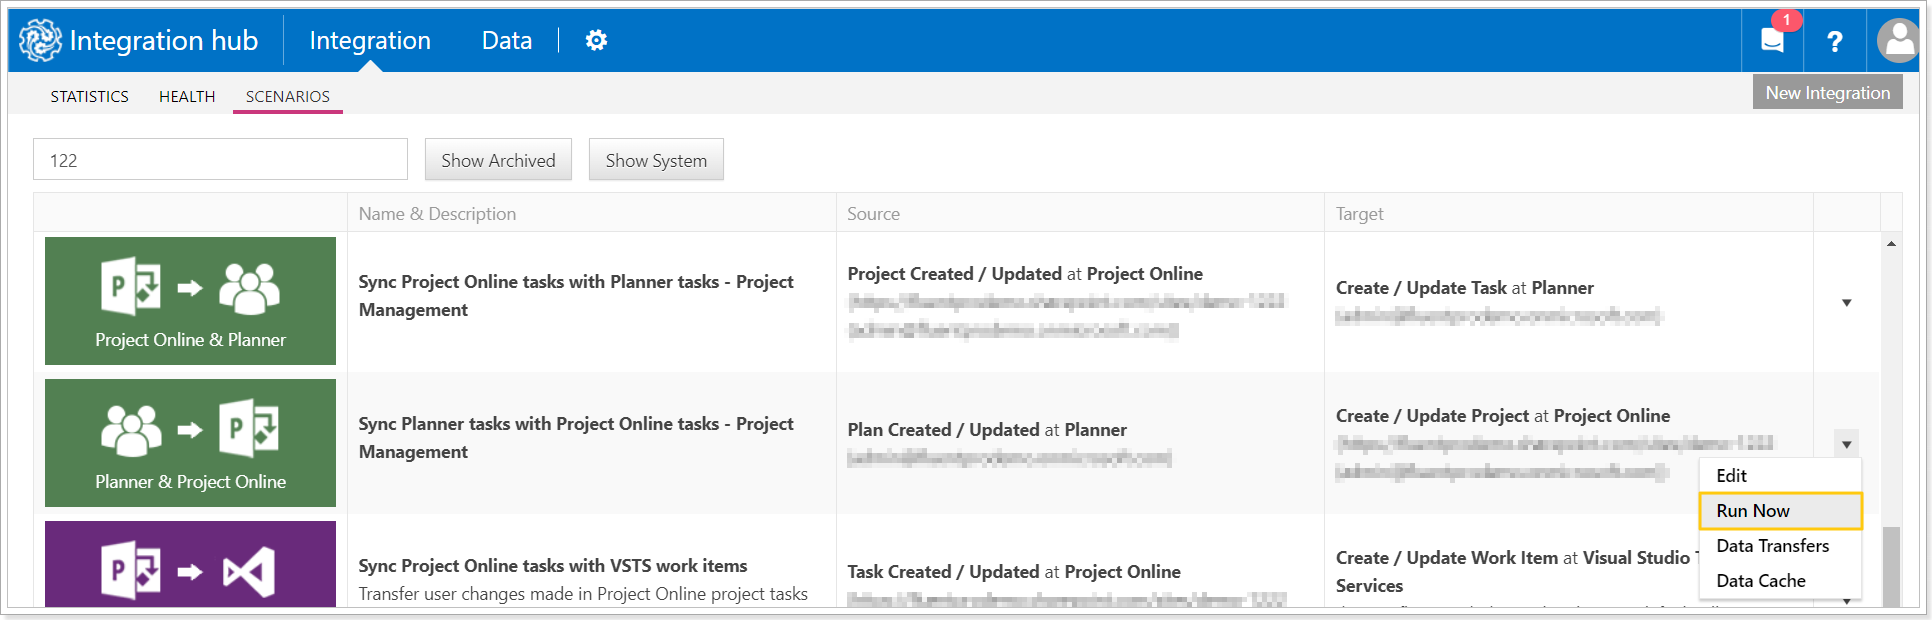
1. Open Integration Hub on the Scenarios page and select to edit the required scenario.
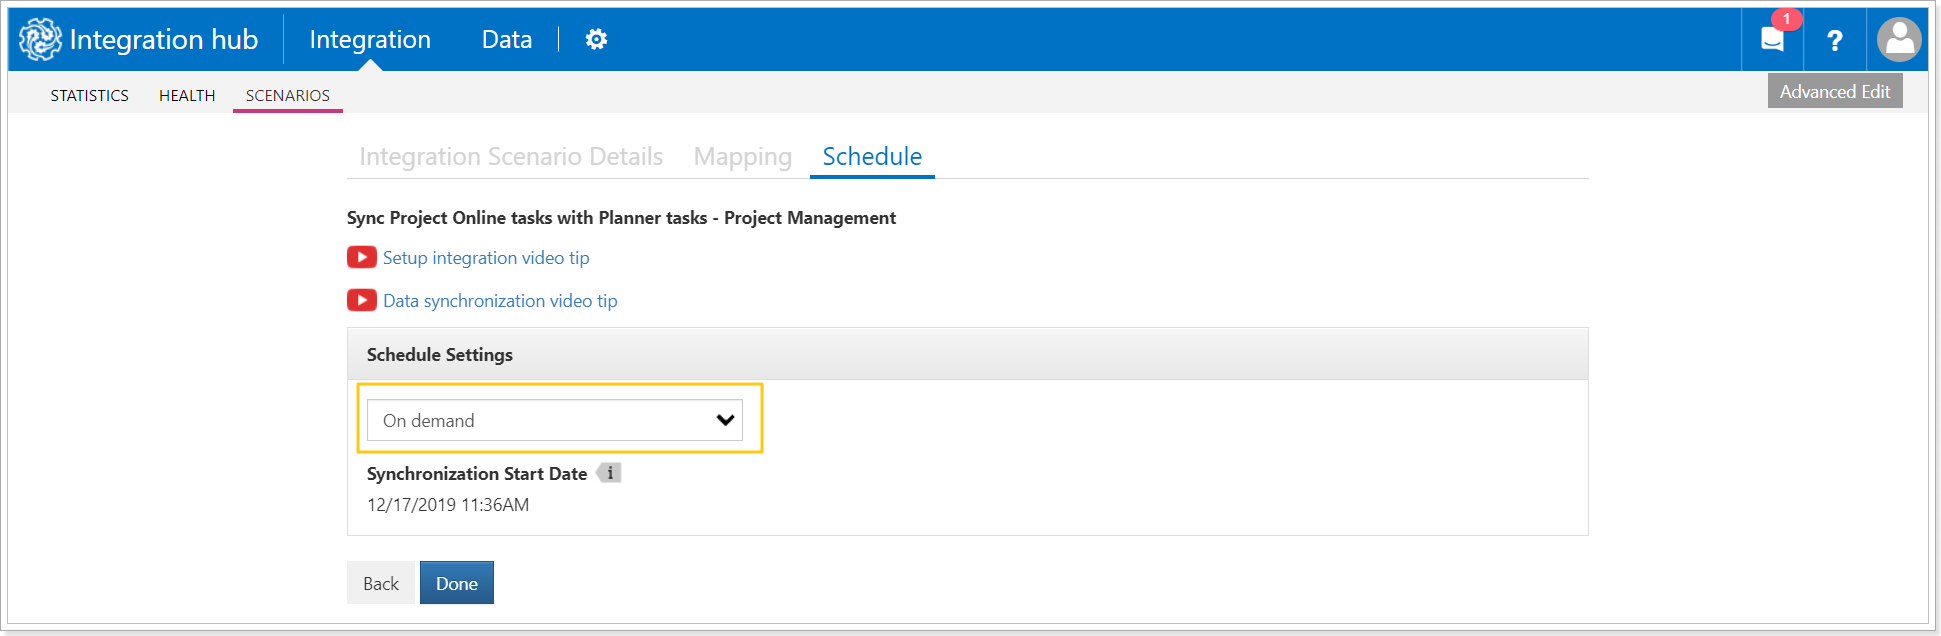
2. Open the Schedule settings and select the 'On-Demand' option. If the setting was set to 'By schedule' it is required to change this setting so that the synchronization is not launched automatically when the new tasks are created or the existing ones are edited and the test is run successfully.
Click Done.
3. Open Project Online project selected for synchronization. Edit a few task fields supported for integration or create a few new test tasks. Make sure the tasks are marked for synchronization: the 'Sync with Planner' field is set to Yes.
4. Open Integration Hub and select the 'Run now' option for this scenario.

5. If the tasks are synchronized successfully, open the scenario for editing again and change the Schedule setting to the 'By Schedule' if needed.
For a test synchronization from Planner to Project Online perform the following:
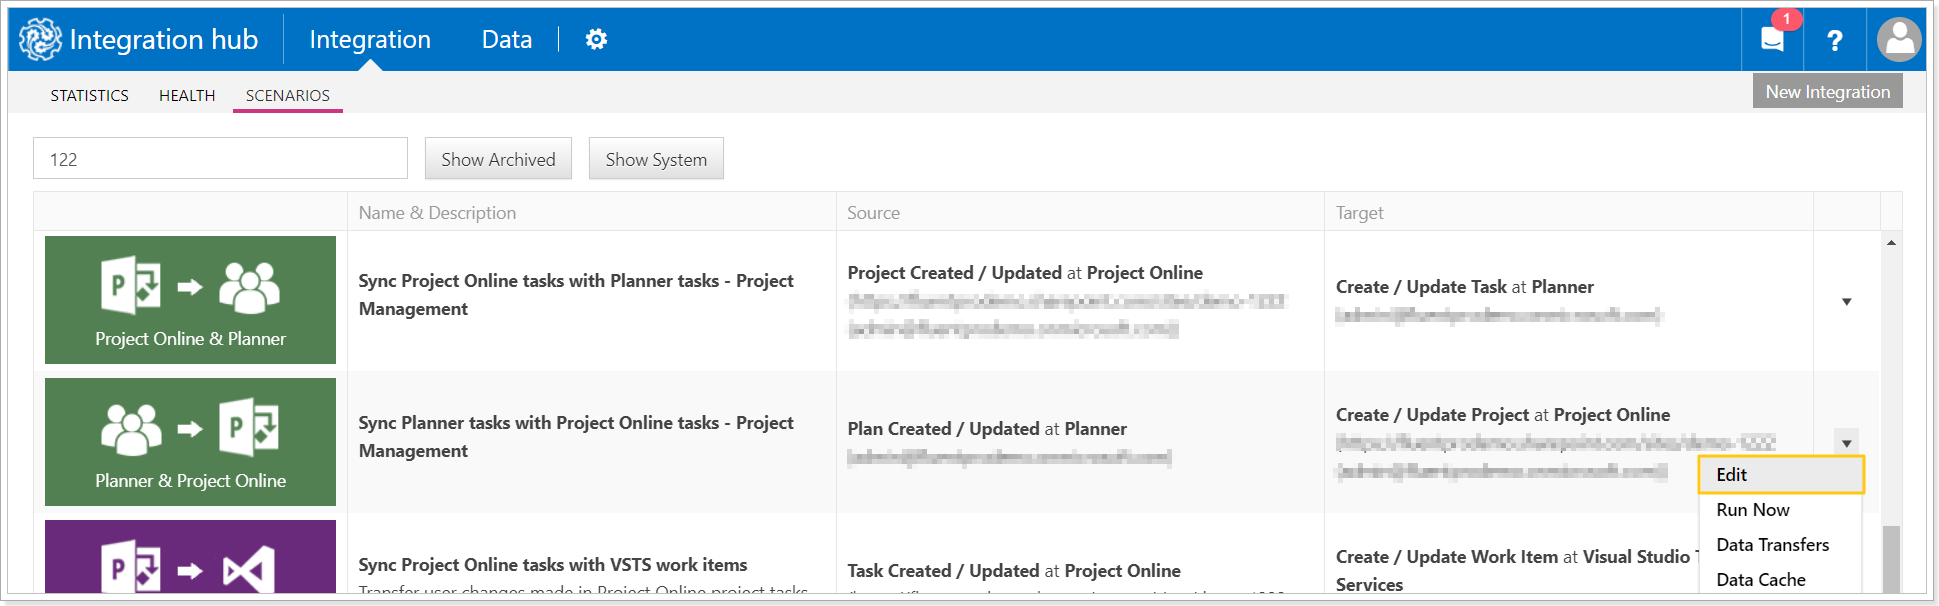
1. Open Integration Hub on the Scenarios page and select to edit the required scenario.
2. Open the Schedule settings and select the 'On-Demand' option. If the setting was set to 'By schedule' it is required to change this setting so that the synchronization is not launched automatically when the new tasks are created or the existing ones are edited and the test is run successfully.
Click Done.
3. Open Project Online on the Project Information or Project Details PDP and check that the plan is mapped to the project by making sure that the Plan ID is set in the 'Planner Plan ID' field.

4. Open Planner plan selected for synchronization and create a few new test tasks.
If there are any existing tasks that you need to synchronize with Project Online, but they were created before the first integration was launched for the current scenario, it is required to recreate them to include in the synchronization
5. Open Integration Hub and select the 'Run now' option for this scenario.
6. If the tasks are synchronized successfully, open the scenario for editing again and change the Schedule setting to the 'By Schedule' if needed.
Solution 4
One Planner Plan is mapped to several projects in Project Online.
The same Planner Plan cannot be mapped to different projects in Project Online. One unique Plan can be synchronized to one unique project in Project Online.
If one Planner Plan is mapped to several projects in Project Online, the data marked for synchronization will be skipped, and will not be synchronized.
There will be the following warning on the log file:
Ambiguous projects mapping. Ignored projects: "Project Schedule"; "Planner Test Tasks"
If you have several projects mapped to the same plan, delete the Plan ID of this plan from the PDP of the projects you do not need to synchronize with this plan.
Make sure that the required Plan ID is set for one Project Online project only.
Solution 5
The Project Online project was remapped to a different Planner plan.
If you need to synchronize the Project Online project to another Planner plan perform the following:
1. Delete the Planner Plan ID of an old plan from the PDP page of the Project Online project.
2. Provide the Planner Plan ID of a new plan in the Plan ID field on the PDP page. Save the changes.

3. Recreate tasks that you need to synchronize to a new Planner plan in the Project Online project.
It is required to recreate the tasks because the Integration Hub cache stores the link between the project and the previously mapped plan. To break this link, the tasks should be recreated in Project Online.