
Data Management allows to perform the following operations:
1. Perform Data Synchronization Read more
- Setup Data Synchronization Schedule
- Trigger synchronization manually
- Update Synchronization Account Read more
2. Set one or multiple SharePoint groups for EPM Pulse Administrators Groups, Authors Groups, and Viewers Groups.
3. Add a new data connection.
4. Edit your data connection information.
5. Delete data connections.
Data Connections
Data connections can be added in the EPM Pulse app.
Follow the steps below to create a data connection in EPM Pulse:
1. Sign in to the EPM Pulse app.
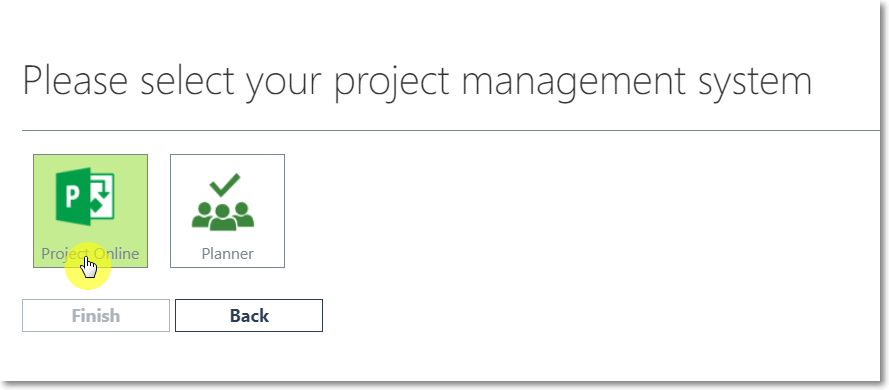
2. Select your Project Management system (Project Online in our case).
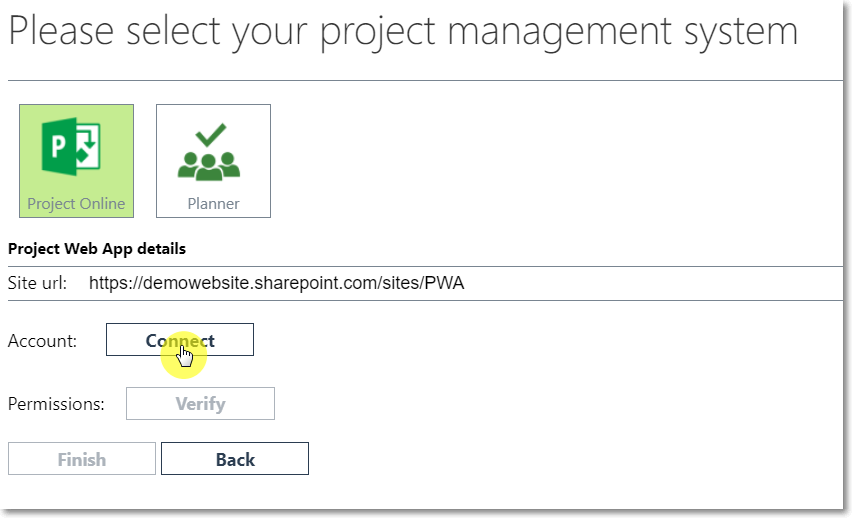
3. Specify the PWA Site URL.
Before you proceed, tenant Global Administrator (or Application Administrator) consent is required to allow EPM Pulse to access your Microsoft 365 tenant. Admin consent should be granted only once; after this, any user account credentials without admin permissions can be used to add/refresh the Project Online connection.
Ask your Azure Global Administrator or Azure Application Administrator to grant consent for the EPM Pulse enterprise app.
For this, please copy the following URL for granting tenant-wide admin consent:
https://login.microsoftonline.com/common/adminconsent?client_id=b2497771-1994-4499-8209-dd5693b9af3a
For more details, please refer to this article.
4. Click Connect to proceed.
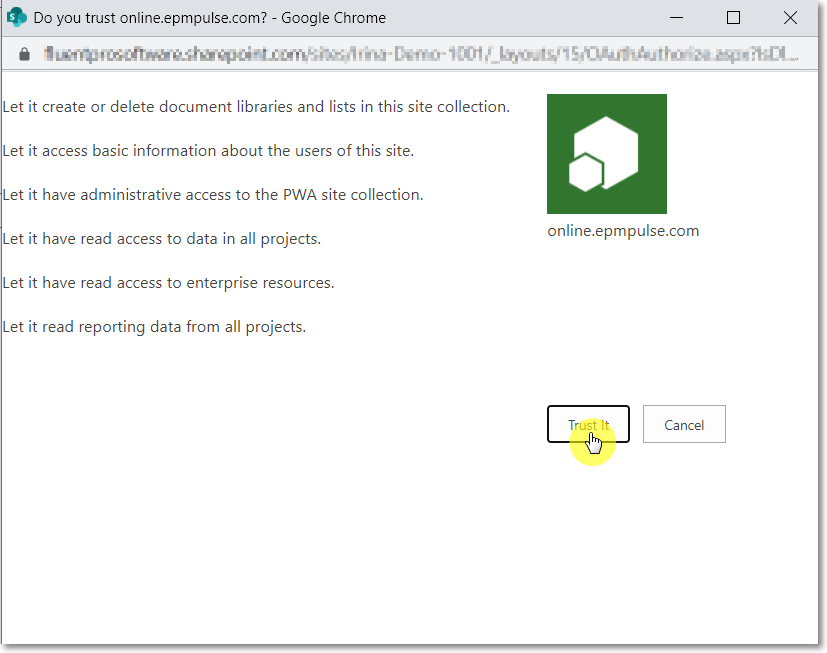
5. Press the Trust It button in the ‘Do you trust EPM Pulse for Project Online’ window if you confirm all the permissions.
6. Press the Verify button in the Project Web App details section to see if you have all the required permissions for EPM Pulse.
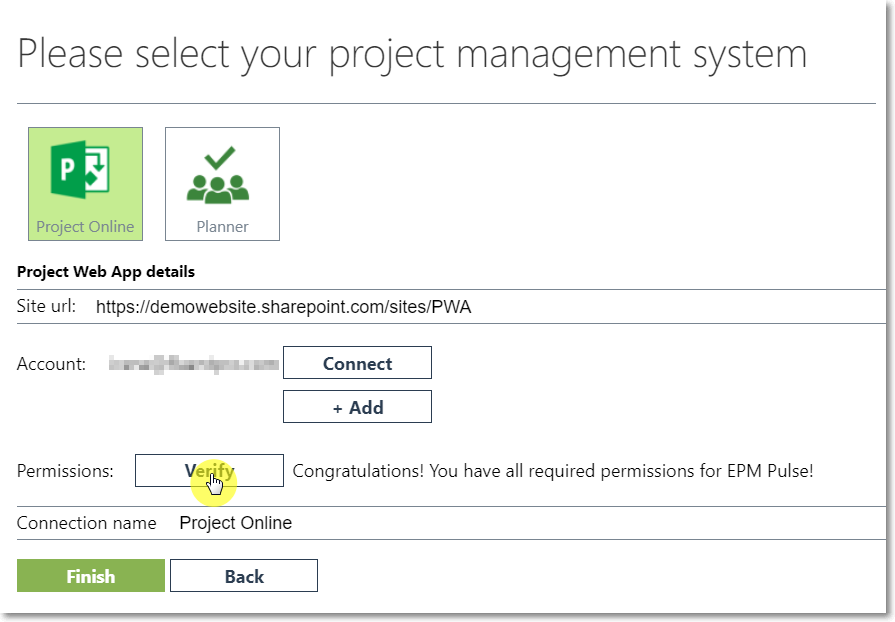
7. Click Finish to add this connection to EPM Pulse Online.
8. When the connection is added, please allow EPM Pulse some time to perform the initial synchronization, which normally takes around 10 minutes.

Adding another data connection
You can add another connection if your license for EPM Pulse allows that.
Please note: To avoid throttling by Project Online (if data sync fails with a 429 error or takes longer than expected) we recommend using separate accounts for each new EPM Pulse Project Online connection. Also, it is recommended to use dedicated service accounts instead of personal accounts. The user account should have the Project Web App license and should be assigned to the PWA Administrators security group and Site Collection Administrators group on the PWA.
To add one more connection to your EPM Pulse, click on the gear button and open the Data Management option from the menu.

Select the Add new data connection option.
")
- Select your Project Management System.
- Specify the PWA Site URL and click Connect to proceed.
- Press the Trust it button in the ‘Do you trust EPM Pulse for Project Online’ window if you confirm all the permissions.
- Press the Verify button in the Project Web App details section to see if you have all the required permissions for EPM Pulse.
- Click Finish to add this connection to EPM Pulse Online. When the connection is added, please allow EPM Pulse some time to perform the initial synchronization, which normally takes around 10 minutes.

After creating one more connection, two PWAs will be connected to your EPM Pulse and you will be able to use the data from the PWAs while working with EPM Pulse Online.
Editing Data Connection
When the connection is created, you can edit your data connection information if needed. To do that, please click the Manage button.

You can perform the following changes:
- Change the name of the data connection.
- Refresh the account. Please refer to Data Synchronization in EPM Pulse Online article, “Update Synchronization Account” section to find a detailed description of the process.
- Verify permissions. Press the Verify button to see if you have all the required permissions for EPM Pulse.
- Enable/Disable PWA data access permissions.
- Provide project filter query to filter out Projects and sites for data synchronization.
- Manage SharePoint groups for EPM Pulse.
- Add/Delete synchronized SharePoint lists.
- Change Sync Schedule. Remove or add days of the week or schedule additional data synchronizations to be performed during the day.
Please note: By default EPM Pulse allows scheduling up to 10 syncs for trial licenses and up to 24 syncs for full licenses for one data connection. If you need to extend this limit it is required to send the corresponding request to our Support Team at support@fluentpro.com. - Change contact e-mail.
In case Use PWA data permissions checkbox is checked, EPM Pulse will inherit PWA access permissions. This means that users will be able to see only the projects that are visible to these users in the project center.

Please note: The User Mapping section will only be available when the connection is added to the tenant for the first time. If this connection is deleted, the section will not be available.
Deleting data connection
You can delete data connections if needed. To do this:
1. Go to Data Management.
2. Click the Delete button.

3. Confirm the deletion of the reports in the confirmation pop-up window.