Please note: FluentPro Datamart is now based on EPM Pulse technology and therefore it shares some parts of user interface with FluentPro EPM Pulse.
For Project Online connections
You can change the account if needed (e.g. user was removed\disabled, access rights were changed, etc.).
To refresh or change the account perform the following:
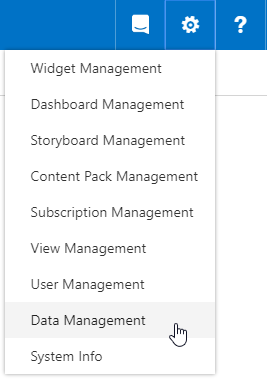
1) Navigate to your EPM Pulse, click the gear-like button in the top right corner of the screen and select Data Management option from the drop-down menu.
2) Click the Manage button next to your data connection.

Please note: If you want to refresh Data Synchronization Account, you need to be logged in to your PWA using the account that is set as Data Sync Account in EPM Pulse. If you want to change Data Synchronization Account, you need to sign out from your PWA first.
If you are using DataMart Cloud, before you proceed, tenant Global Administrator (or Application Administrator) consent is required to allow EPM Pulse to access your Microsoft 365 tenant. Admin consent should be granted only once; after this, any user account credentials without admin permissions can be used to add/refresh the Project Online connection.
Ask your Azure Global Administrator or Azure Application Administrator to grant consent for the EPM Pulse enterprise app.
For this, please copy the following URL for granting tenant-wide admin consent:
https://login.microsoftonline.com/common/adminconsent?client_id=b2497771-1994-4499-8209-dd5693b9af3a
For more details, please refer to this article.
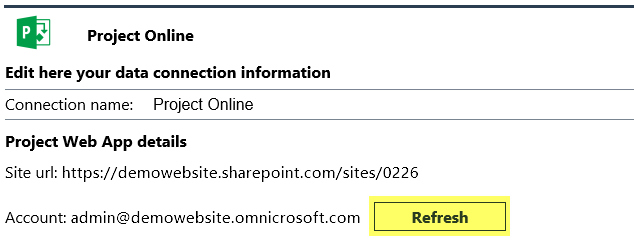
3) Press the Refresh button in the Project Web App details section.
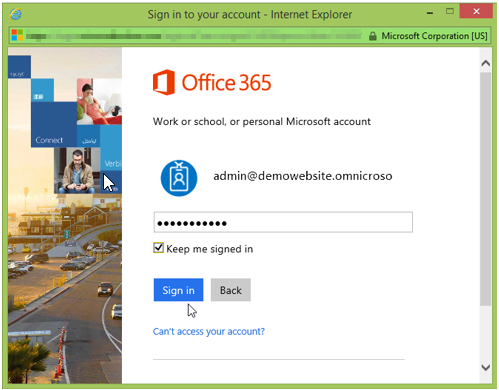
4) If you are not logged in to your PWA, you will be asked to enter the credentials for the sync account. Fill in all the necessary information to continue.
5) Press the Trust it button to confirm all the permissions.
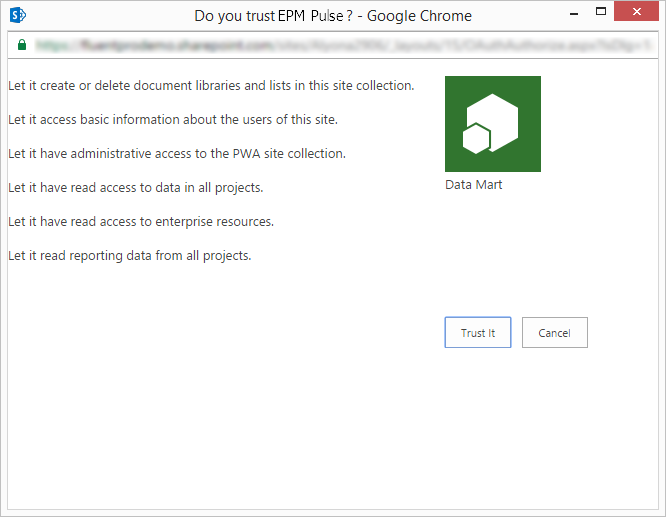
If you want to refresh Data Synchronization Account and you are already logged in to your PWA, you will be taken directly to the “Do you trust EPM Pulse?” screen with a list of permissions requested by EPM Pulse On-Premises Edition app. Press the Trust it button to confirm all the permissions.
6) Press Verify button in the Project Web App details section to see if you have all the required permissions for EPM Pulse.

7) After refreshing the permissions for your account or changing your account, click Save button.

For Project Server 2013/2016 connections
To refresh or change the account perform the following:
1) Navigate to your EPM Pulse, click the gear-like button in the top right corner of the screen and select Data Management option from drop-down menu.
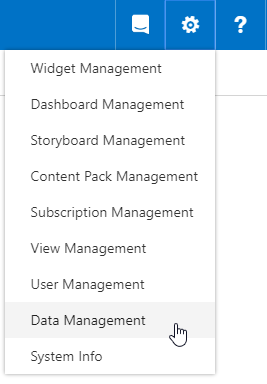
2) Click the Manage button next to your data connection.

3) Press the Refresh button in the Project Web App details section.
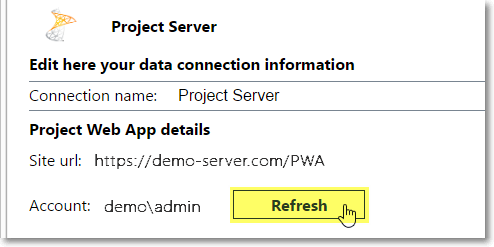
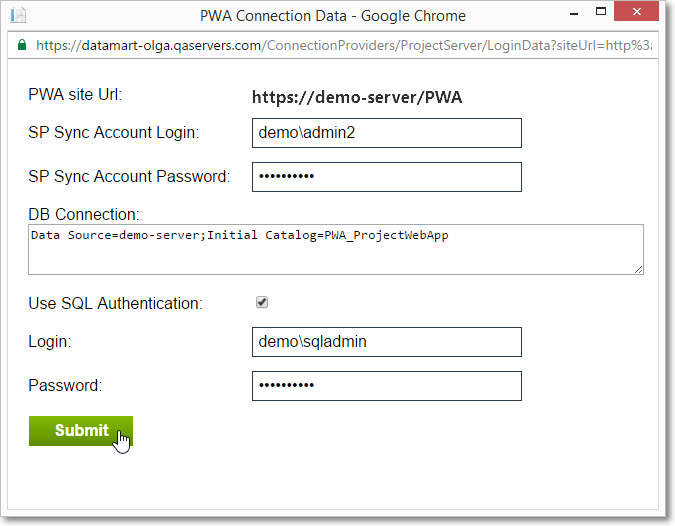
4) In the PWA Connection Data window provide a new SP Sync Account Login and Password or a new SQL Account Login and Password, or both, and then click Submit:
5) Press Verify button in the Project Web App details section to see if you have all the required permissions for EPM Pulse On-Premises Edition.

6) After refreshing the permissions for your account or changing your account, click Save button.

Please note: Each time you set up an account, On-Premises Edition will be granted with access to PWA reporting for limited time period. If a user, whose account is designated as a sync account, visits the On-Premises Edition during limited time period, then sync account will be updated automatically, otherwise you will need to update it manually following the instructions above.
