
At this point all necessary configuration is present in the target PWA, the test copy is performed, it is time to proceed to Projects migration.
Please note: The best approach to Project migration is splitting them into batches - e.g. Active, Completed, Not Started Projects, Project, which are Planned to be archived.
Key points, which need to be verified after the Projects copy to target PWA is complete [manual verification]:
- Project Owner
- Workflow Stage
- Project level custom fields in PDPs
- Schedule (cost fields, duration, % complete, work, start/finish dates, custom fields)
1. Navigate to the G.A. Suite site and log in with your account.
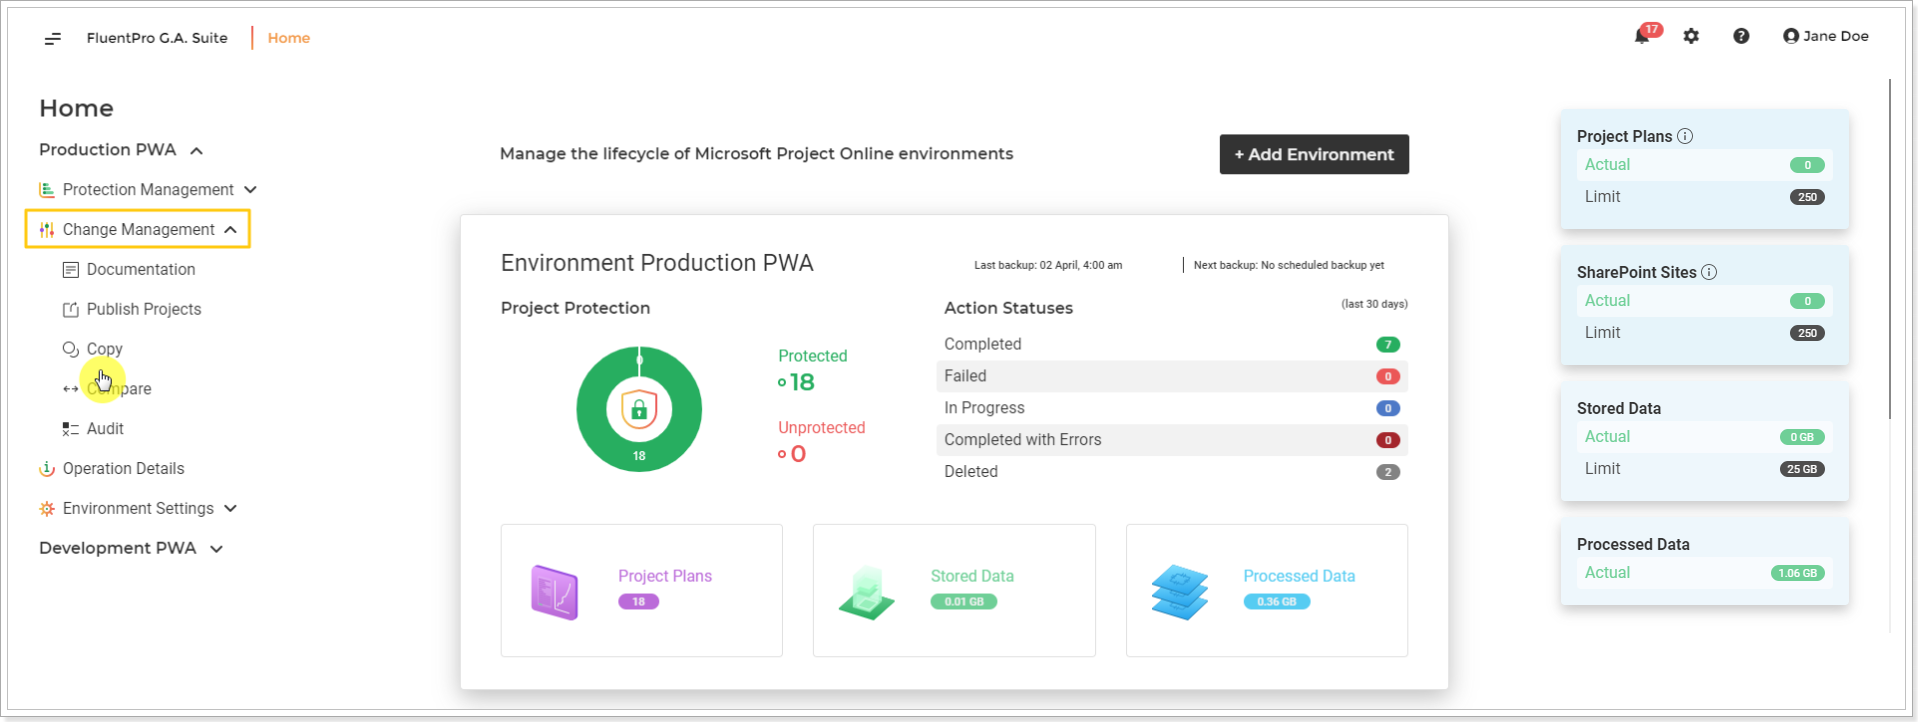
2. On G.A. Suite Homepage click on the source environment title, navigate to the Change Management section and choose the Copy option:
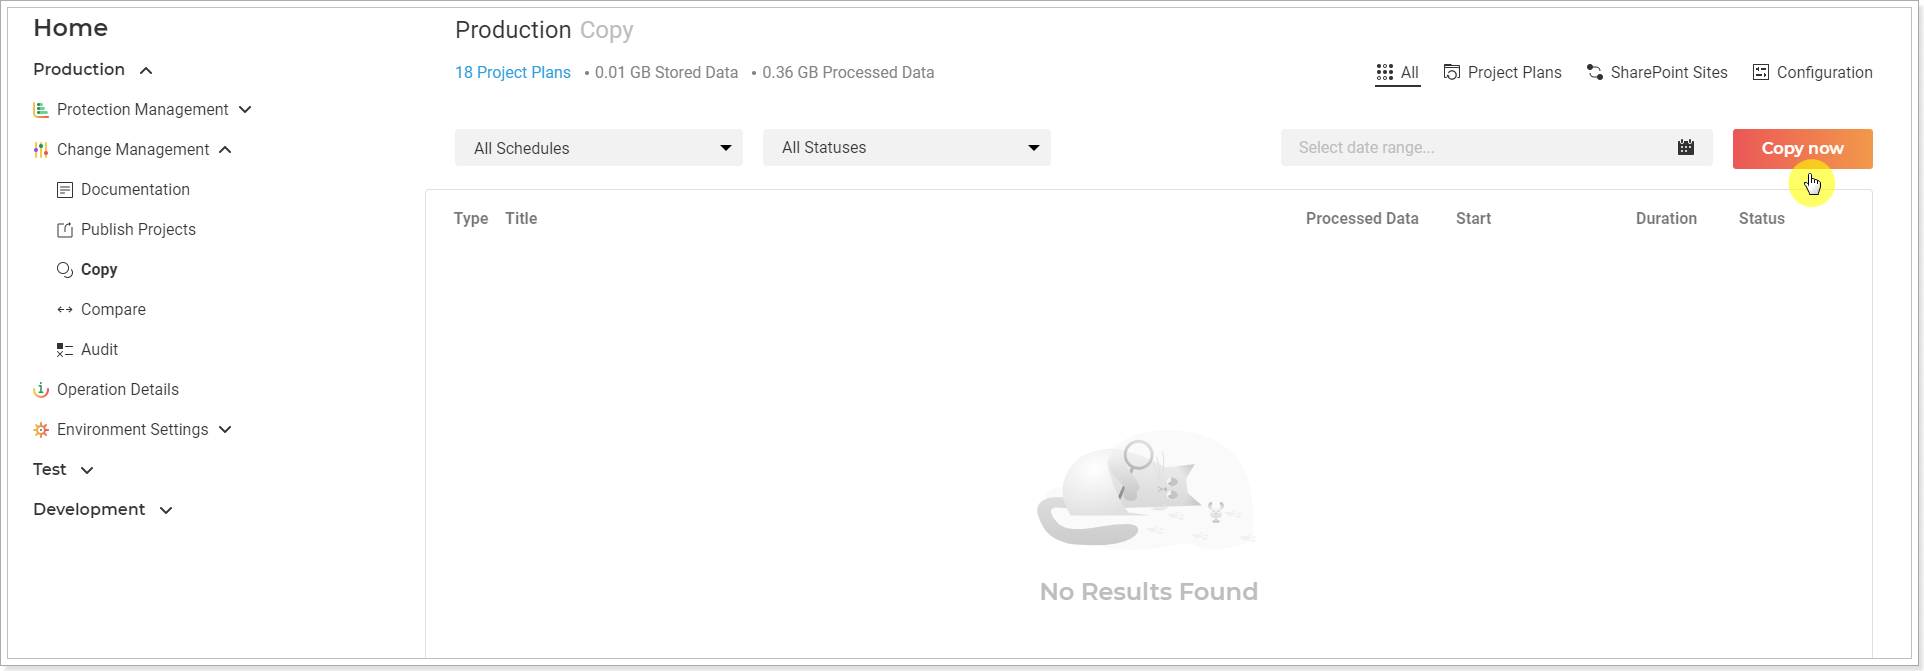
3. On the 'Copy' page click on the Copy now button:
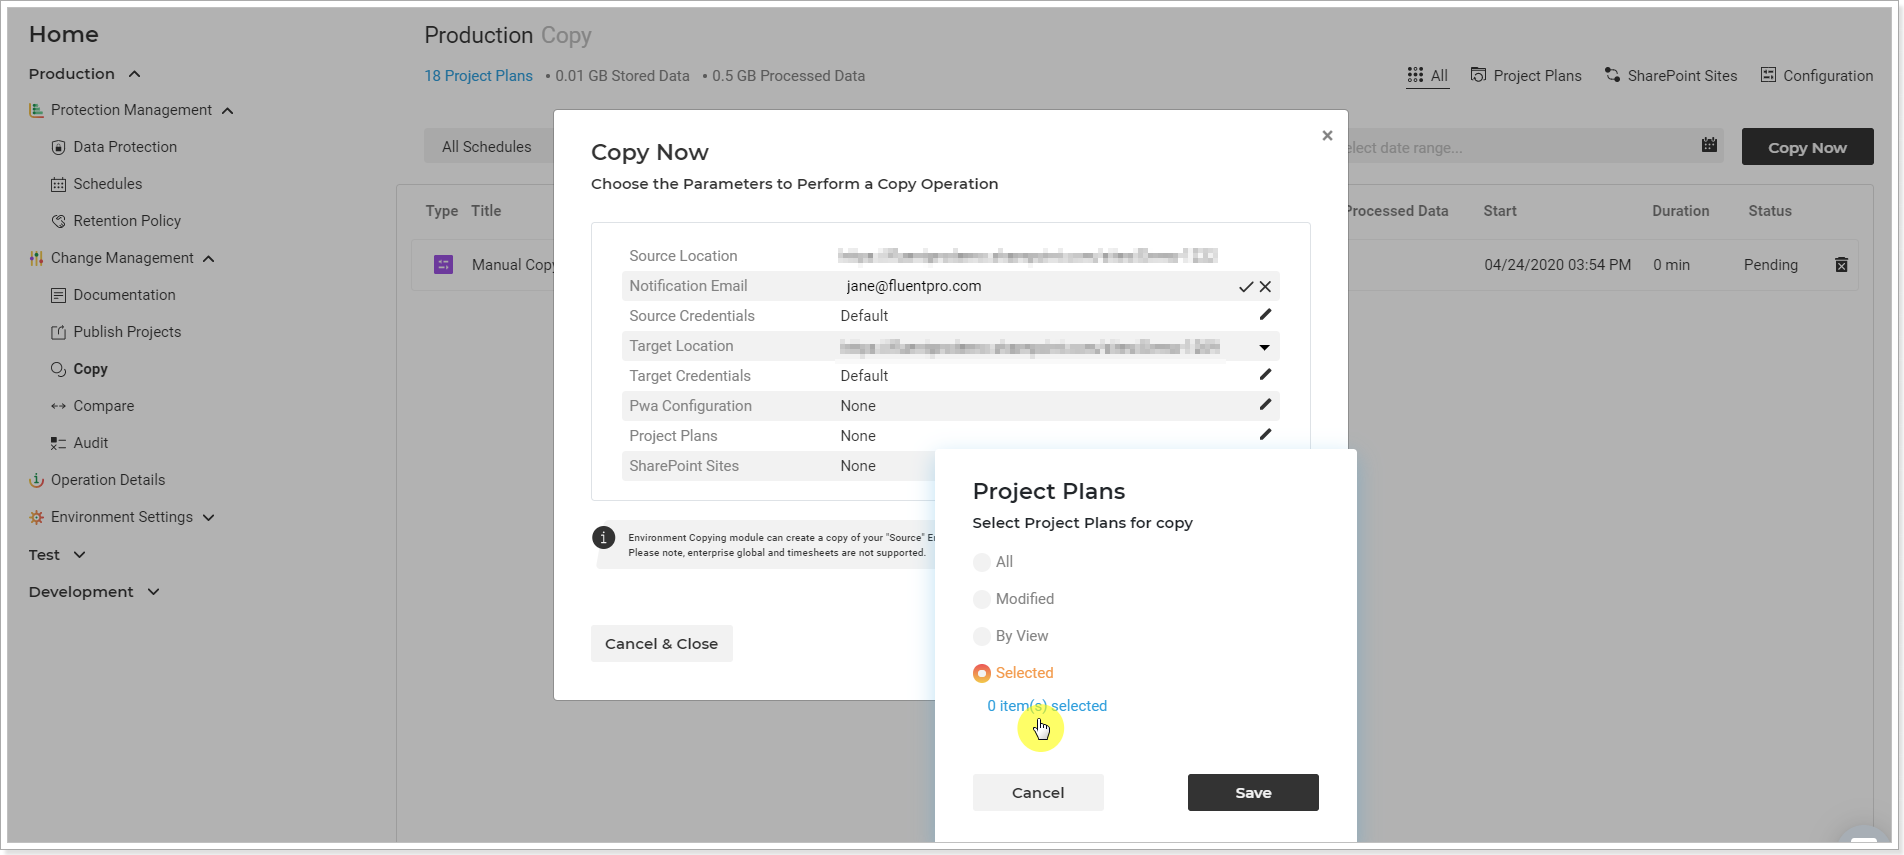
Copy Now window will be opened. Review and edit the required information here by clicking on the pencil-like button next to each section.
- Source location - check that the source PWA URL is correct.
- Notification Email - specify the email, where the notification will be sent on completion.
-
Source credentials - Provide specific credentials, if needed, and validate them. Multi-factor Authentication for Office 365 users is also available. For more details refer to this article. Please note: By default G.A. Suite uses the credentials which were provided when adding PWA to G.A. Suite. These credentials are stored and may be found on the Credentials Manager or Credentials page. If for some reason you would like G.A. Suite to use a different set of credentials, use this option.
You can add multiple credentials to perform the operation and add more accounts to the accounts list.
In case of any issues with an account (permissions or access lost; password expired) during G.A. Suite operation processing, another one will be used to successfully complete the operation. Also, using the Multiple credentials option makes G.A. Suite performance faster. - Target location - the PWA configuration will be copied to the selected PWA. Please make sure the required PWA is added to your G.A. Suite tenant and licensed.
- Target credentials - provide target-specific credentials if you need to use different credentials from the ones provided in the Environment Settings.
- PWA Configuration - Skip this option.
4. Next it is possible to select specific Project Plans for copying:
Project Plans - click on the pencil-like button to select the projects you need to upload to the target PWA now:
All - choosing this radio button all projects will be copied over from the source PWA to the target.
Modified - choosing this radio button you will be able to copy only those Project Plans which were modified in the selected period of time - last 2, 3,4 days, etc.
By View - if you select this radio button, you need to specify the Project Online view name from your PWA. Only those Projects Plans, that fall under the specified view will be selected for copying.
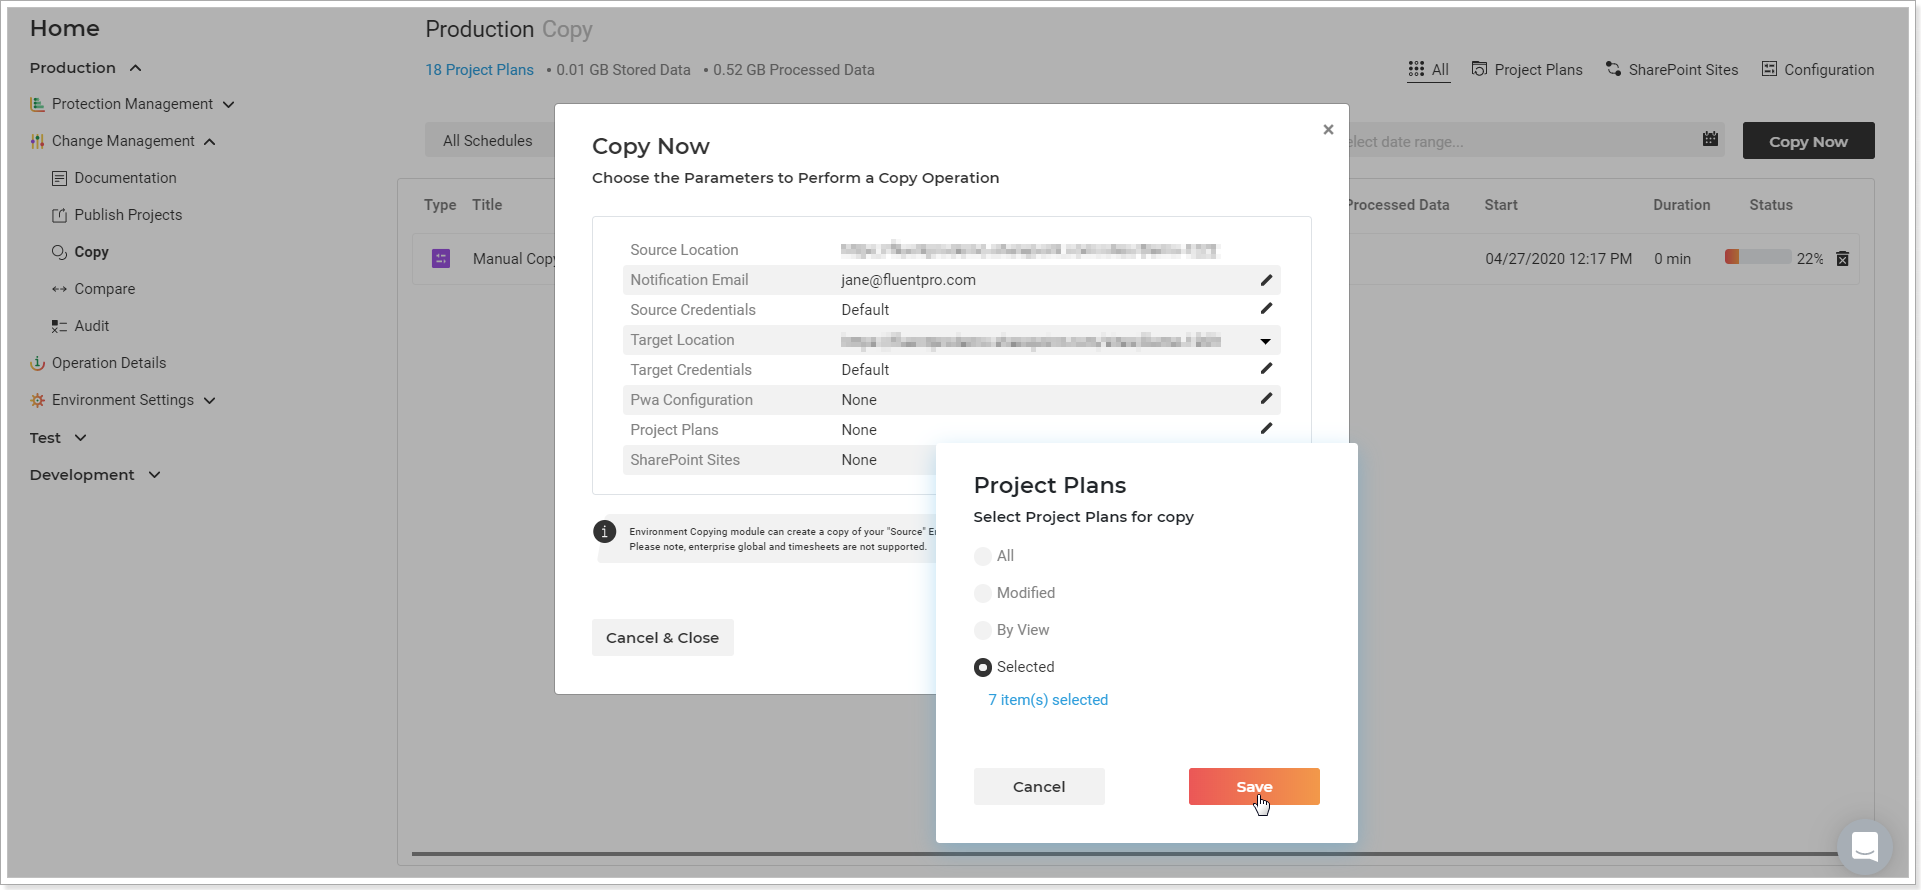
Selected - this option will allow selecting some specific projects only. Click on the number link to choose the needed projects.
Ignored - this option allows excluding specific projects from copying operation.
Please note: As per FluentPro recommendation, Projects need to be transferred in batches. If you would rather migrate all Projects at one go, choose the 'All' radio button.
As you click on the number link, the Project Plans window will be opened and all Projects from the source PWA will be loaded to this window at once. You can filter the projects by 'View' or by 'Modified date' if needed using the filters on the top of this window. When the required filter is selected, the projects list will be loaded from the PWA into the Project Plans page according to the selected filter.
5. Select the projects you need to upload to the target PWA.
Please note: If you need to select the projects from different Project Center views, it is also possible. Select the required view, check the checkboxes of the required projects. Then open the next view and select the projects that you need to include in this operation from this view as well. You will then see the total number of the selected projects by clicking on the Selected button that shows the number of projects that are currently selected for the current operation.
The Total Items button allows reviewing all projects that are loaded to the Project Plans screen.
Also, the projects can be additionally filtered out by the Project name, % Complete, Type, EPT, Modified fields, using the button next to each field. You can provide the filtering criteria there to get faster to the projects you need.

As soon as the required projects are selected, please click the 'Add selected' button.

6. Click Save to save the selection.
Don't delete Sites/Projects before upload - select this option, if you don't need to remove projects and their sites selected for upload from the target PWA before upload. (Projects with the same name and/or project UID will be deleted if the check box is not checked. The projects and sites will be deleted in the same way as you delete them manually).
7. Click Copy now to begin the copying process.
Copy summary screen will be opened where you can review the information for the launched operation. You can Cancel and Pause the operation if required.
8. Click Close to return to the Copy page.
As the process finishes, navigate to the target Project Online PWA and verify the Projects for correctness per points stated at the beginning of this article.
As the Projects were copied proceed to Copy the Project Sites.