
1. Download and launch Microsoft Power BI Desktop, then download and unzip the Power BI Pack template file.
2. Sign-in to the Power BI service.
3. In Power BI Desktop, click File > Open.
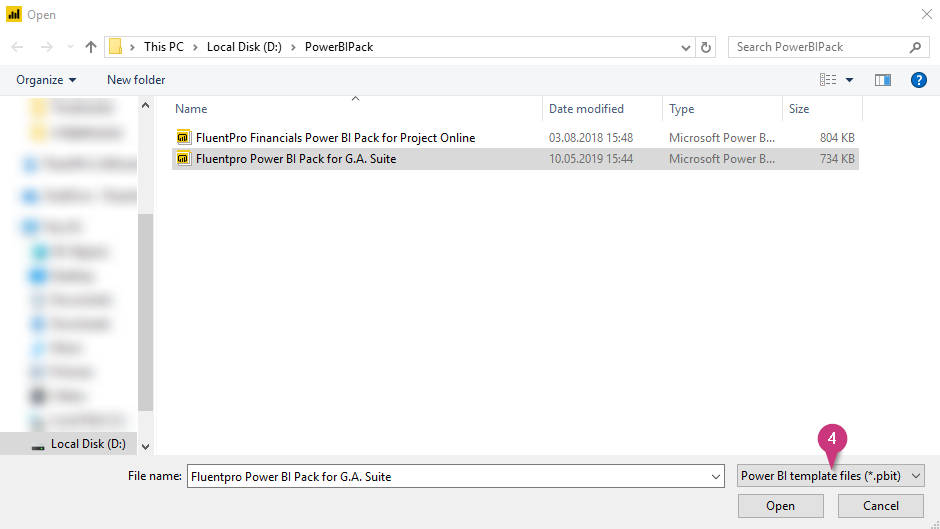
4. Use the file extension dropdown in the bottom right corner of the window to choose Power BI template files (*.pbit) file type. Navigate to the folder where you have downloaded the FluentPro G.A. Suite Power BI Pack template file, choose it and click Open.
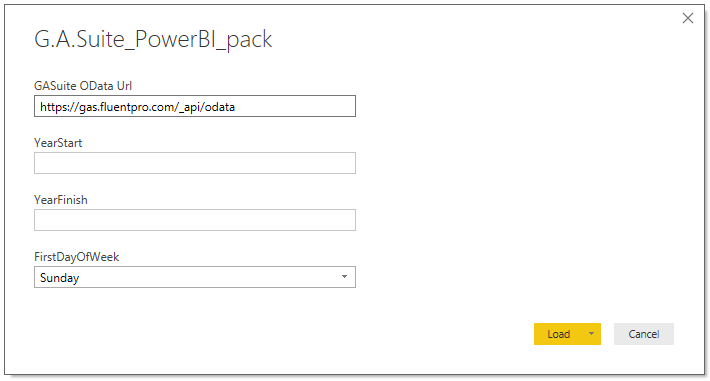
5. In the menu which appears, enter the following parameters:
G.A.Suite OData Url – enter the working OData URL for your G.A. Suite account.
YearStart (optional) – set the start date for data analysis. This setting is required only if you wish to analyze only a specific time range of data obtained from the G.A. Suite.
YearFinish (optional) – set the end date for data analysis. You can edit this setting later.
Please note: You can edit the YearStart and YearFinish parameters later in the Power BI web app (Settings (gear) icon > Settings > Datasets > [Name of your G.A. Suite BI Pack dataset] > Parameters).
FirstDayOfWeek – select the day your work week starts. Needed to properly adjust the dates in your report.
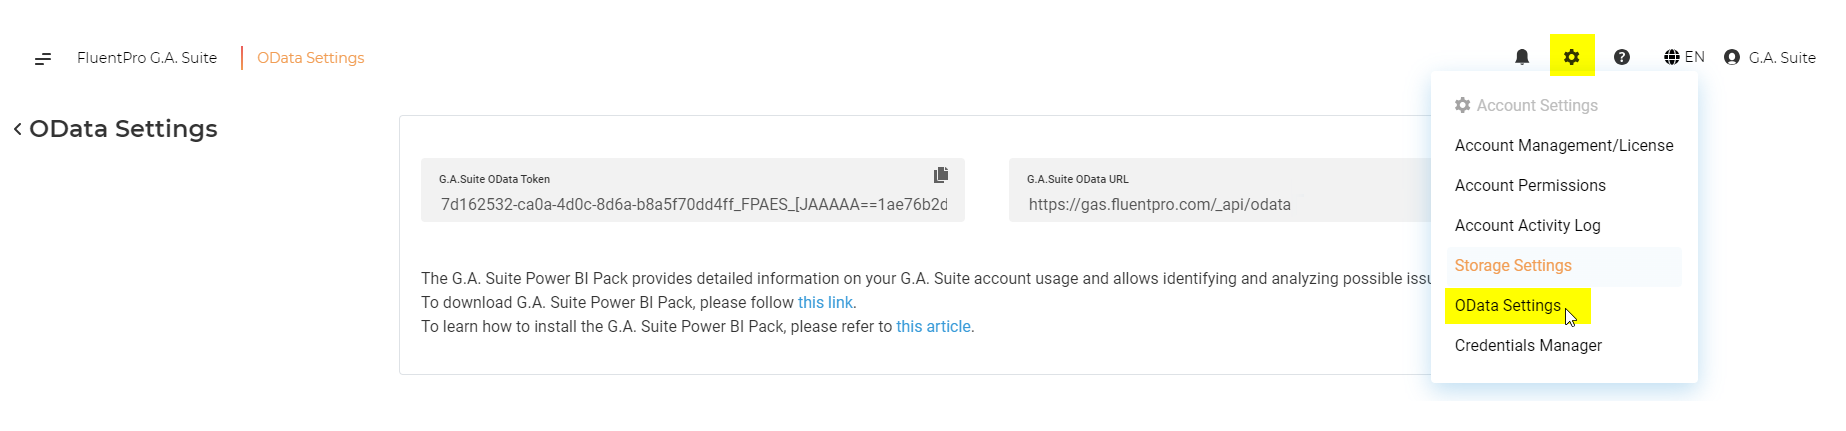
To get a valid OData URL, launch G.A. Suite, navigate to Settings > OData management and click Copy button next to the OData URL field:
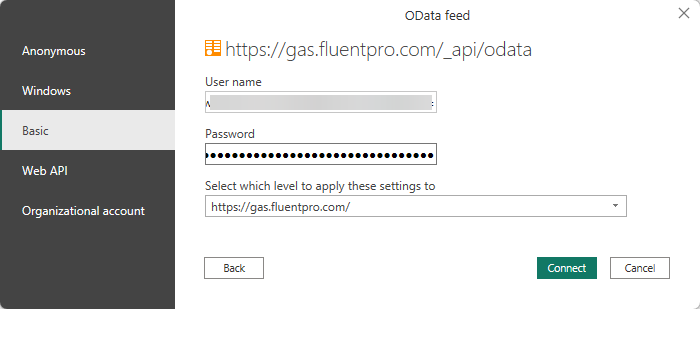
6. In the connection credentials menu which will appear, click on Basic. Return to the OData management page in G.A. Suite and click Copy next to the OData Token field. Paste this token into the User name field:
Please note: By default, Power BI saves all the credentials and permissions you enter. If you have entered invalid credentials on step 6 and encountered an error, please do the following:
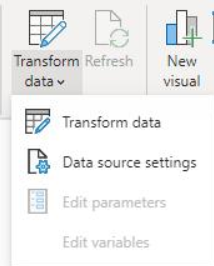
- In Power BI Desktop, click on Transform Data > Data source settings.
- Choose the invalid credentials in the list and click on the Clear permissions button.
- Restart Power BI Desktop in order for changes to take effect and repeat this guide starting from step 3.
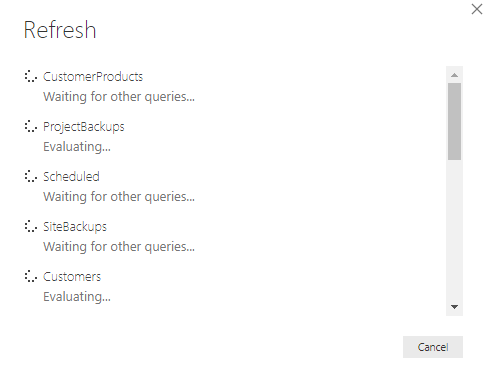
7. Wait until Power BI downloads your data into the report. This may take some time depending on how much data it needs to load.
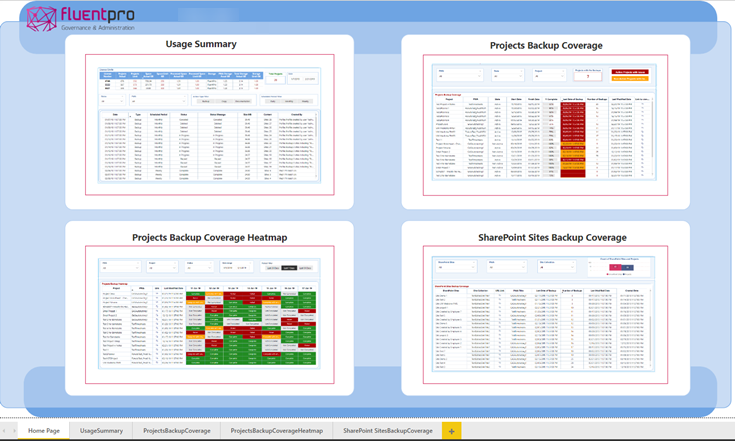
8. The result should look like this:
9. To make this report available online, save it to local storage (you will be prompted by Power BI to do this before publishing) and then publish it to your workspace (File > Publish > Publish to Power BI).

10. As soon your report is published, you will need to navigate to the Power BI application site and check Dataset settings to make sure your report will be updated.
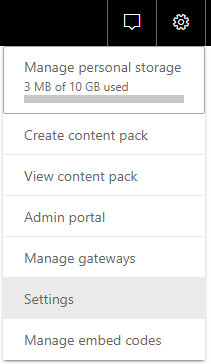
Open your report at the Power BI application site, click on the Settings (gear) icon and choose Settings. On the page which opens, choose the Datasets tab and choose the FluentPro PowerBI Pack for G.A. Suite dataset (if you have chosen a different name for your report while saving it in PowerBI desktop, the dataset name will be equal to it):
11. In the Settings menu, check the Data source credentials and Parameters sections to make sure the application has the proper access to update your reports:
If you see a warning about the invalid credentials in the Data source credentials section, click on Edit credentials and make sure that the authentication mode is set to Basic, and enter a valid OData token in the User name field again.

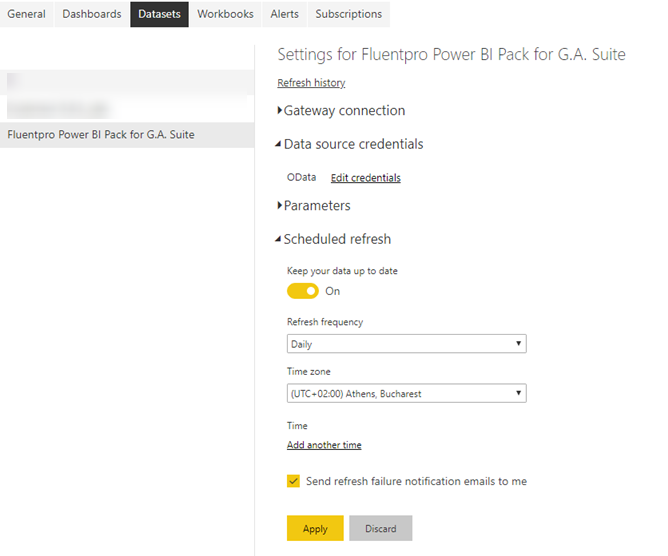
12. To set up an automated refresh schedule, open the Scheduled refresh section and set the desired Refresh frequency and Time zone.
After your report is published, you can find it in your Reports list (My workspace > Reports).