
Before you start please make sure you have a valid license for Project Online. It is required to have a valid Project Plan 3 or Project Plan 5 license.
1. In Integration Hub navigate to Integration –> Scenarios page and click the New Integration button.

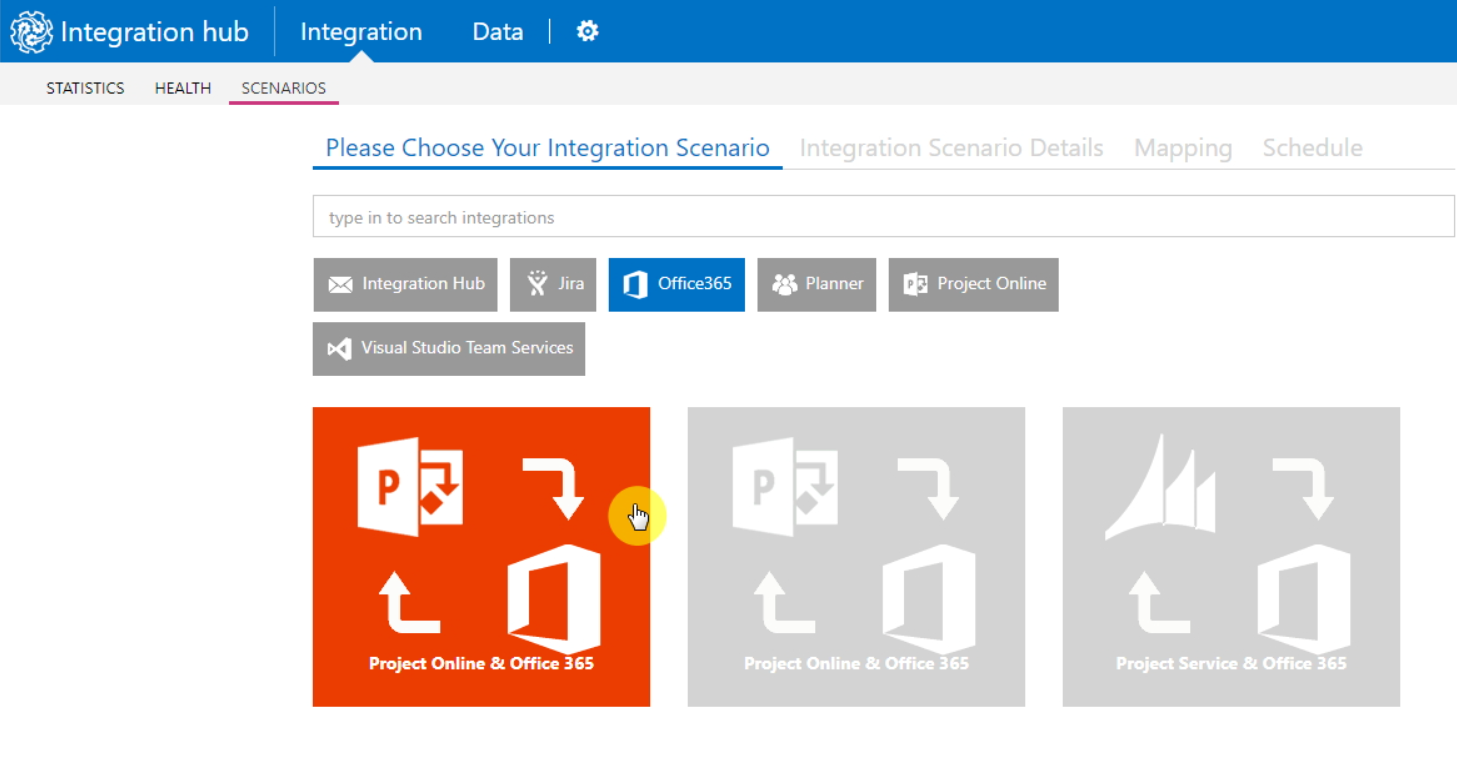
2. Choose Project Online & Office 365 scenario with One-way synchronization of Project Online task with Office 365 Outlook event description.
3. In the Connection field click New and provide the Project Online PWA URL to which you would like to establish the connection. Alternatively, you can select an existing URL from the drop-down list.
In Project Online connection there are three authentication options:
-
OAuth
The 'OAuth' authentication type is a standard and preferred option. When it is used, Integration Hub is authorized to access your resources without sharing credentials. The access token is issued to the Integration Hub app by the authorization server, with approval from your side. Integration Hub then uses the access token to access and process your Project Online data and stores the refresh token for continuous integration.
Please note: If you are creating the first Integration Scenario in your Integration Hub tenant and choosing the OAuth authentication type, there might be a problem with the connection to Project Online. If a problem occurs, as a workaround, we recommend creating the first scenario using SharePoint credentials. When the first scenario is created, later on, you can change the authentication type of this scenario for the OAuth authentication type as well, if required. -
SharePoint Online credentials
If the ‘SharePoint Online credentials’ authentication type is selected a connection will be set up via login and password to a connected SharePoint account. In this case, the credentials are stored and protected in the Integration Hub app. Login to the PWA and please make sure that the account used for running integrations has the necessary set of permissions. -
SharePoint On-premise credentials
This type is used for Project Server 2019 and is available for Integration Hub on-premises version only. If this type is selected a connection will be set up via login and password to a connected SharePoint account. In this case, the credentials are stored and protected in the Integration Hub app. Login to the PWA and please make sure that the account used for running integrations has the necessary set of permissions.
Please note: The Project Server you add as a URL in the login field should be within the same domain as the virtual machine where Integration Hub on-premises is installed.
Please note: account used for Project Online connection should have the following permissions:
- for SharePoint Permissions Mode - a member of Site Collection Administrators and default “Administrators for Project Web App” SharePoint group.
- for Project Permission Mode - a member of Site Collection Administrators and “Administrators” PWA group (Web Administrators (Project Web App Synchronized).

4. You need to create the necessary custom field in the PWA. This can be done in the following ways:
- Click the 'Create fields' button - All fields listed under Parameters will be created in the defined PWA.
- Create custom fields listed under Parameters manually - navigate to your PWA and manually create the needed fields.
Please note: The names should fully correspond to the ones listed under Parameters.
Please note: Master Projects are not supported for integrations.

5. Click the 'Verify Configuration' button to check if all fields have been created successfully. Then click Next to proceed.

6. Click New and sign in to Office 365 with a Microsoft account to establish a connection to Outlook Office 365 in the appearing window. Authorize Access to Office 365 by clicking Accept button. Then click Next to proceed.

Please note: the account used for Office 365 connection should have the Global Administrator permissions.
Also, the synchronization account requires the 'Exchange Online' license feature enabled. This feature is a part of 'Office 365 E3' and other similar licenses.
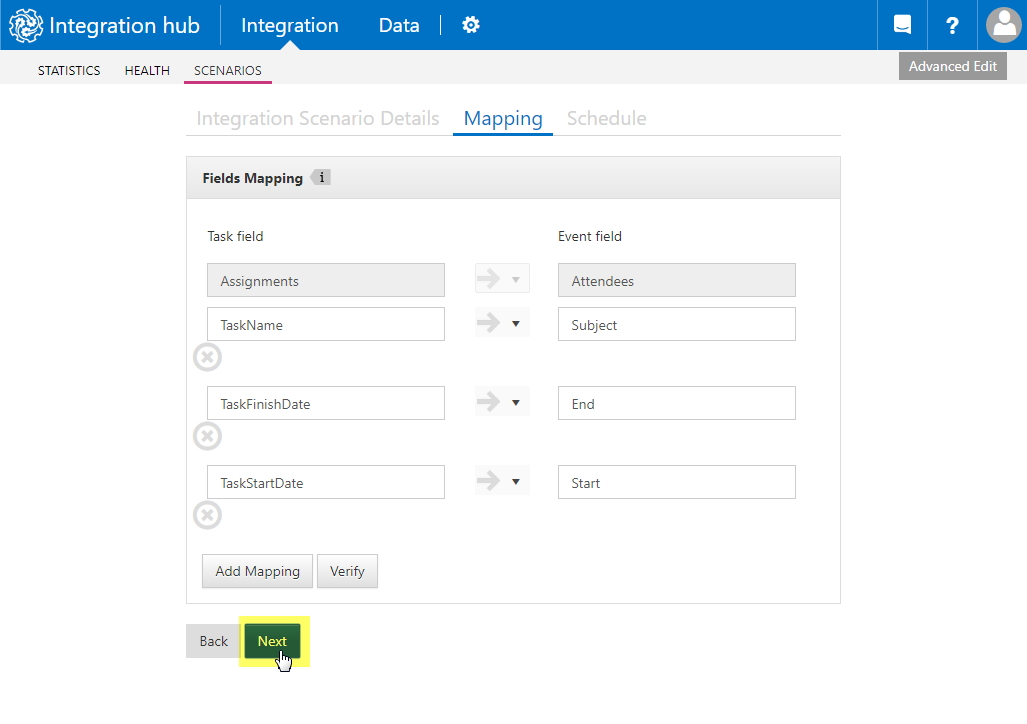
7. On the Fields Mapping wizard screen you can see default mapping rules. No actions are required here. Click Next to proceed.
8. Integration link schedule can be configured on the Schedule Settings page. There are two options of the integration starting available:
- On demand - means that integration will be started only manually by clicking on the appropriate button.
- By schedule - means that integration will be started automatically according to the configured rule daily or weekly.
Synchronization Start Date option allows specifying the timestamp to be used as a start date for polling data (to be used in the context of processing “old” data - not only new one that is created after integration setup)

Configure Project Online
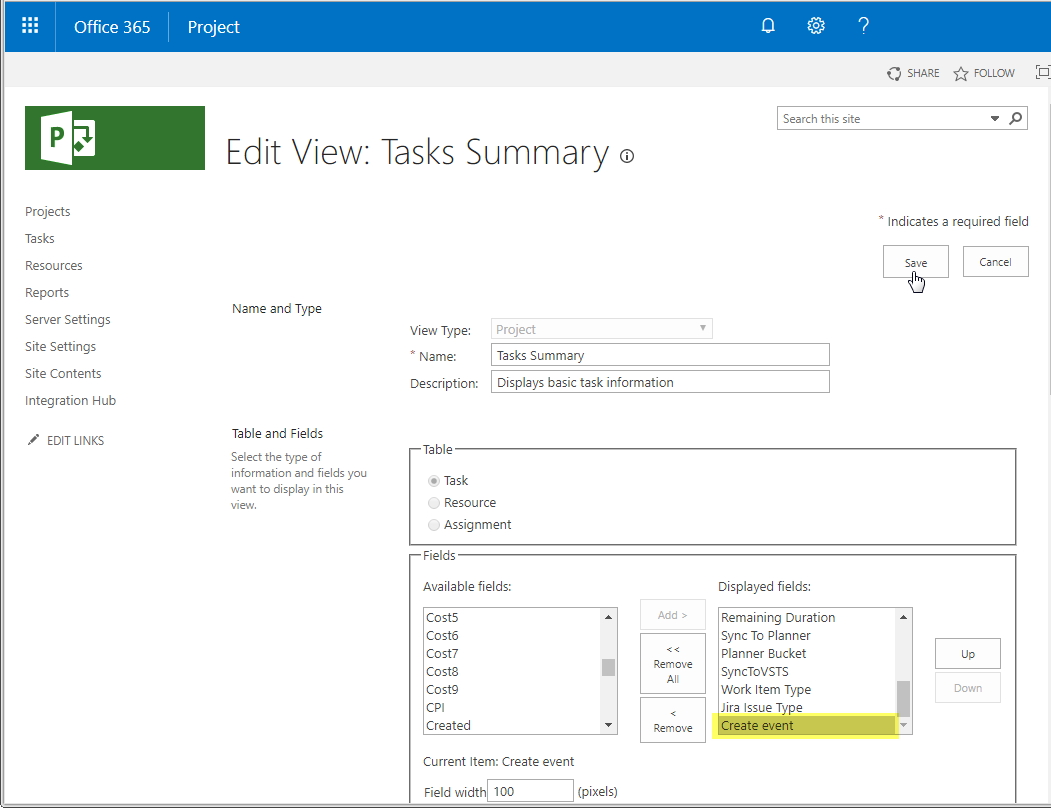
The pre-defined "Create event” custom field (created in the PWA during scenario configuration) should now be added to the Task View.
Adding ‘Create event’ field to a Task View.
1. Navigate to PWA Settings → View Management
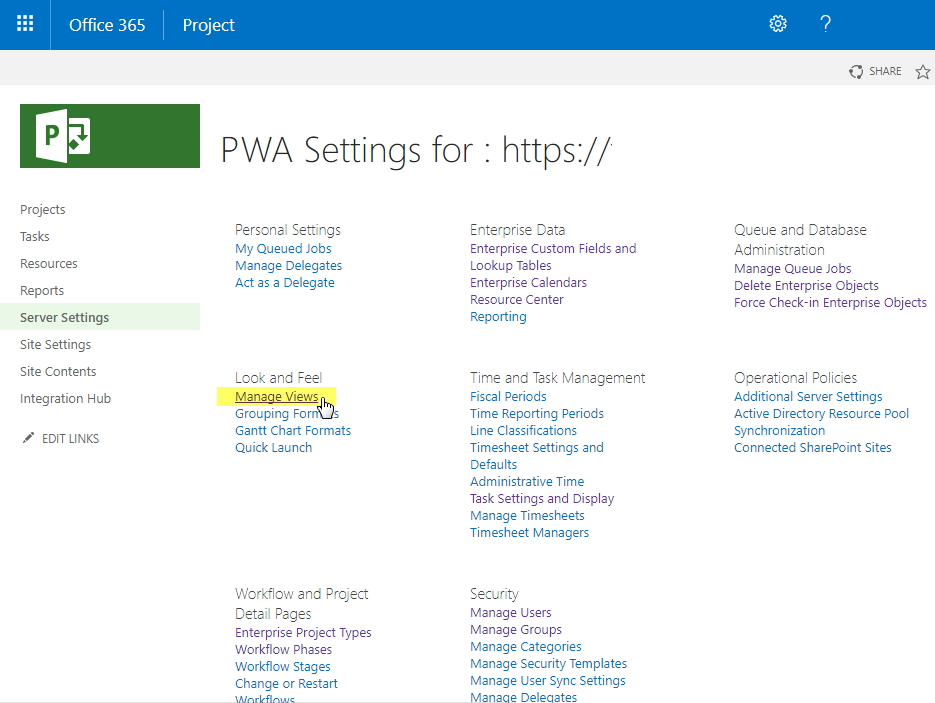
2. Create a new Task View or edit existing one (e.g. 'Task Summary') and add “Create event” field to this view.
Testing Integration
1. In Project Online create a new project or open any existing one.
2. Add a new task with the defined title, start and finish dates and add an assignment(s).
Please note: Start Date and Finish Date are required fields in Office 365 Outlook, so they might be specified for tasks in Project Online.
3. Set Create event custom field to ‘Yes’.

4. Run integration link.

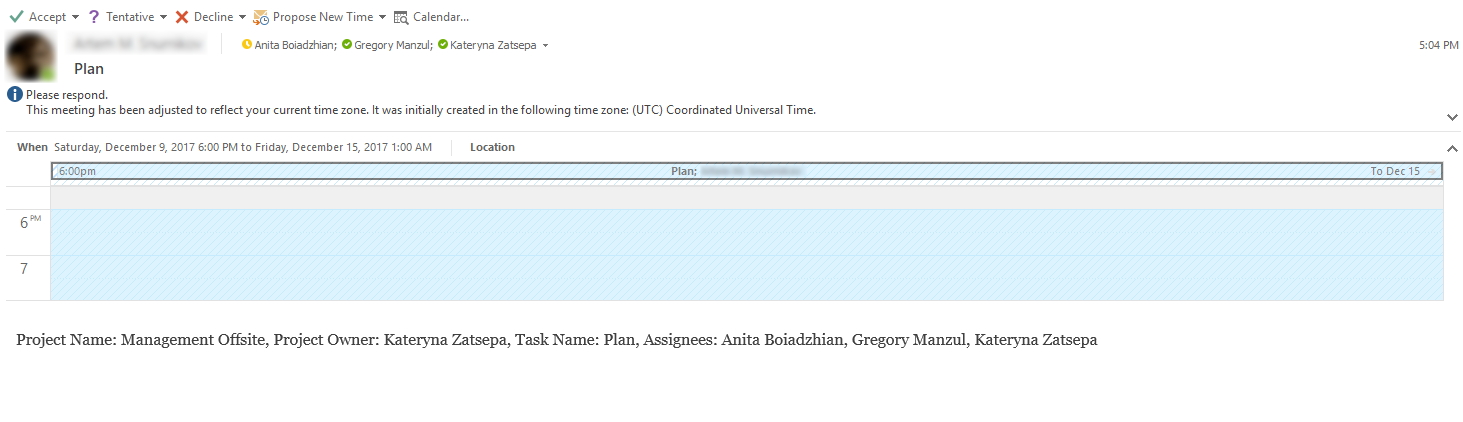
5. An event with defined parameters in the task will be created in Office 365 Outlook.
Please note: The logic of counting endpoints in the Project Online -> Outlook integration scenario is different than in other scenarios. One endpoint is allocated for 30 calendar days when one successful data transfer of one unique task from Project Online to an event in Outlook takes place. So, successful integration of each unique task takes one endpoint only one time in 30 days.
Also, for integration with Outlook, Global Admin account should be used. If a task in Project Online has a few users assigned to it, during the integration to Outlook each user will receive this task as an event in their Outlook calendars as well as the user who is Global Admin will receive a notification. In this case an endpoint will be allocated for one task only once regardless the number of users who receive an event.