
Creating a SharePoint list
- Open your SharePoint Project Web App home page and navigate to Settings → Site contents
- Click on add an app, choose CustomList and enter the name of your list (we will use CustomList_Tutorial as an example). Click on Create button and you will be redirected to your new custom list page.
- Click on Newto add a new item to your list and enter its title.

- Now let’s add some additional columns (entities) to your item. Click on + and add a couple more fields (for this tutorial, we will use a number and a flag field named Number_Tutorial and Flag_Tutorialrespectively.

- Add any value to each field.

Please note: The field which contains the title of your item is a Single line of the text field type and by default is used as a project name during integration with Project Online.
Creating custom fields in ProjectOnline
- Navigate to your PWA Settings menu.
- Go to Enterprise Custom Fields and Lookup Tables section.
- Click on New Field.
- Enter the name of your field (Tutorial_Number). Under the Entity and Type section, choose the Project entity and Number type.
- Save the field by clicking on the Save button at the bottom or upper right part of the page.
- Repeat steps 3 to 5 to create another project field to match the remaining item in our SharePoint list (Name: Tutorial_Flag, Entity: Project, Type: Flag).
- The newly added project fields should now be available on the Project Details page of any project.
Creating integration scenario
- Navigate to the IntegrationHub main page (PWA home page → Settings → Site Contents → FluentPro IntegrationHub).
- Go to the Scenarios tab and click on the New Integration button at the upper right corner of the page.

- Choose Project Online & SharePoint Online integration scenario type.
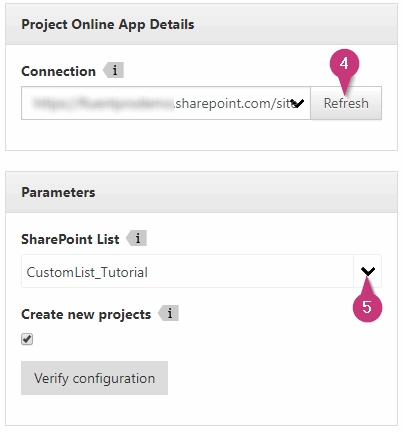
- At the Project Online App Details section, click New and enter PWA site URL and choose the Authentication method (OAuth by default). If your connection already exists, you may find your PWA address in the Connection dropdown list.
- In the Parameters section, choose the SharePoint list we have created for this tutorial (CustomList_Tutorial). The Create new projects flag should be checked since we didn’t create a corresponding project for this integration.
- Click Next to proceed to the fields mapping page.
- At the Fields Mapping page, you will see your first mapping created by default, which links the Title column of your SharePoint list to the ProjectName of the project which will be created by this integration. Now we need to map the remaining entities.
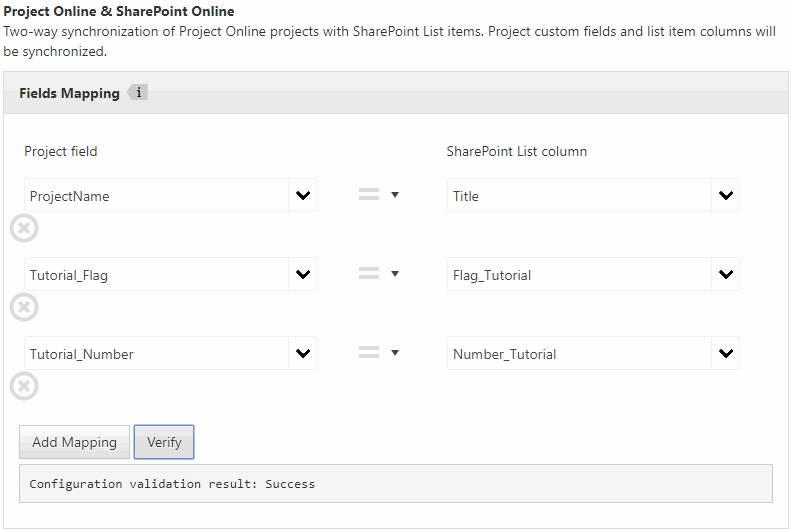
8. Click on Add Mapping. In the Project field dropdown of your new mapping on the left, choose the Tutorial_Number field. In the SharePoint List column dropdown, choose Number_Tutorial. The mapping direction dropdown in the middle should remain bidirectional (“=”).
9. Repeat step 6 to map Tutorial_Flag project field to Flag_Tutorial SharePoint List column.
10. Click on Verify button to check if there are any problems with the current configuration. The response should read “Configuration validation result: Success”.
11. Click on the Next button.
12. The Schedule page allows choosing between the manual (on-demand) or scheduled synchronization between your list and your project. For this tutorial, we will choose the on-demand integration.

13. It is recommended to set the Synchronization Start Date to the current time minus one day so that Integration Hub could recognize your recently created SharePoint list at once.
14. Click Done to return to the Scenarios page
Renaming your scenarios (optional)
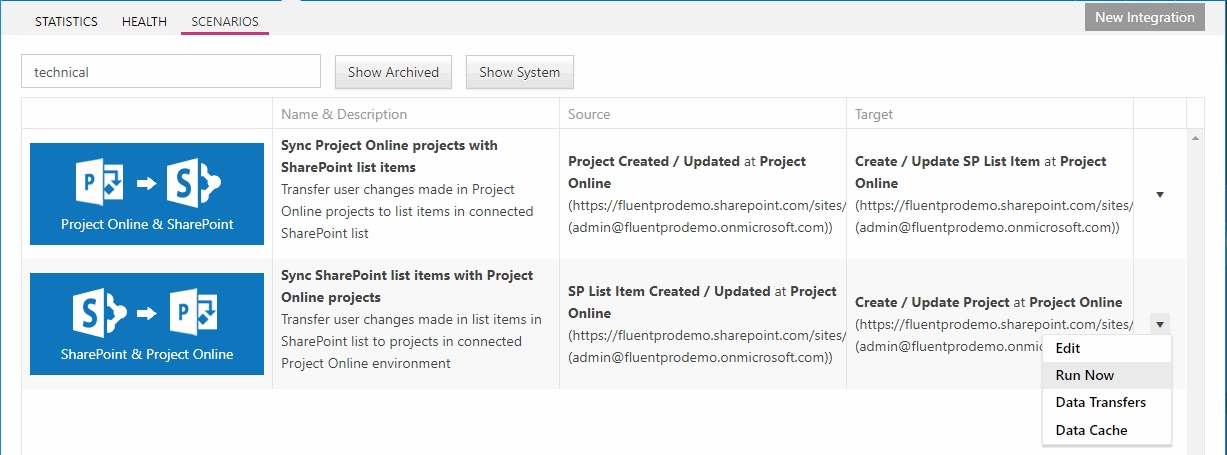
Now you will see that two new scenarios were created, named by default Sync Project Online projects with SharePoint list items and Sync SharePoint list items with Project Online projects. To change the name of a scenario:
- Click on the down arrow corresponding to your scenario at the right and choose Edit.

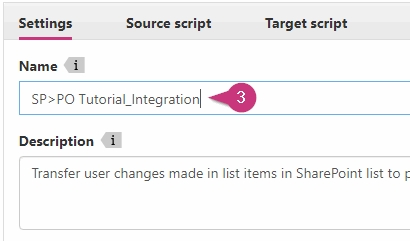
- After the Integration Scenario Details page is opened, click the Advanced Edit button in the upper right corner of the page.

- Scroll down to the Name field and enter the new scenario name.
- Scroll to the bottom of the page and press Save.
Running your integration for the first time
Please note: in this Tutorial, we should start with the SharePoint → Project Online scenario first, since the project corresponding to your SharePoint list still does not exist but will be created after the first integration.
- Open the IntegrationHub main page and go to the Scenarios tab.
- Find your integration scenario in the list, click on the down arrow at the right and choose Run now.
Accessing the logs (optional)
- Click on the Settings icon on the upper bar of the IntegrationHub page.
- On the Jobs tab, find the job entitled as your integration scenario.
- Click on the down arrow corresponding to this job and choose View Logs.
Checking the result
- Navigate to your Project Web App and open the Project Center. You should see a new project entitled Project_Tutorial in the list.
- Open this project and go to the Project Details page. You should see the Tutorial_Flag and Tutorial_Number custom fields containing the values transferred from your SharePoint list.