
The following test cases are a great way to check if your integration scenario is working as expected.
Please note: It is highly recommended to test your integration scenarios on the TEST Projects and TEST Planner plans before you configure integrations for your real existing projects and plans. If anything goes wrong, it will be easy to correct on the test projects, not on your real data, and then take this into account while configuring integrations for your real projects and plans.
How the data is transferred in Integration Hub between Project Online and Planner.
It is very important to make the updates in the projects and plans (create new tasks) for the first time integration because, in order for the integration to take place, it is required to have changes within the project/plan since the integration scenario has been created. If there are no changes after the scenario is created, Integration Hub will have nothing to transfer from Project Online to Planner, for example. As the changes are performed after the scenario is created, Integration Hub will detect these changes and will transfer data from Project Online to Planner.
The date when the scenario creation is taken as a time frame starting from which Integration Hub starts reading data for integrations.
Another way to set this time frame is to specify it while creating a scenario in the "Synchronization start date" field, it is only possible to set this date while creating a new scenario.
Case 1: Data synchronization between new Project and New Plan (Initial run from Project Online to Planner).
1. In Project Online, create a new project, open its PDP page for editing, and set the “Sync Project with Planner” field to 'Yes'.

Leave the “Planner Plan Id” field and “Planner Group Email” fields empty so that Integration Hub could create a new plan and a new group in Planner during synchronization automatically.
Leave the “Planner Plan Id” field empty but provide the “Planner Group Email” if you would like to create a new Plan automatically in the existing Office 365 group.
Please note: The account used for integration should have access to the required Planner Groups (the ones involved in the integration) and be a member of the Plans selected for synchronization. Please refer to the help article on connection account requirements for Microsoft Planner.
2. Open the schedule of this project, create several tasks, and mark them for synchronization: set the “Sync Task with Planner” field to 'Yes'.

3. Publish the project and then check it in.
Please note: It is very important to publish the project before launching integration because only after publishing new data appears in OData and can be read by Integration Hub.
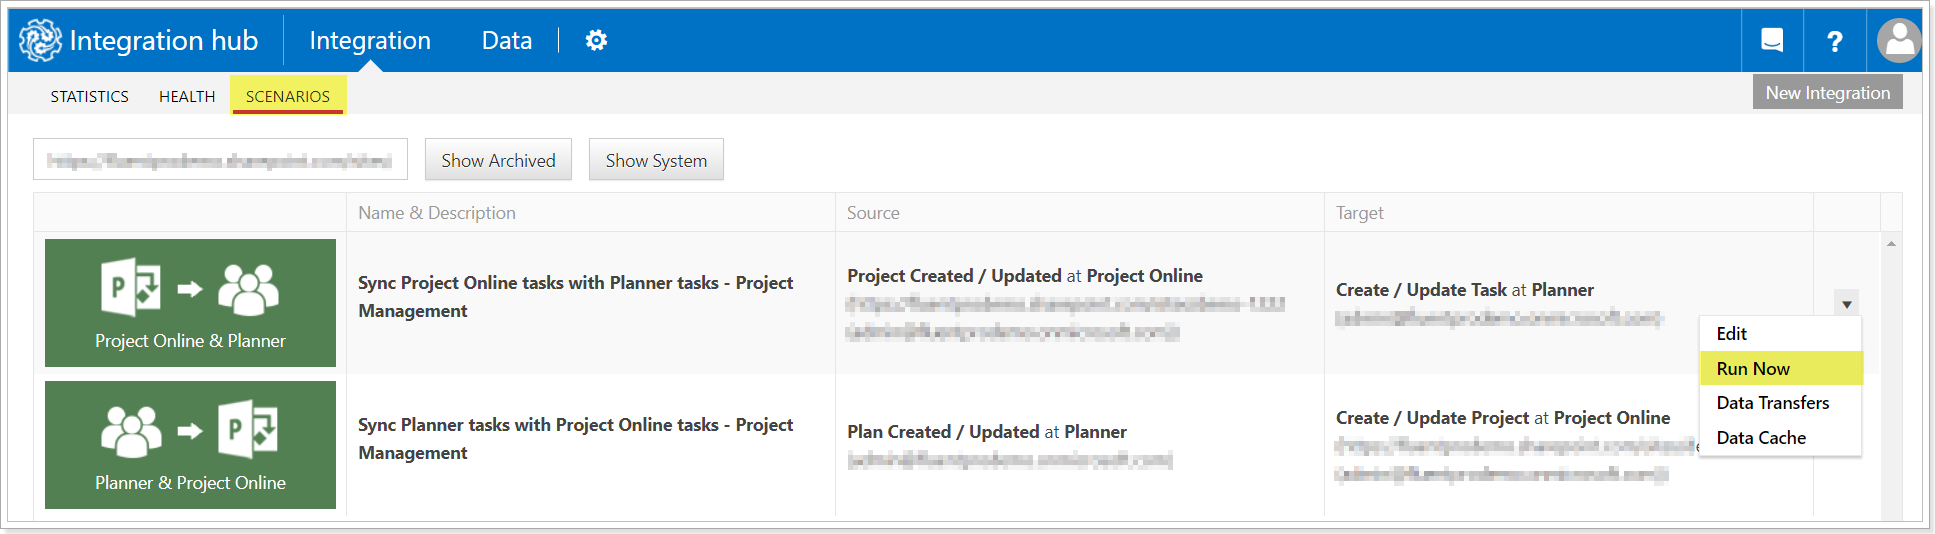
4. Open Integration Hub on the Scenarios tab, select the required scenario (direction from Project Online to Planner). Navigate to the scenario menu on the left and select the Run Now option to launch integration.
5. In Planner a new plan with appropriate tasks will be created automatically.
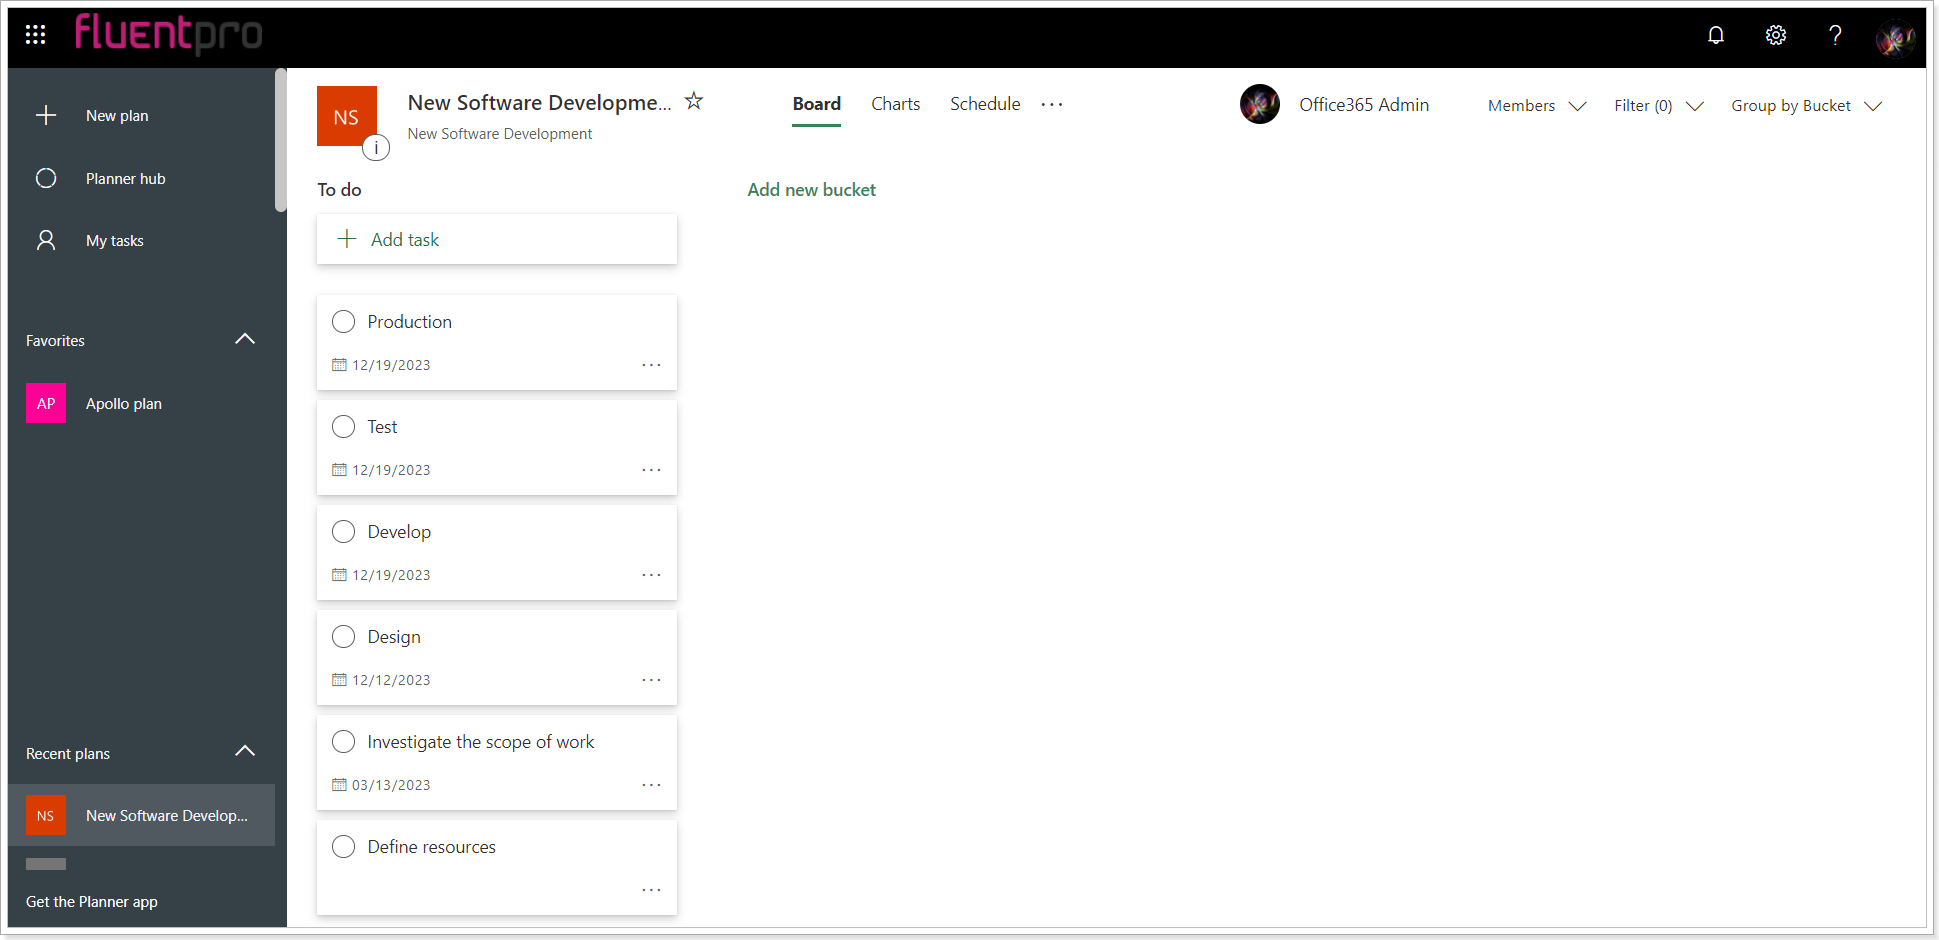
6. In Planner make some updates for the migrated tasks and add a new task. Please find the supported synchronized entities in this help article.

7. Open Integration Hub on the Scenarios tab, select the required scenario (direction from Planner to Project Online). Navigate to the scenario menu on the left and select the Run Now option to launch integration.

8. In Project Online tasks will be updated and new ones will be created.

Please note: “Planner Plan Id” field and “Planner Group Email” fields on the PDP page of the project will be filled in automatically after the synchronization of the task updates or newly created tasks from Planner to Project Online is completed.
Case 2: Data synchronization between existing Project and existing Plan (Initial run from Project Online to Planner).
1. In Project Online open any existing project on the PDP page and set the “Sync Project with Planner” field to 'Yes'.

2. Also, on the PDP page, fill in the “Planner Plan Id” field with the plan id of the plan you want to sync tasks to. Planner plan Id can be obtained from its URL, open the required plan, and copy its plan id from the URL.

Paste this ID into the “Planner Plan Id” field on the PDP page of the synchronized project and save the changes.

If you do not provide the Planner Group Email, the required plan will be found by the Planner Plan ID provided and will be synchronized successfully.
Please note: It is possible to map one Planner plan with one project in Project Online at a time. If you try to map multiple plans in Planner with the same project in Project Online, Integration Hub will not transfer any data from/to the project in Project Online.
3. Open the schedule and mark some tasks for synchronization by setting the “Sync Task with Planner” field to 'Yes'.
4. Make some minor updates to existing tasks or create new tasks in the project. Please find the supported synchronized entities in this help article.
5. Save the changes, publish the project, and then check in it.

6. Open Integration Hub on the Scenarios tab, select the required scenario (direction from Project Online to Planner). Navigate to the scenario menu on the left and select the Run Now option to launch integration.

7. In Planner appropriate tasks will be created in the mapped plan.

8. Now, open Integration Hub on the Scenarios tab and select the required scenario (direction from Planner to Project Online). Navigate to the scenario menu on the left, select the Run Now option to launch integration, and wait for the synchronization to complete.
This synchronization should be launched before you create any new tasks in Planner.
9. In Planner, update the migrated tasks and create new tasks. Please find the supported synchronized entities in this help article.
Run an on-demand synchronization from Planner to Project Online again by clicking the Run Now button in the integration scenario again.
When data synchronization is completed, all updated and created tasks will be synchronized to the mapped Project in Project Online.
Please note: The “Planner Group Email” field on the PDP page will be populated automatically on the last synchronization from Planner to Project Online.