
This article describes the process of updating an existing installation of EPM Pulse On-Premise to a newer version.
NOTE: If your currently installed version is 4.0.0.20 and lower but higher than 3.2, it needs to be uninstalled prior to update. Please uninstall it from ‘Programs and Features’ or use the EPM Pulse installer. No additional clean-ups are required.
Installation
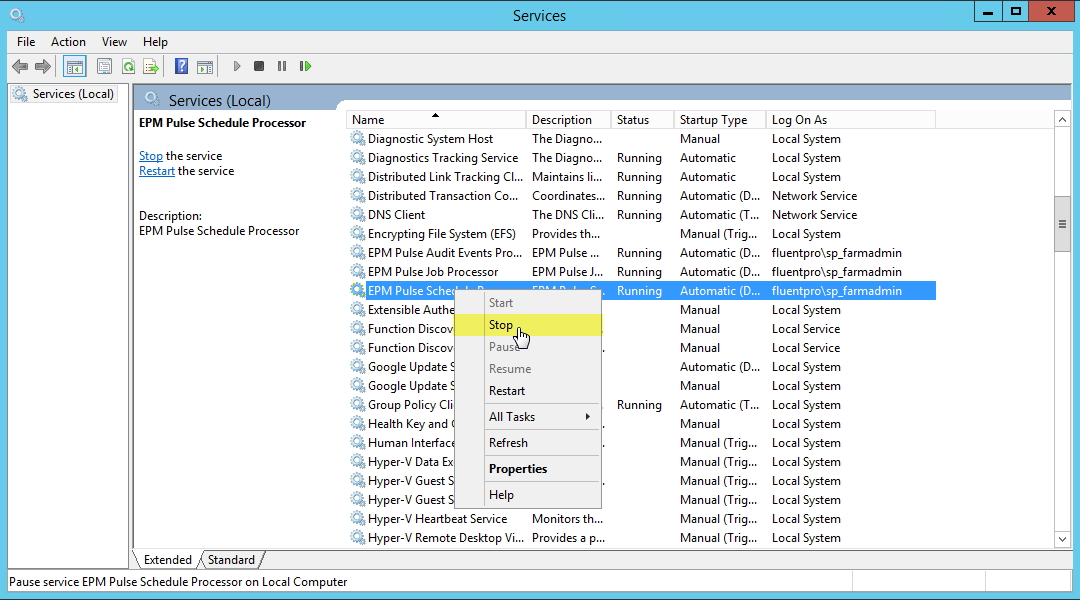
1. Stop EPM Pulse Job Processor , EPM Pulse Schedule Processor, and EPM Pulse Audit Events Processor (if started): go to Services → Right click on each of the services → Stop
Please note: In case you have not stopped EPM Pulse services you might receive an “EPM Pulse Files in Use” error. In this case click Continue and the installer will stop EPM Pulse services automatically.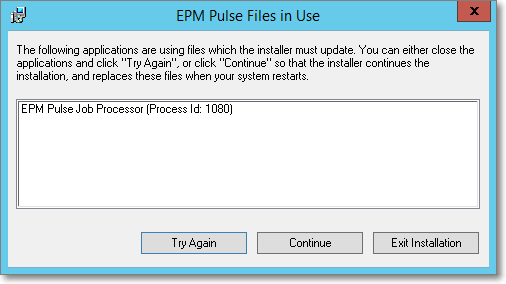
2. Run the EPM Pulse On-Premise installation file (double click on it).
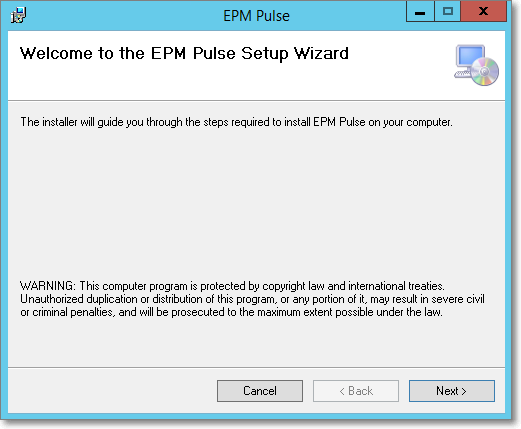
3. Installer will run. Click the Next button.
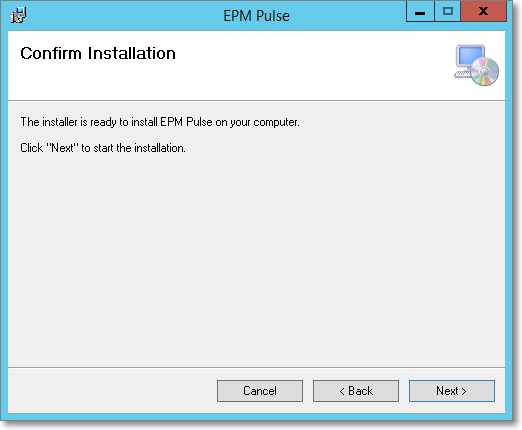
4. Confirm the installation and click the Next button to proceed.
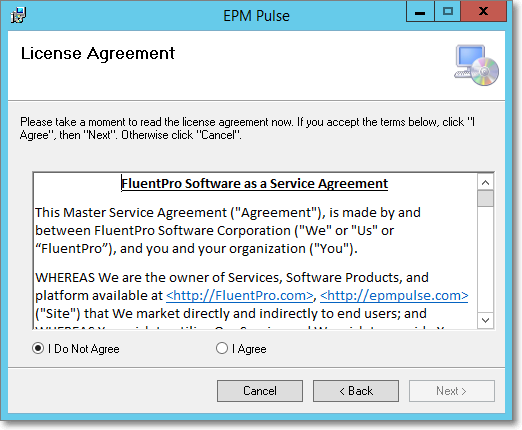
5. Read EULA (End-User License Agreement) and Select “I Agree” to continue. Click Next.
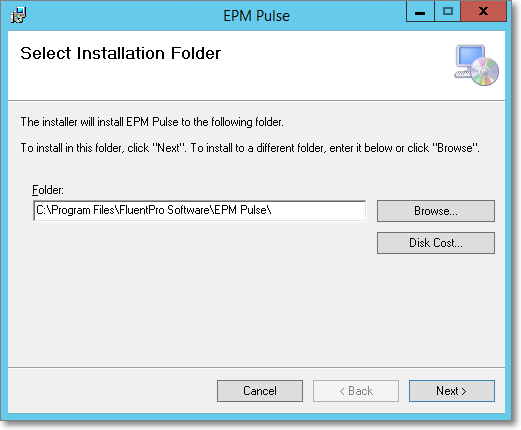
6. Check that the EPM Pulse installation folder specified is correct. Click Next.
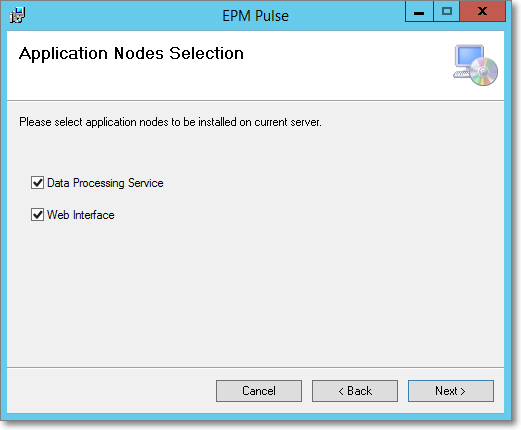
7. Proceed to the next wizard screen. Here it is possible to choose application nodes to be installed. Click Next.
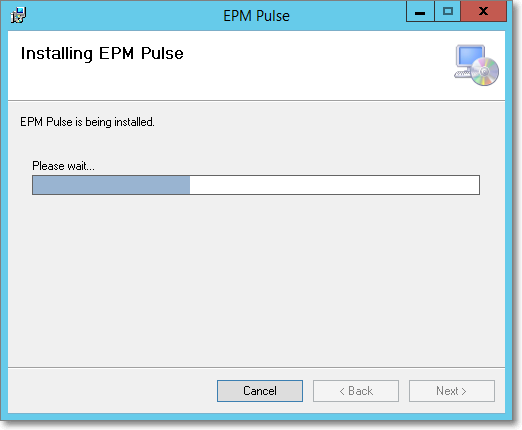
8. Allow some time for EPM Pulse to be updated.
Configuration
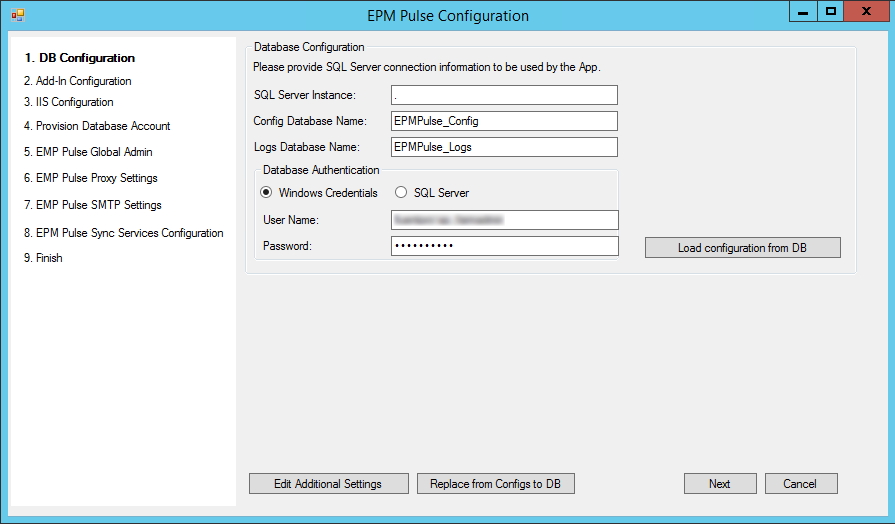
When the installation completes, proceed with the “EPM Pulse configuration” wizard.
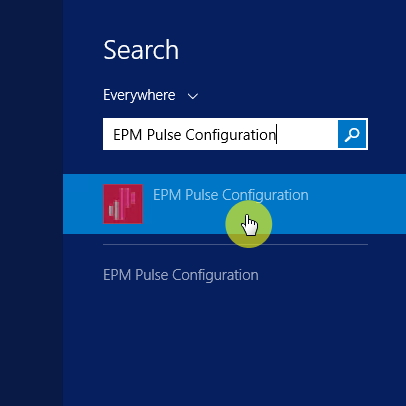
1. Run EPM Pulse Configuration wizard from the “Start” menu.
Replace from Configs to DB button - starting from build 4.0.0.24, we implemented storing the configuration in EPM Pulse Database instead of configuration files in the server. If your current installation is 4.0.0.23 and lower or if you have not previously used this option, please use the 'Replace from Configs to DB' button in each EPM Pulse configuration wizard screen to move the configurations to EPM Pulse Database.
2. The wizard already contains all configurations, specified during initial installation. Verify that all settings in each section are correct and click “Next”.
3. On step 8, select the services which need to be configured on this server:
- Job Service - if this node is chosen the “EPM Pulse Job Processor” service will be configured and should start automatically once an installation process will be finished;
- Audit Service - choose this node if you have a license for FluentPro Audit Manager. Otherwise, it is not required for EPM Pulse successful installation;
- Schedule Service – choose this node to configure the EPM Pulse schedule service.
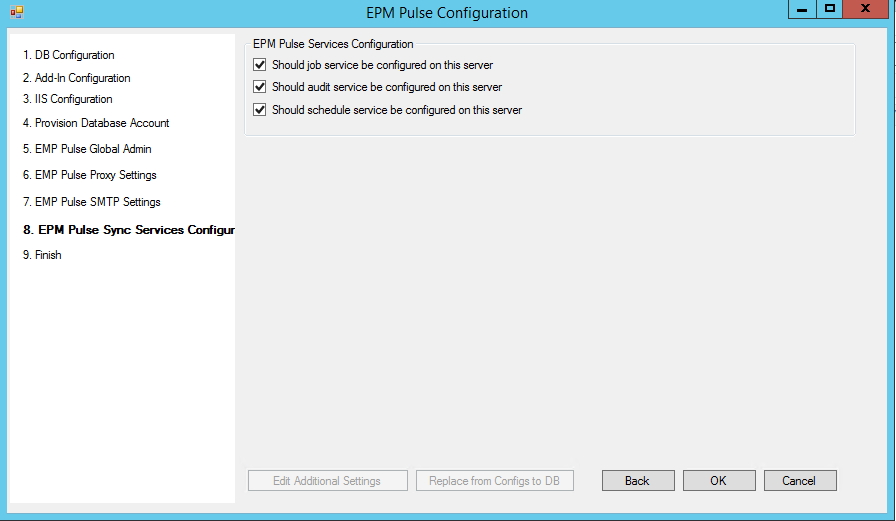
4. Click Finish to complete the configuration and exit the wizard.

Post-update verification
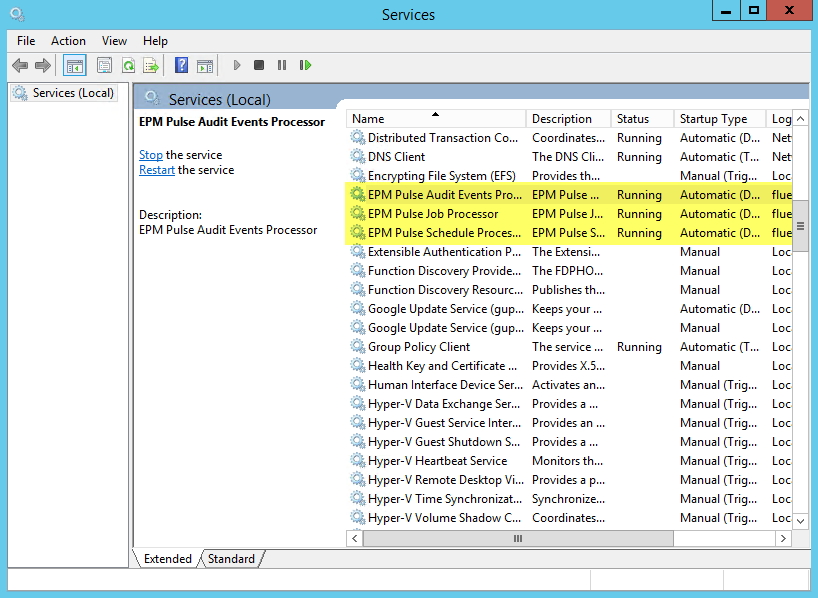
- Navigate to Services and verify, that EPMPulse.Job.Processor and EPM Pulse Schedule Processor services were started. EPM Pulse Audit Events Processorshould also be running is you chose to configure it. In case they are not running, please start them manually.
- Open Internet Information Services (IIS) Managerand under 'Sites' choose EPM Pulse site. In 'Browse Website' section click on the link to navigate to your EPM Pulse.

In case of any issues or errors during installation, please submit a request at support@fluentpro.com