Set up widget parameters for Ad Hoc Timeline Widget
1. Click on the widget to activate the widget menu and click the  button to open widget parameters.
Please note: Ad Hoc Timeline widget parameters are presented on 7 tabs, such as Fields, Sorting, Grouping, Task Filter, Project Filter, Drill Down and Misc. Fields tab parameters are responsible for what information will be displayed in the widget, and the rest of the tabs are responsible for how it will be presented.
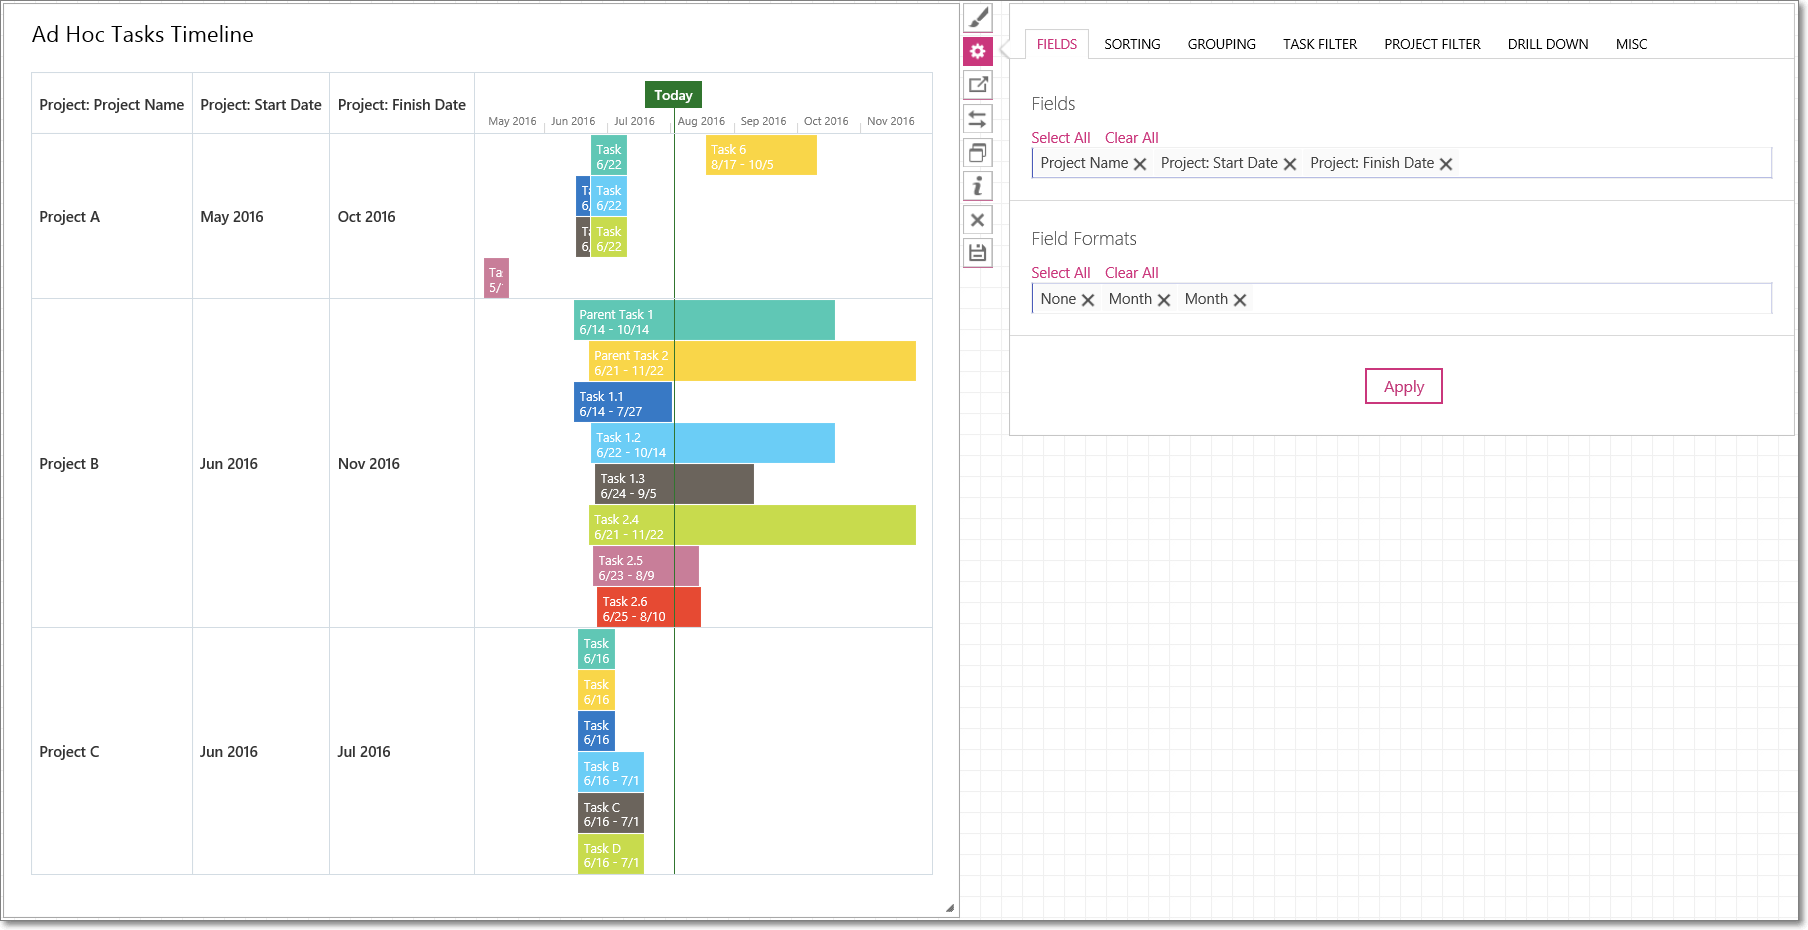
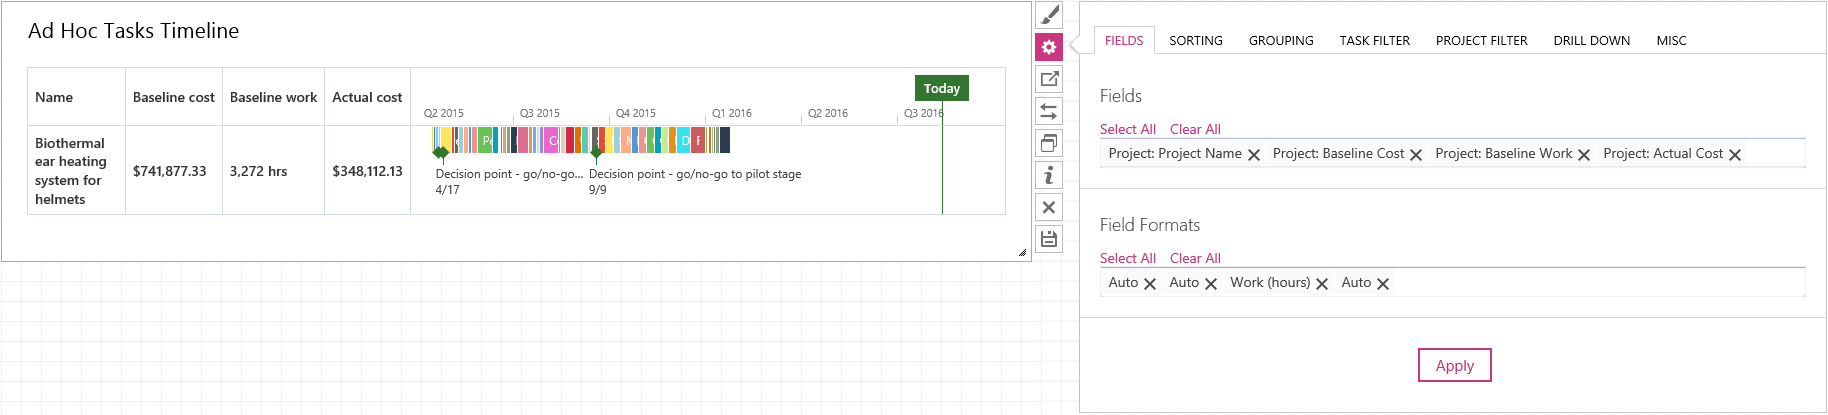
2. On the Fields tab define what fields will be displayed as columns in the widget:
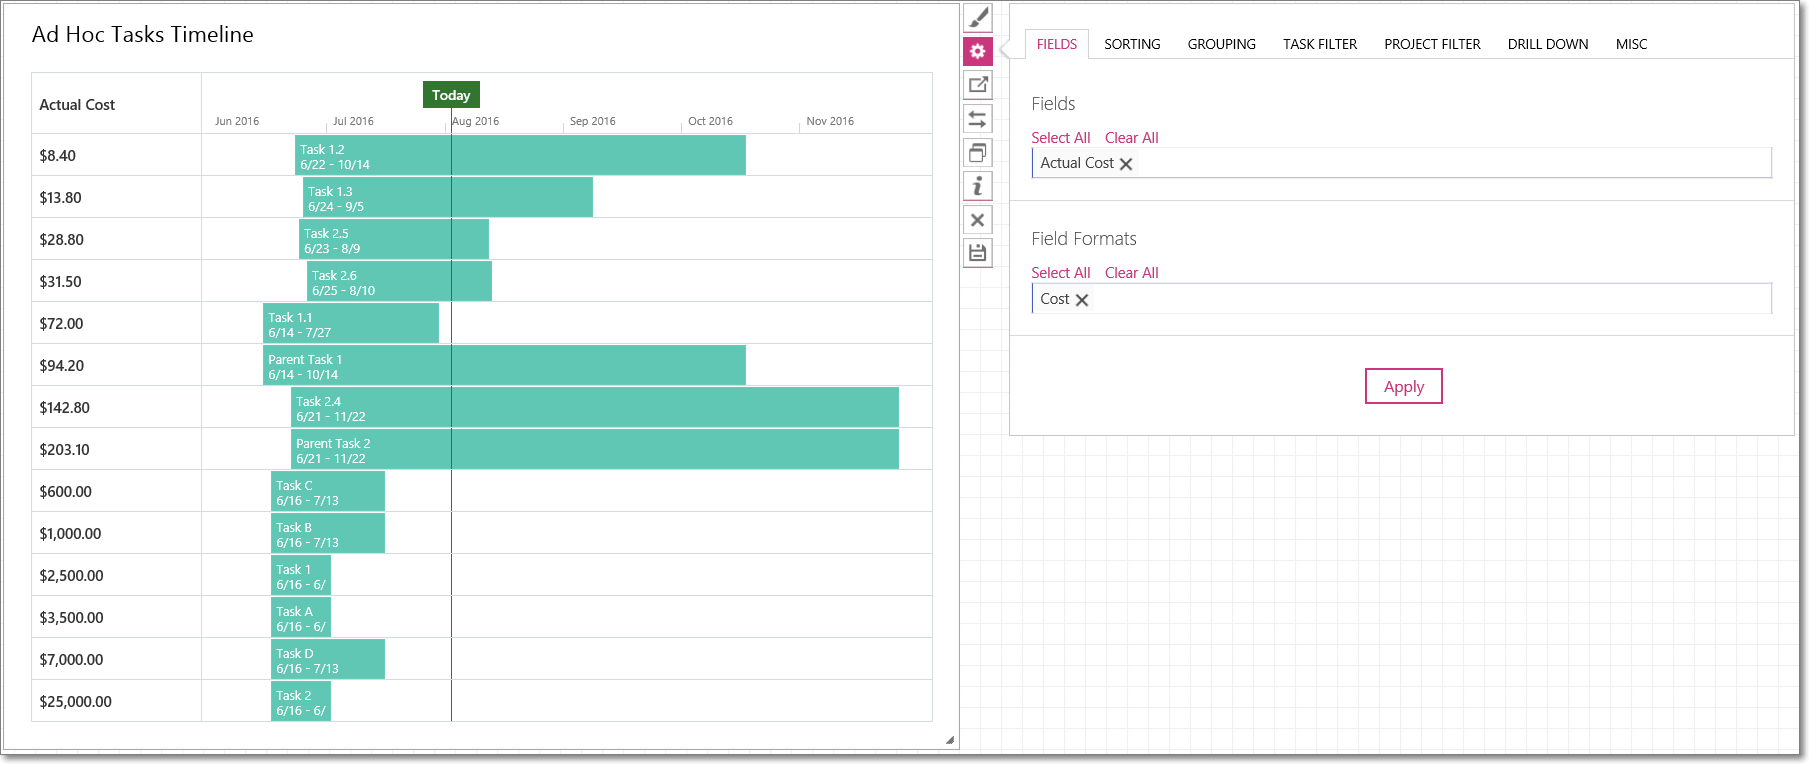
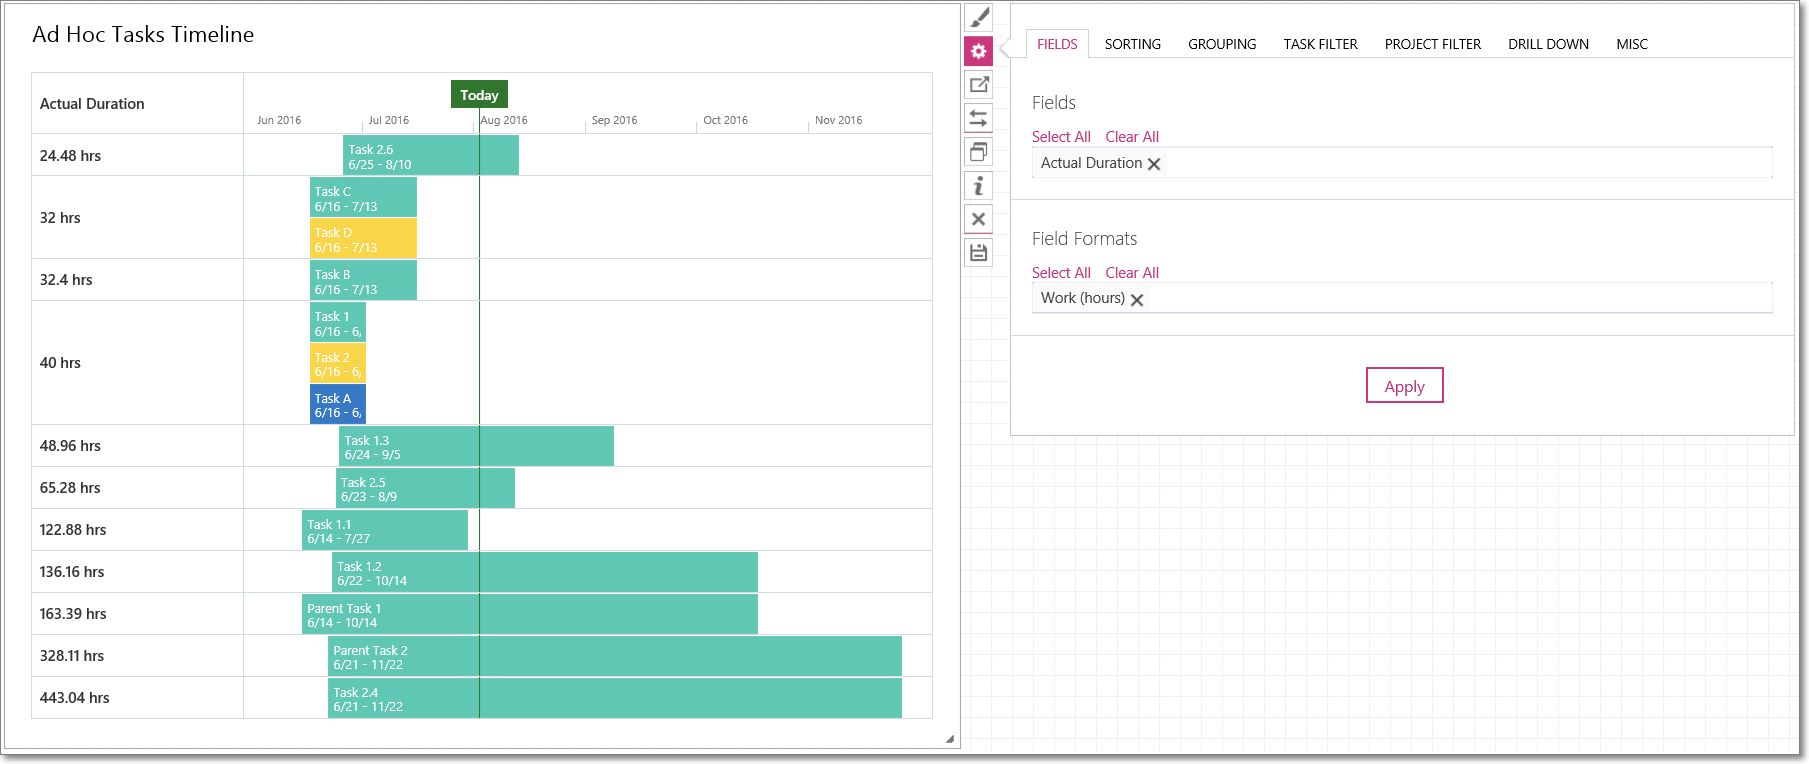
a) First select the fields, to do this click the Fields section, and it will show a dropdown listing all fields available for this widget, click on the field to add it to the widget Fields.
You can add as many fields as you need. Columns in the widget will be displayed in the same order as the fields added to the Fields section.
Please note: In case you add several fields, they should be project-level fields.
b) And then set specific Field Formats for the timeline value. The following formats are available: None (can be used for strings, such as Project Name), Integer, Decimal, Cost, Percent, Duration, Work(hours), Duration(days), Date, Week, Month, Quarter, Year, Flag, Html, Link.
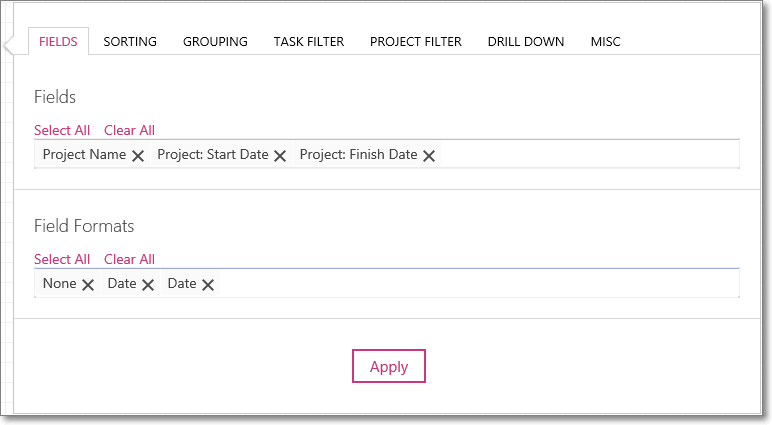
Please note: EPM Pulse automatically sets Field Format for Cost, Duration and Date fields type.
To change pre-defined by EPM Pulse format for a specific field, define format for this field, setting the rest fields format to Auto.
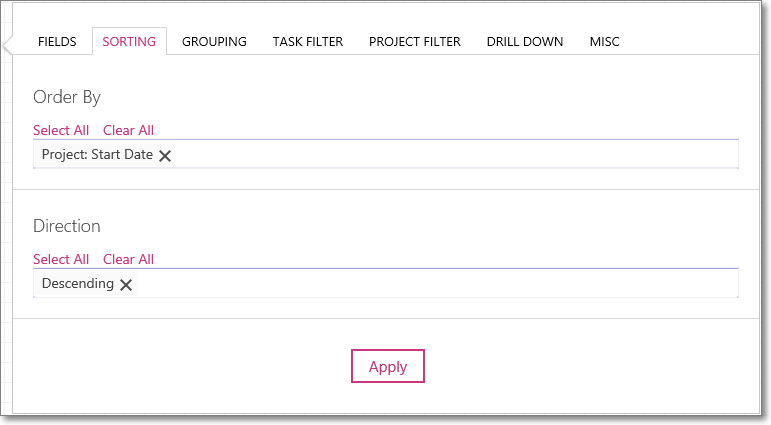
3. On the Sorting tab you can define by what field the records in the widget will be ordered and in what direction – ascending or descending.
a) Click on the Order By section, and select one/multiple fields by which the records will be ordered.
b) Click on the Direction section, select either Ascending or Descending direction.
Please note: It is not necessary for the field selected in the Order By to be added to the widget via the Fields tab. Widget records will be ordered by the selected field even if the field itself is not displayed in the widget.
4. On the Grouping tab you can define by what field the records in the widget will be grouped if grouping is needed.
a) Click on the Group By section, and select one field by which the records will be grouped.
b) Group Keys section allows to group fields additionally. Fields will be grouped by Group Keys and will be displayed by Group by settings in the widget. For example, there are two Parent Tasks with the same name and they include several tasks each. If you group them by Parent Task Name, one parent task name will be displayed in the widget and all tasks will be shown below.

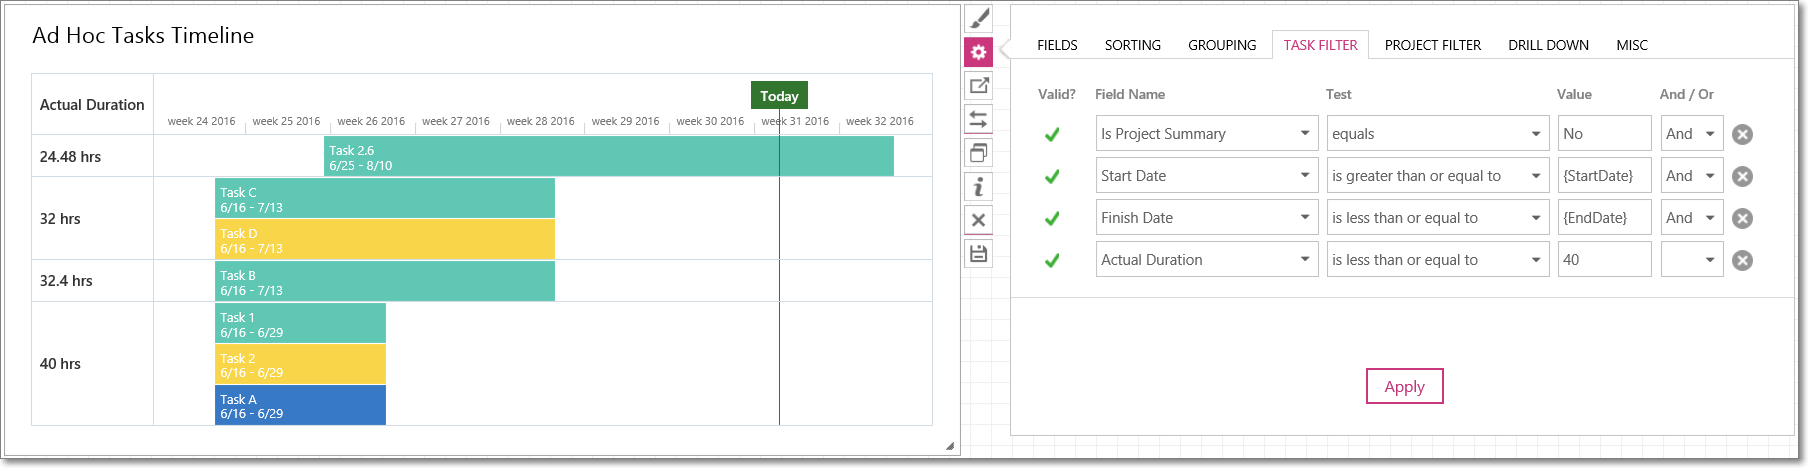
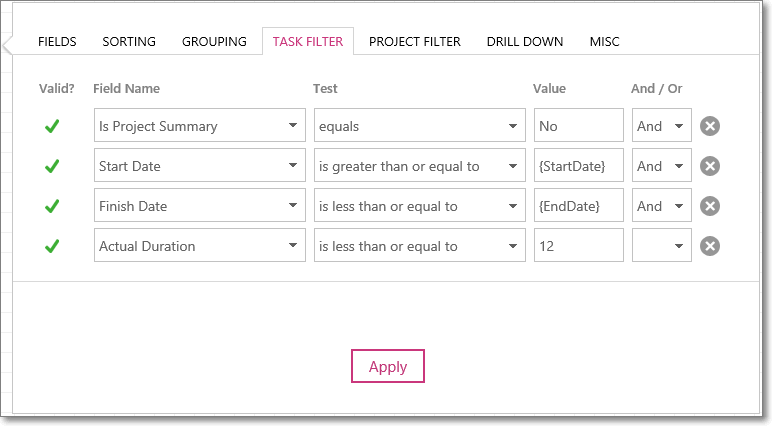
5. On the Task Filter tab you can find pre-defined filters.
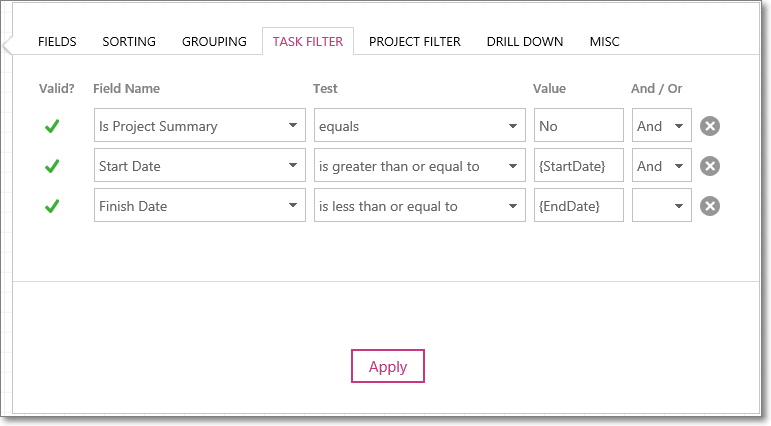
You can delete these filters, change them or add new ones.
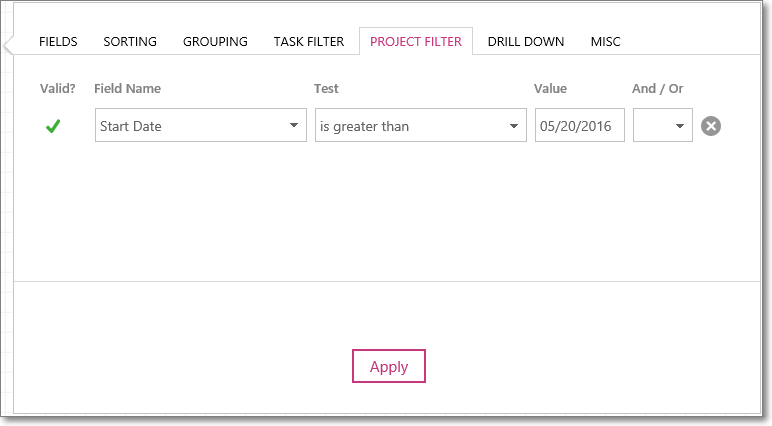
6. On the Project Filter tab, if needed, you can apply a filter in addition to the dashboard-wide Project Filter to filter out the data displayed in the widget. To filter the data out, select a field name and conditions.
Please note: If a date field is selected in the Field Name, then it is possible to filter the records by the following values:
- {Today}
- {StartDate}
- {EndDate}
Where the {StartDate} and {EndDate} are the start and end dates of the dashboard timeline:
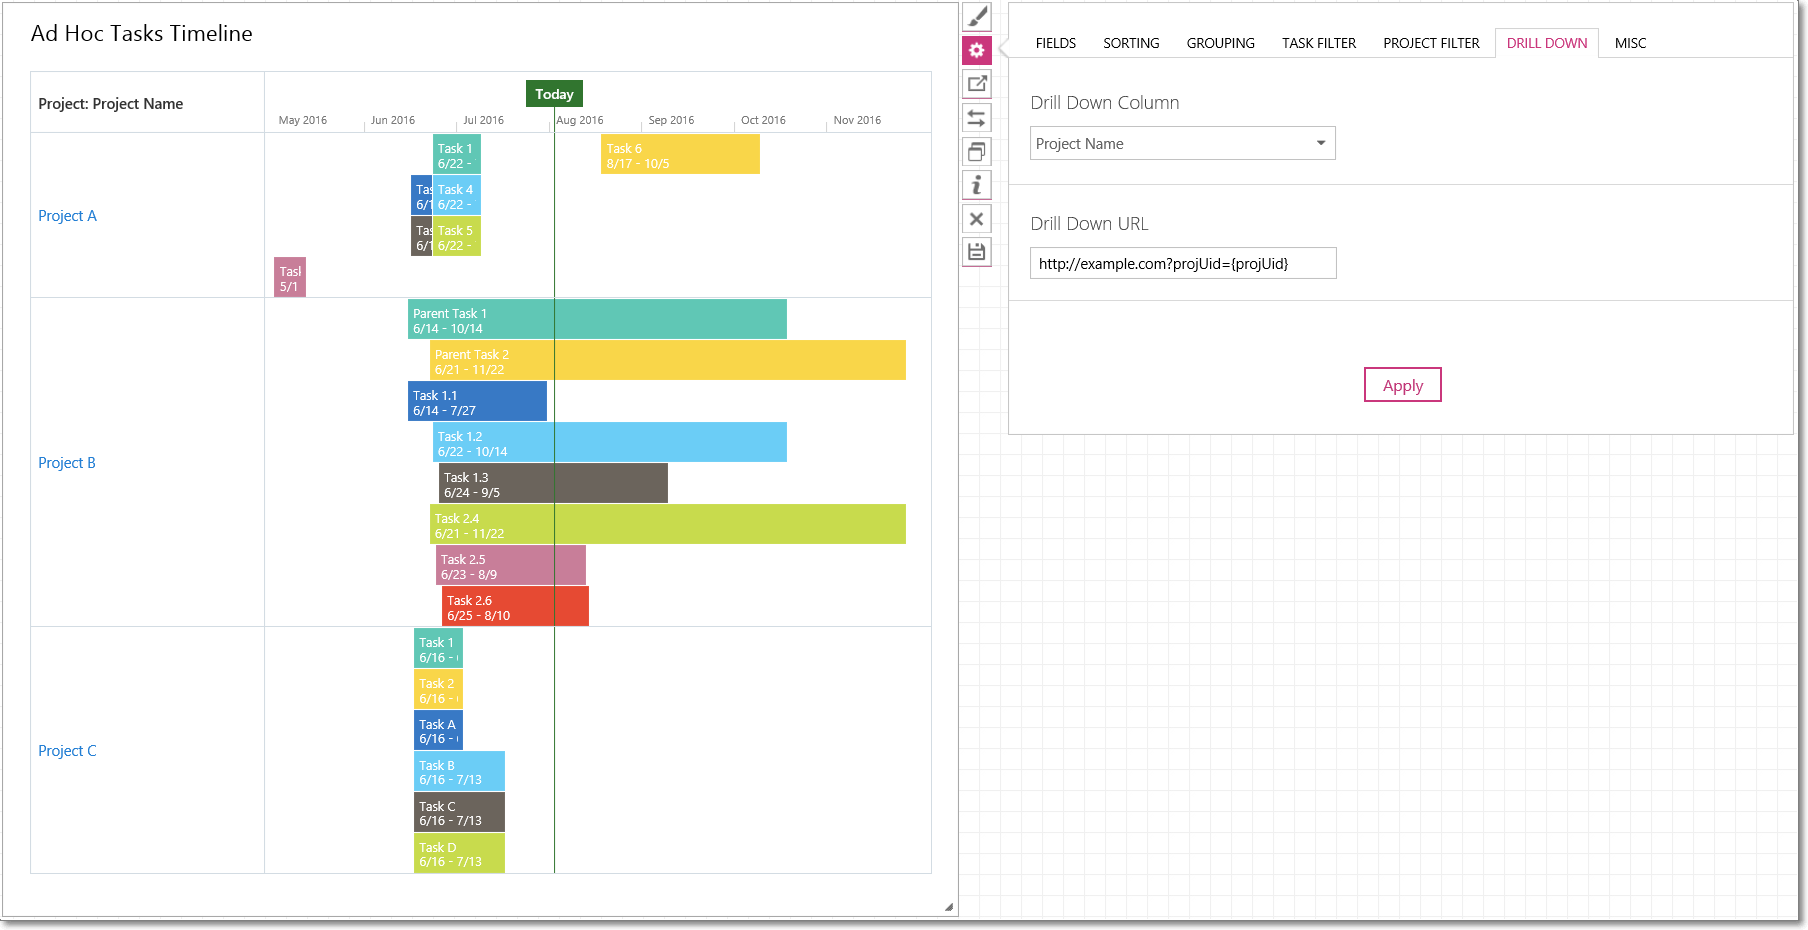
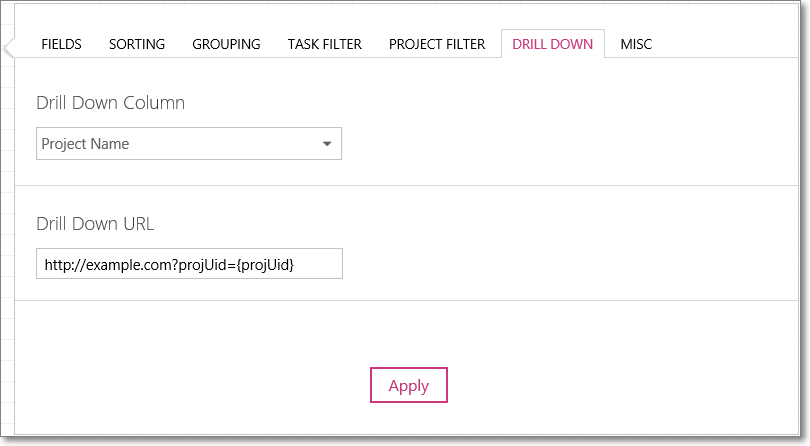
7. On the Drill Down tab you can define a drill-down link specifically for this widget, instead of using a dashboard-wide drill-down links definitions.
a) Click on the Drill Down Column section, and select a field that will be a drill-down link. Make sure to select the field that is displayed in the widget, otherwise, the drill-down link will not be visible.
b) Type the drill down source URL into the Drill Down URL field.
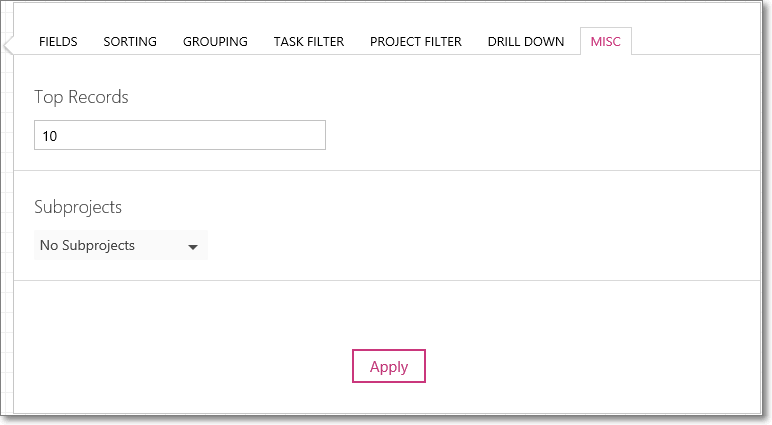
8. On the Misc tab you can define the following parameters:
a) In the Top Records section, you can limit the number of records displayed in the widget, e.g. if “10” is set for this field, then the widget will show only 10 top records. Leave this field blank if you want the widget to return all the records.
b) In the Subprojects section select one of three options: - No Subprojects: only parent (or master) projects will be displayed in the widget, subprojects will be hidden. - Parent Project and Subprojects: both parent and subprojects will be displayed in the widget. - Subprojects Only: parent (or master) projects will be hidden, and only subprojects will be displayed.
Please note: Projects will not be duplicated in the widget, if a project is already displayed due to the Project Filter settings, then it won’t be added one more time due to the Subprojects parameter.
9. Click the Apply button to apply the parameters to the widget.
10. Review the reporting information returned by the widget and edit the widget parameters if needed.
Examples: