There is an option in Project Migrator to restart the migration for items (Plans/Boards/Projects) that have been completed unsuccessfully with the same migration settings, task/item field mapping, and user mapping that have been specified for the original migration. The migration can be retried for those items that have the status 'Failed', 'Completed with errors', or 'Completed with warnings'.
If there is a need to restart the migration, please perform the following steps:
1. Open the Migration History page. Select the migration that you would like to retry and click on its line to open the migration summary.

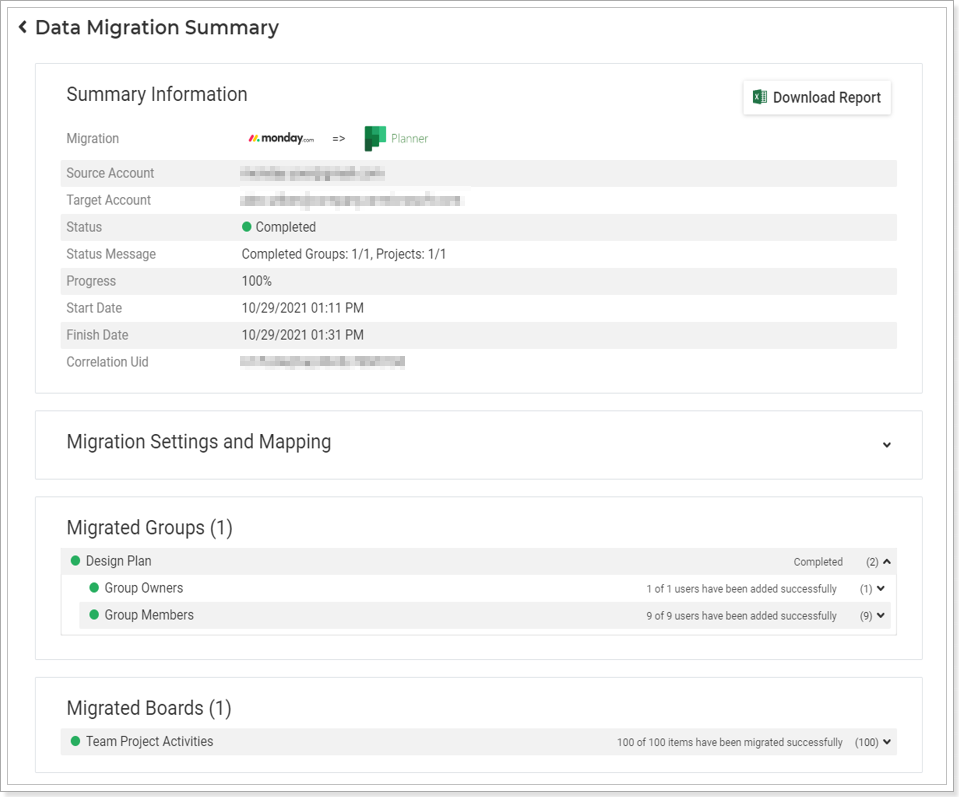
2. On the Data Migration Summary page you can review the list of all items that have been migrated as well as see their statuses.
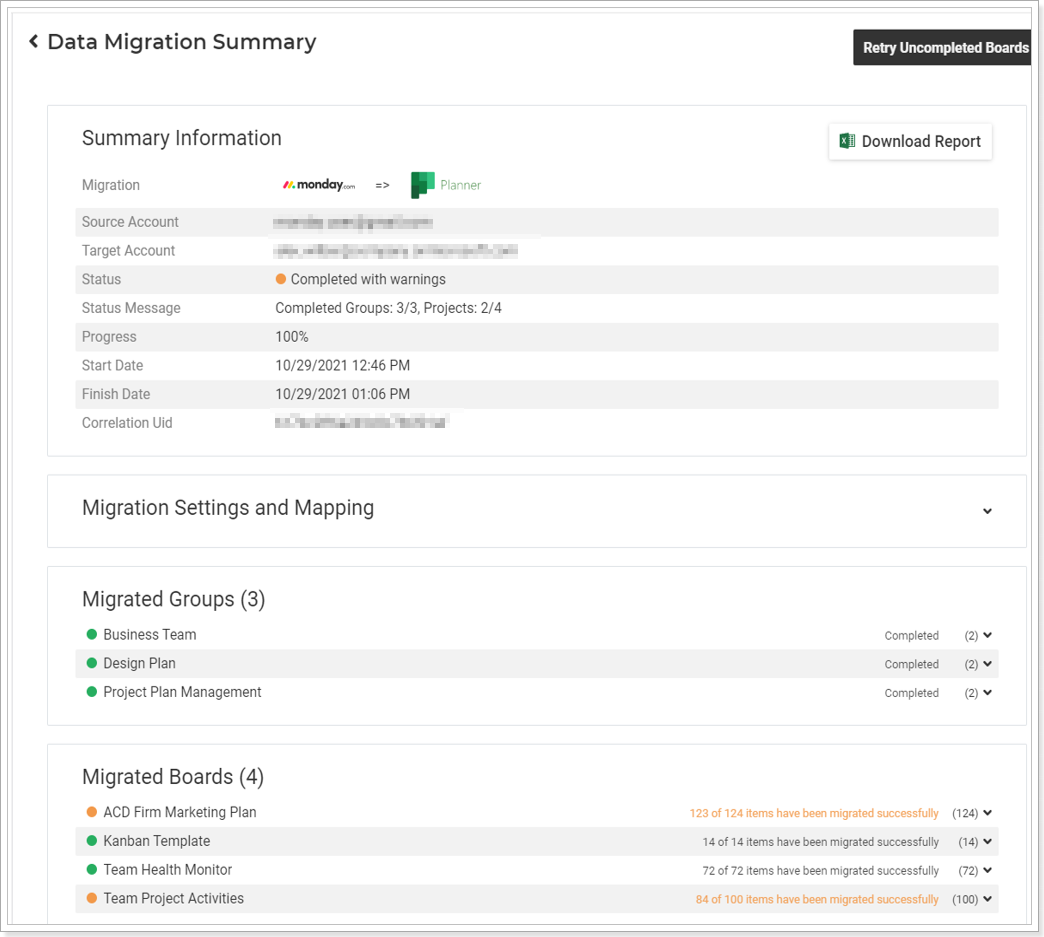
Before restarting the migration, it is highly recommended to review which errors or warnings occurred during the migration and try to eliminate their cause.
If you have any questions or need assistance, please contact our Support Team via live chat or at support@fluentpro.com.
3. To restart the migration for uncompleted items, click on the ‘Retry Uncompleted...‘ button in the top right corner of the data migration summary.

4. You will be redirected to the Restart Migration page. The connection to the source and target systems would be automatically established with the accounts that were previously used for the selected migration. The connection accounts can be changed, though it is not recommended during the migration restart.
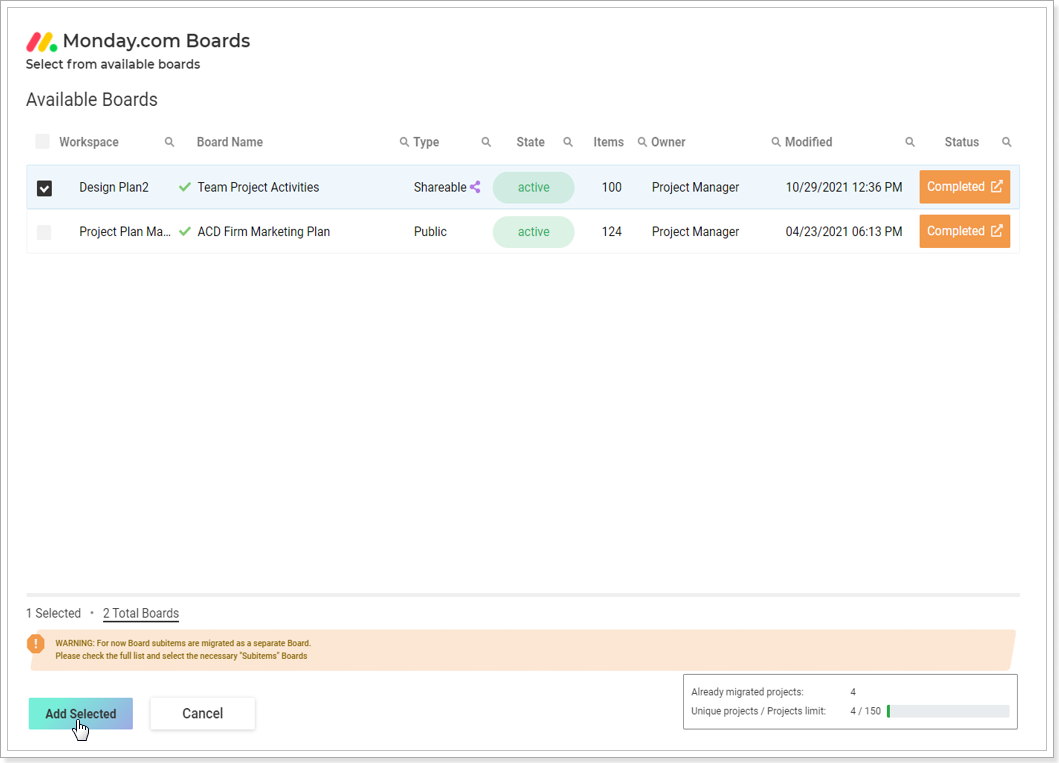
The Selection pop-up for selecting source data to migrate will be opened on the Restart Migration page automatically. There only the source items that were completed with the statuses 'Failed', 'Completed with errors' and 'Completed with warnings' during the previous migration would be displayed. By default, all such source items are selected for restarting the migration.
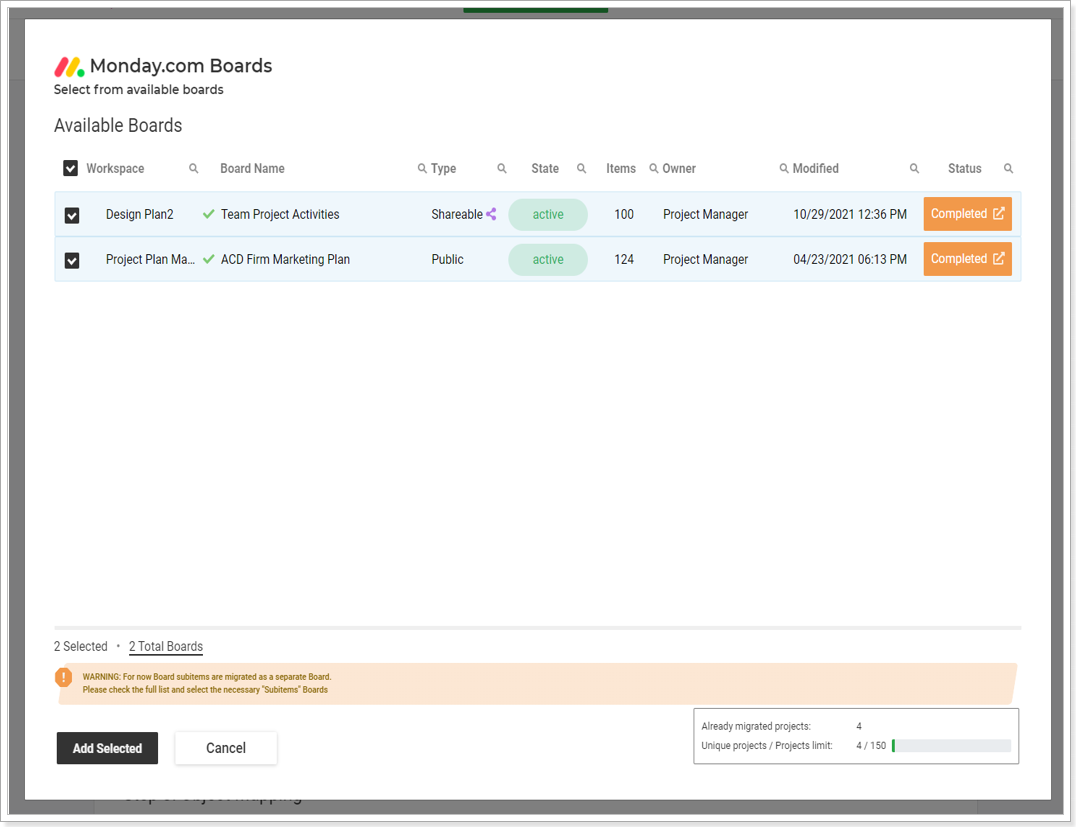
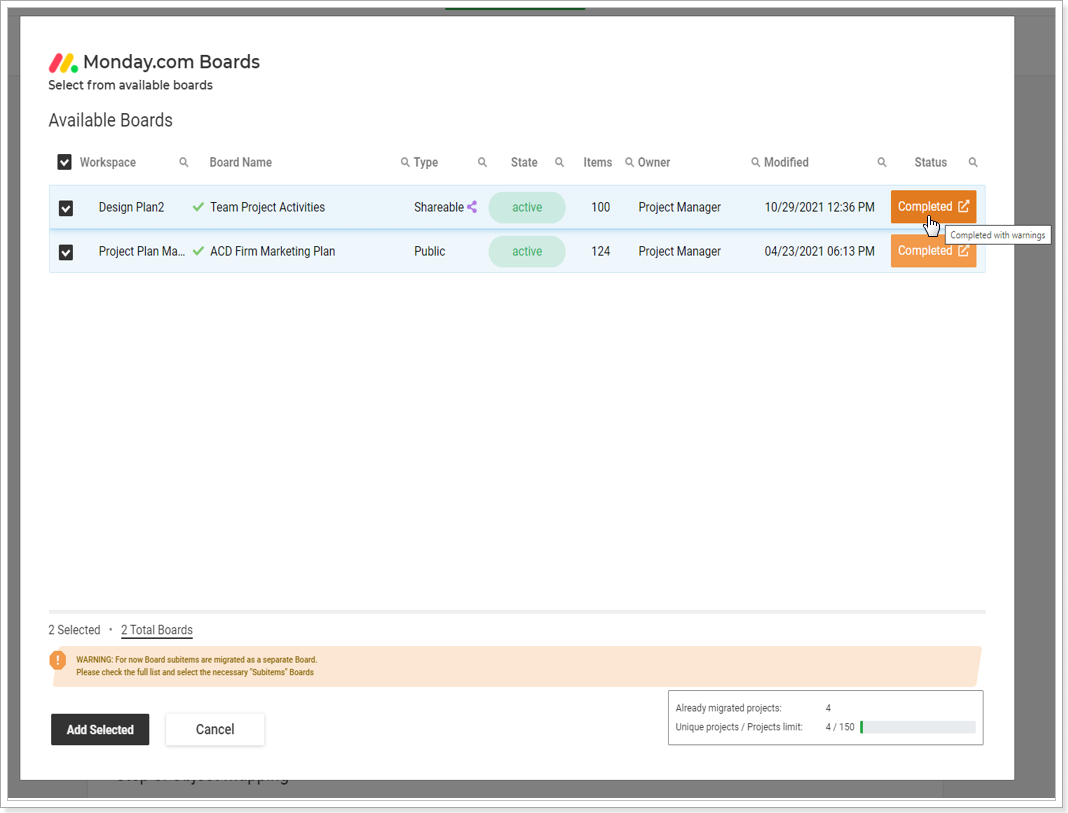
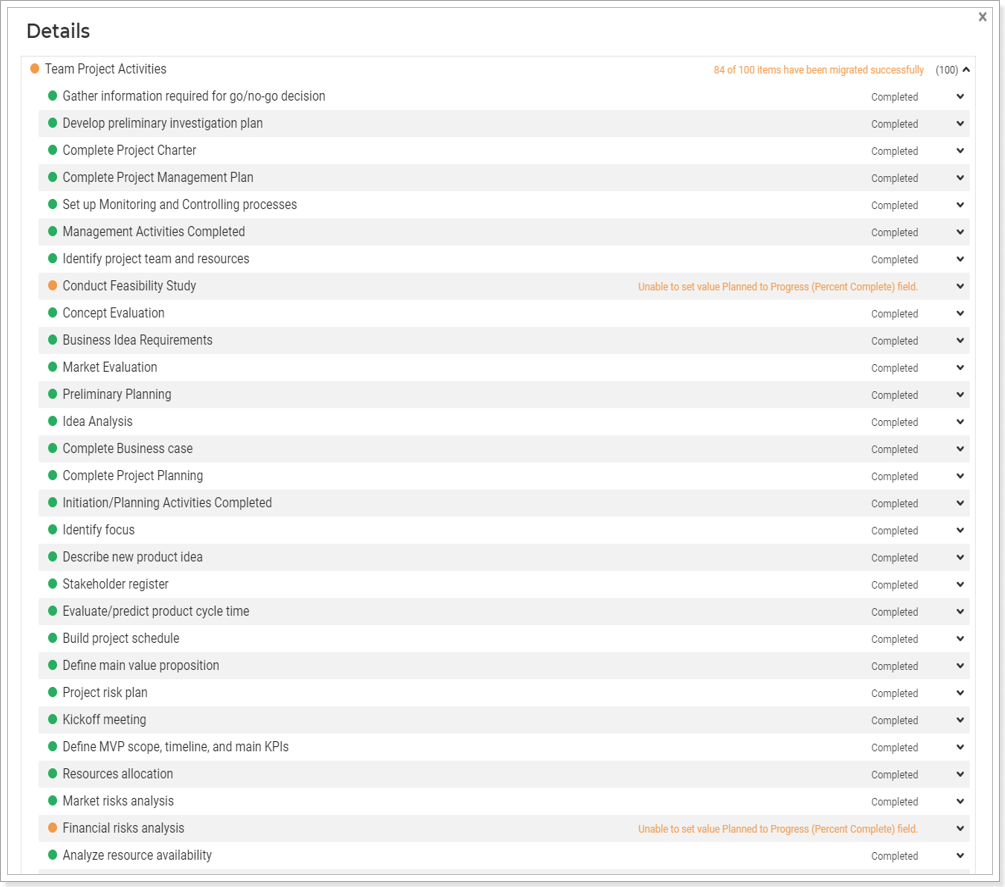
You can review the summary details for each item by clicking on the Status button next to the item name that will open the Details pop-up.
Reviewing the item summary details with an error or a warning message will help you to decide which items to remigrate.
Change the item selection as needed and click on the 'Add Selected' button on the Selection pop-up.
5. The Restart Migration page will be opened with the predefined migration settings, task/item field mapping, and user mapping that have been specified for the original migration.
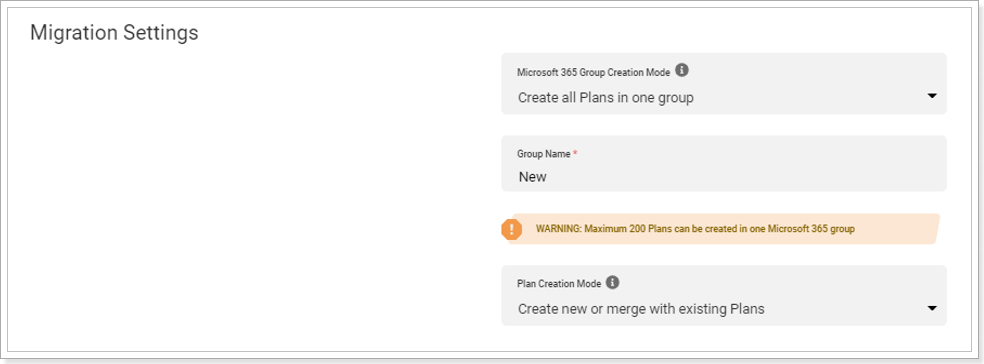
1) Review the selected settings in the Migration Settings section and change them if needed.
In case Plans/Boards/Projects have been already created during the first migration within specific Microsoft 365 group(s), and it is not necessary for them to be created one more time in a different group, leave the Microsoft 365 Group Creation Mode setting as is.
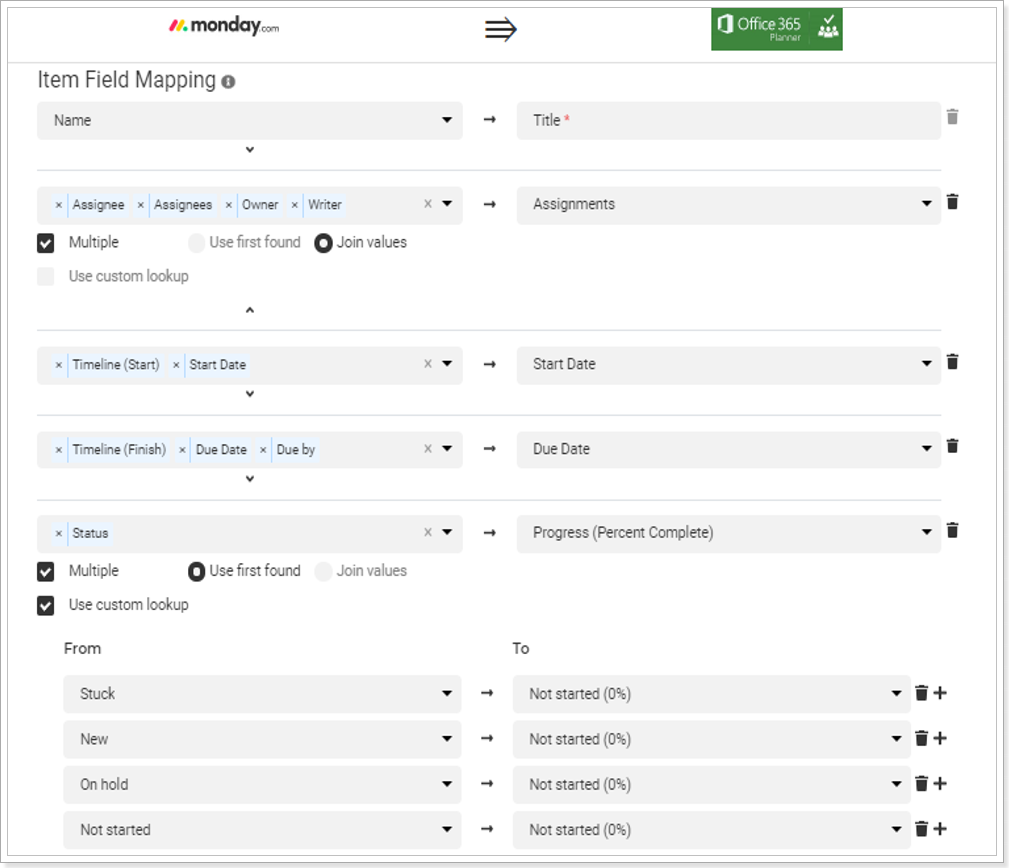
2) Review the item/task field mapping and update it if possible and needed.
The item field mapping, performed during the initial migration, will be updated automatically for the migration from Monday.com to Planner Basic in case of changes – new item fields from the selected Boards will be added and auto-mapped by name, and deleted fields will be removed from the mapping. Although, it is recommended to make sure that the field mapping and the specified advanced options are appropriate.
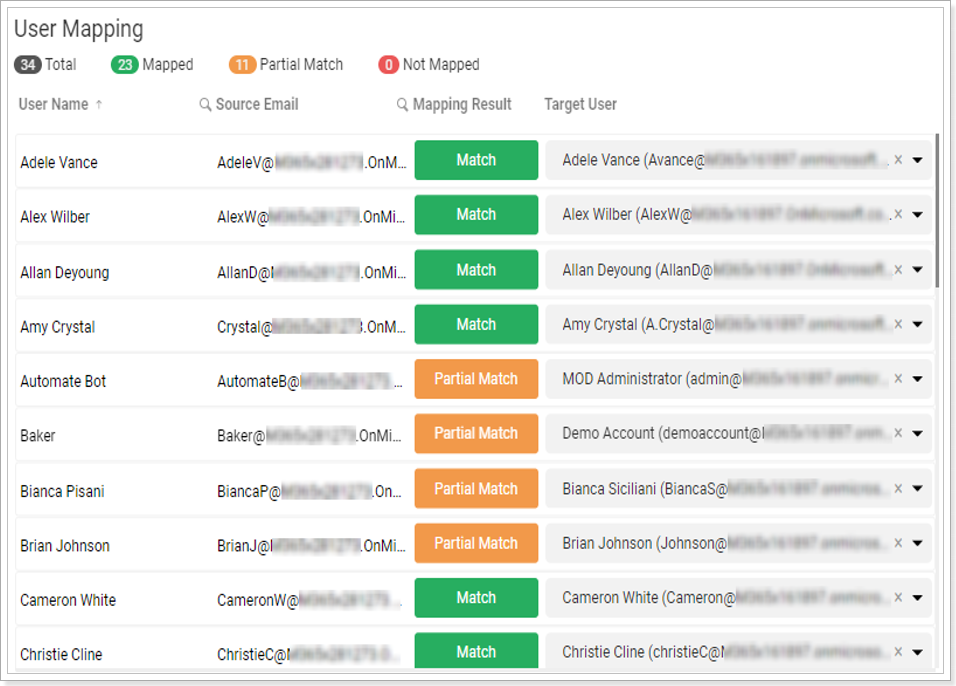
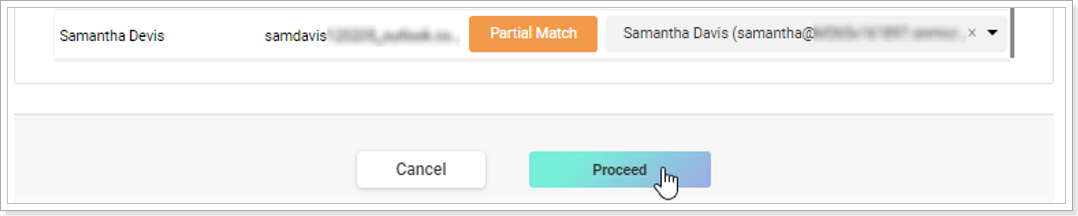
3) Review the user mapping and change it if necessary.
The user mapping, performed during the initial migration, will be updated automatically in case of user changes in the source or target tenant. For instance, if new users have been added to the source tenant, they will be added to the User Mapping list, but may not be mapped with target users. If any users have been removed from the source or target tenant, they will be also removed from the user mapping.
6. Click on the ‘Proceed’ button once the previous steps are completed.
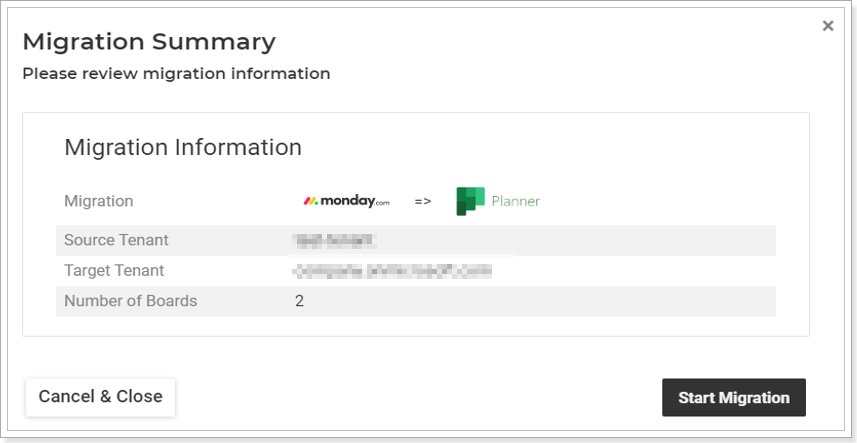
7. Check the migration progress and results on the Data Migration Summary page.