
This article provides a step-by-step guide for upgrading the on-premises instance of G.A. Suite to a newer version.
Please note: The G.A. Suite on-premises upgrade process is straightforward and does not require re-entering configuration settings. All previously defined settings are retained, and only the necessary components will be updated automatically. You can proceed through the upgrade wizard by simply confirming each step.
G.A.Suite on-premises update process should be run on each server within G.A.Suite Farm. SQL Server is an exception here if it’s a standalone server and no G.A. Suite components are installed on this server.
Before you start the G.A. Suite update process, perform the following:
- Open Windows Task Scheduler on the Worker server, locate “Start Modules” task and disable it (right-click on the task and select 'Disable' option).
- Stop all Queuing modules. Log in to Windows using the service account under which the modules are executed. Close all running instances of the Queuing applications. Then, open Task Manager and verify that no process named FluentPro.PMO.Queuing is active. If such processes are present, terminate them manually via the Task Manager.
Update App & Web & Worker Server
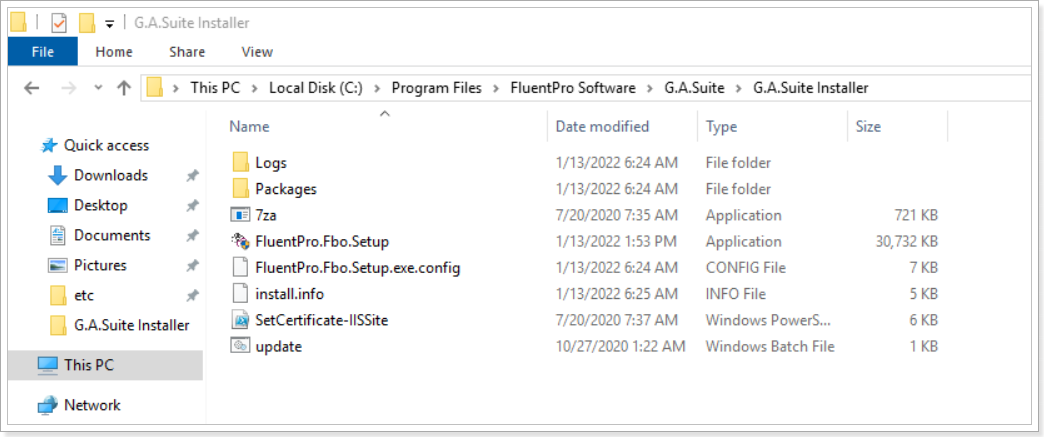
1. Open G.A. Suite installation folder. By default, it is located at: C:\Program Files\FluentPro Software\G.A.Suite\G.A.Suite Installer.
2. Select FluentPro.Fbo.Setup.exe file and run it.
3. The latest version of the G.A. Suite Setup file will be downloaded automatically from the FluentPro download server by G.A.Suite Setup Wizard (in the background).
Click Next on every step of the wizard, select to accept the terms in the Agreement, then click Install on the last step and G.A. Suite will be updated.
Below you may find the description of each step if needed.
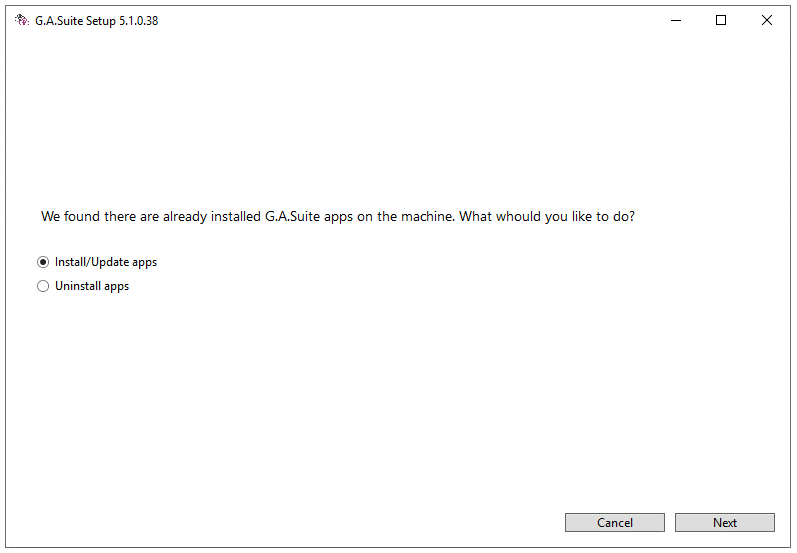
4. In the G.A. Suite setup window that will be opened select the “Install/Update apps” option and click Next.
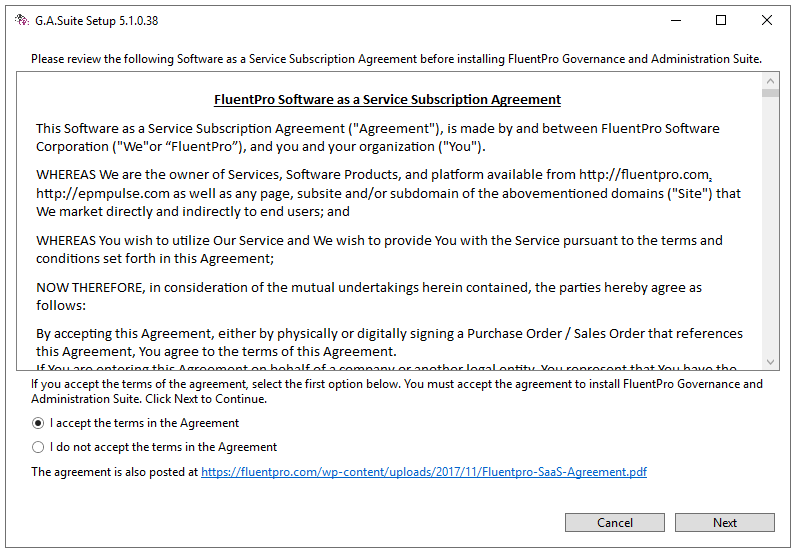
5. Accept the terms in the Agreement and click Next to proceed.
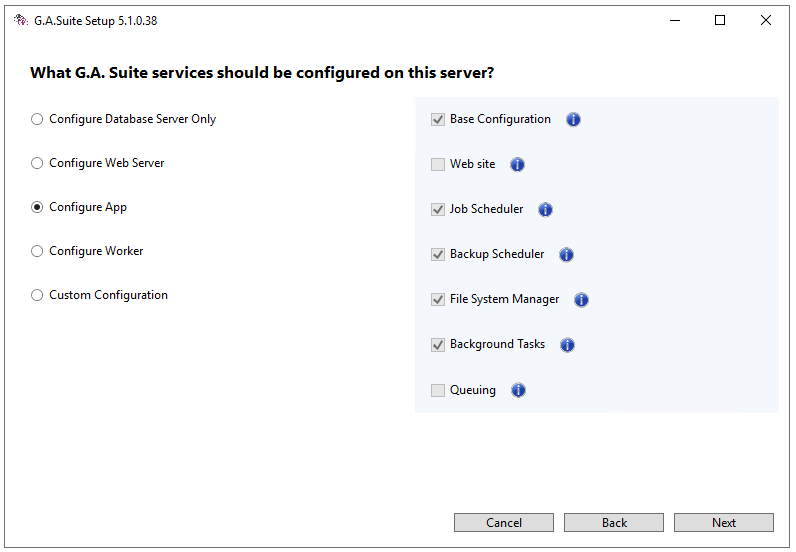
6. The set of services will be preselected based on the previous installation.
If your environment architecture has not changed since the last G.A. Suite installation and you are only performing an upgrade, you can retain the existing settings and proceed by clicking Next.
If changes have been made to your environment, select the appropriate role from the left-hand menu based on your updated configuration. Alternatively, you may choose Custom Configuration to manually select the required services.
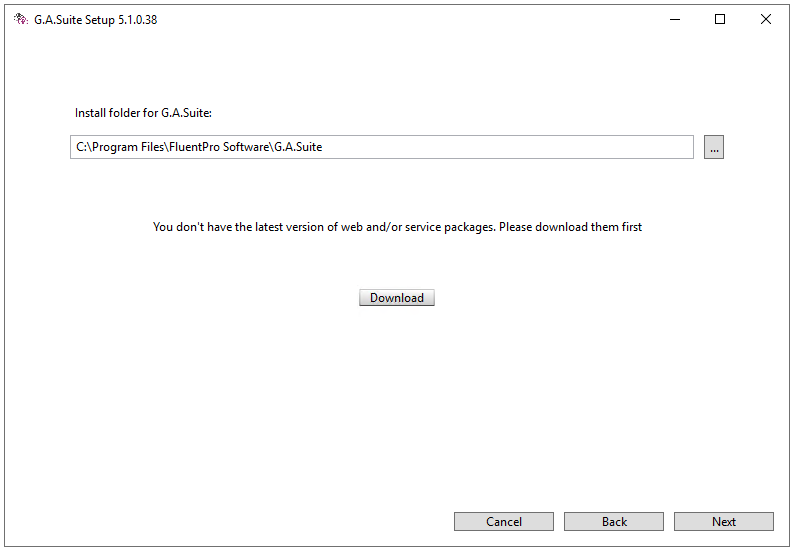
7. On the next step, click the “Download” button to get the latest packages for all G.A.Suite modules.
Click Next.
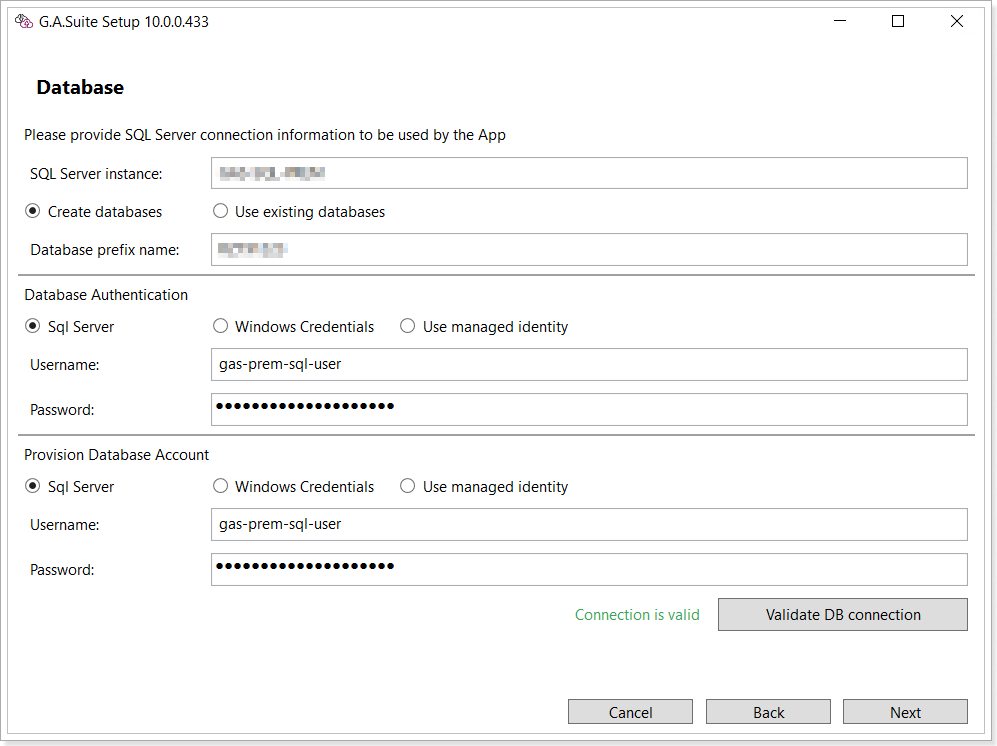
8. The Database configuration will be also already selected according to the settings from the latest installation and will be taken from the “install.info” file.
Verify, if nothing has changed by clicking the “Validate DB connection” option. If it is successful press the Next button to proceed.
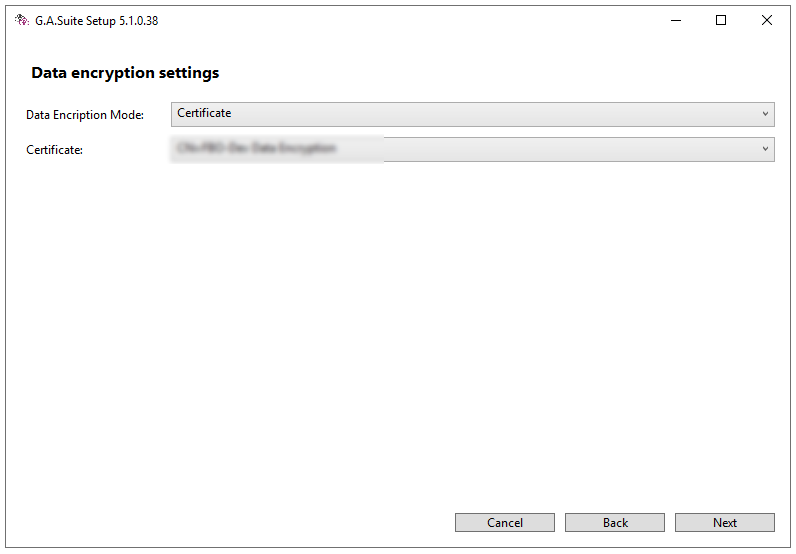
9. Data encryption settings will be also taken from the “install.info” file with the configuration set according to the settings from the latest installation.
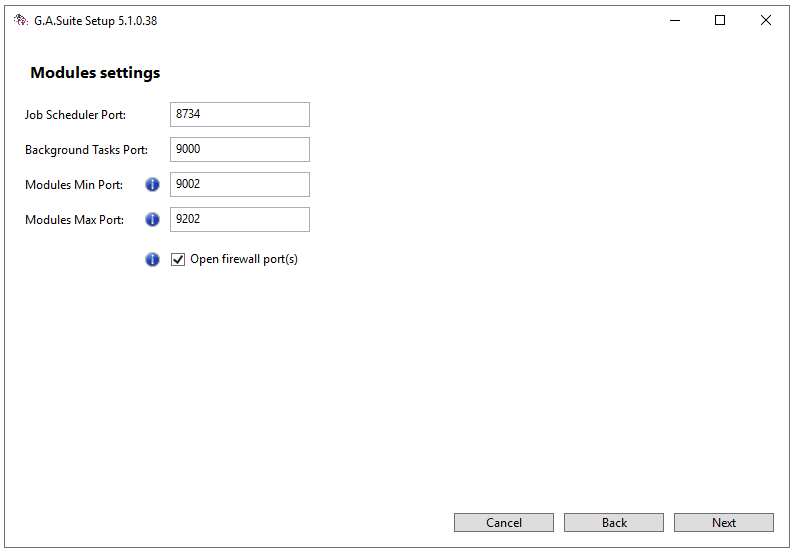
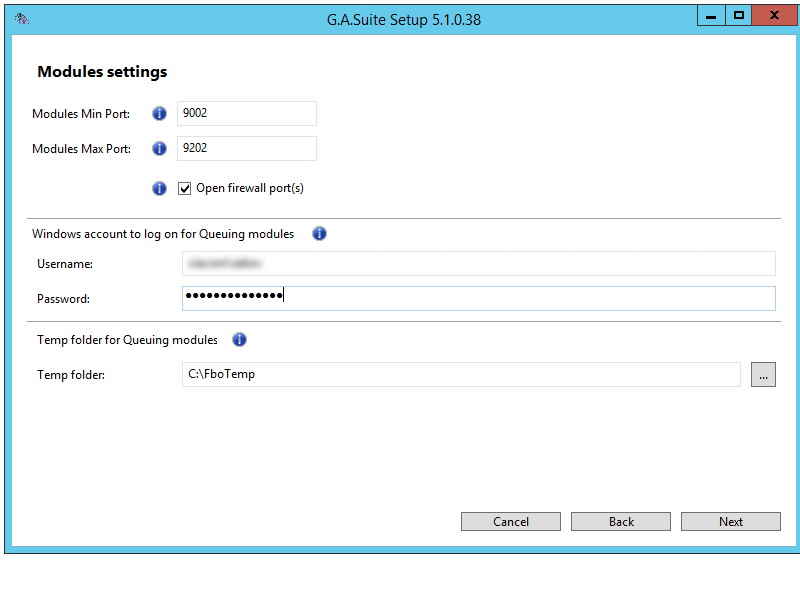
9. 1. Module Settings for Modules Server.
Just check that the 'Open firewall port(s)' check-box is selected.
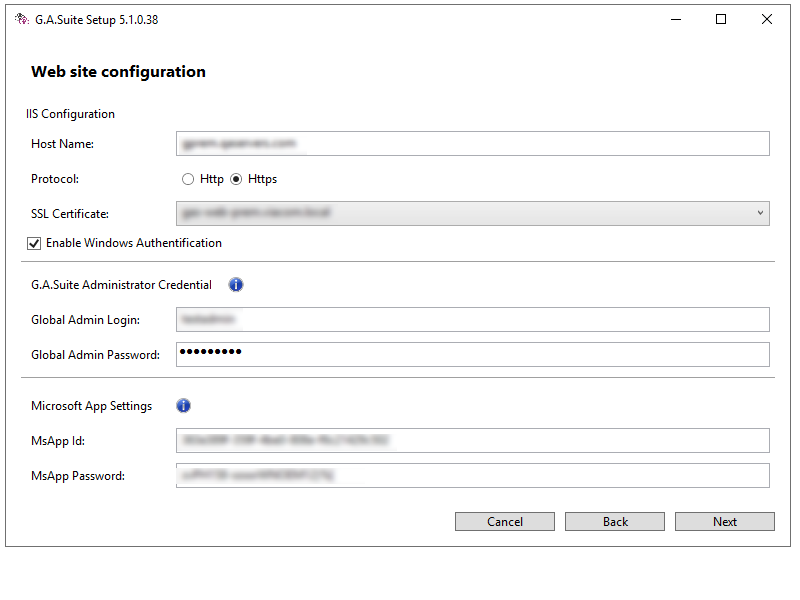
9. 2. Settings for Web server. This is the step where Web site configuration is updated. Make sure that the settings are correct and click Next.
9.3. Settings for Queuing Modules. In this step make sure that the service account credentials for Queuing modules are correct and the “Open firewall port(s)” check box is checked.
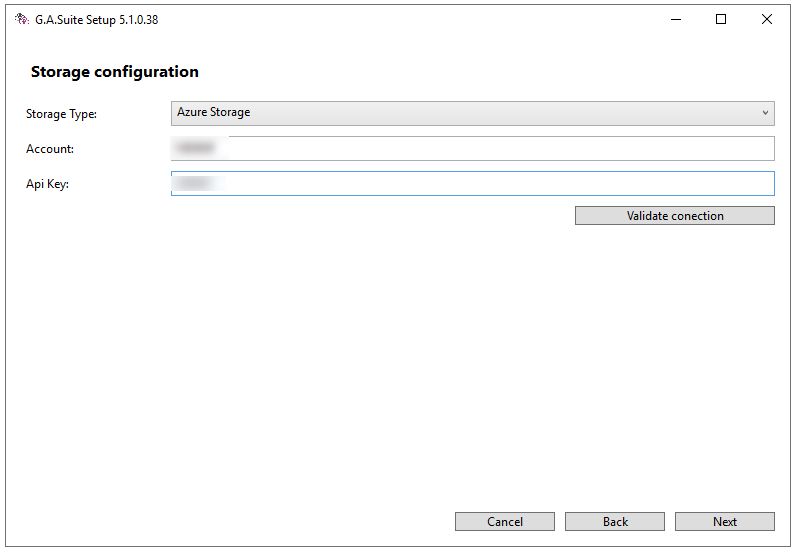
10. The next step is Storage configuration. Click the “Validate connection” button. If the validation process was successful and everything is correct, click Next to proceed.
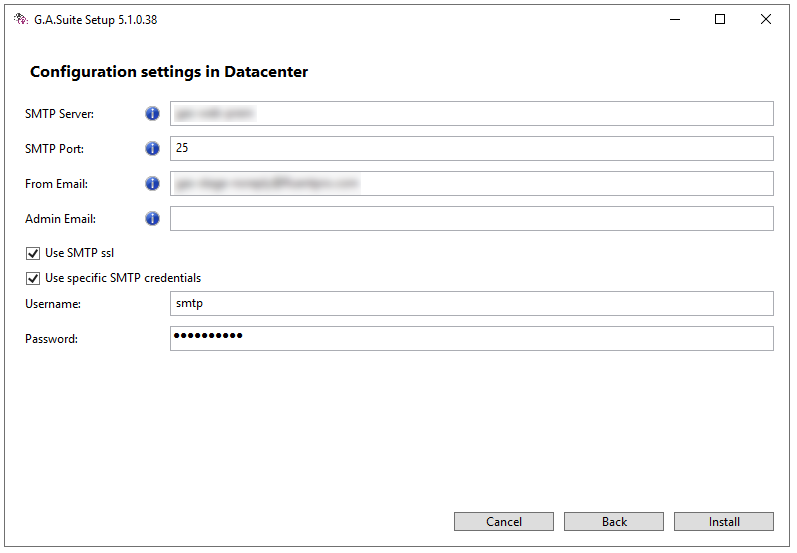
11. Next, make sure that the SMTP configuration is correct and click Next.
12. Click Install to launch the installation process.
Post update verification
App Server
G.A. Suite Windows services will be automatically stopped and started during the update process. After the update is finished, verify that the following services have “Running” status:
- G.A.S Jobs Scheduler Processor
- G.A.S File System Manager Processor
- G.A.S Backups Scheduler Processor
- G.A.S Background Tasks Processor
Web Server
Login to the G.A. Suite and verify if the site is opening without issues.
Workers Server
Open Windows Task Scheduler while logged in under the service account, and verify that the Start Modules task is enabled. Manually run this task to start the Queuing modules. Once started, check the module consoles to ensure there are no errors.