The next step is to Bulk Publish Projects in the source PWA using G.A. Suite before proceeding to copy these Projects.
The reason is that projects may have two versions – Draft and Published. G.A. Suite downloads the last Saved version of Project (Draft), then during the upload of Projects to target PWA it publishes them several times. As a result, if the project is in the Draft version in the source system, you will see this version as published in target one. If we compare the projects – we may see so-called 'false-positive' results of the comparison. To avoid this, it is recommended to perform the publish using G.A. Suite.
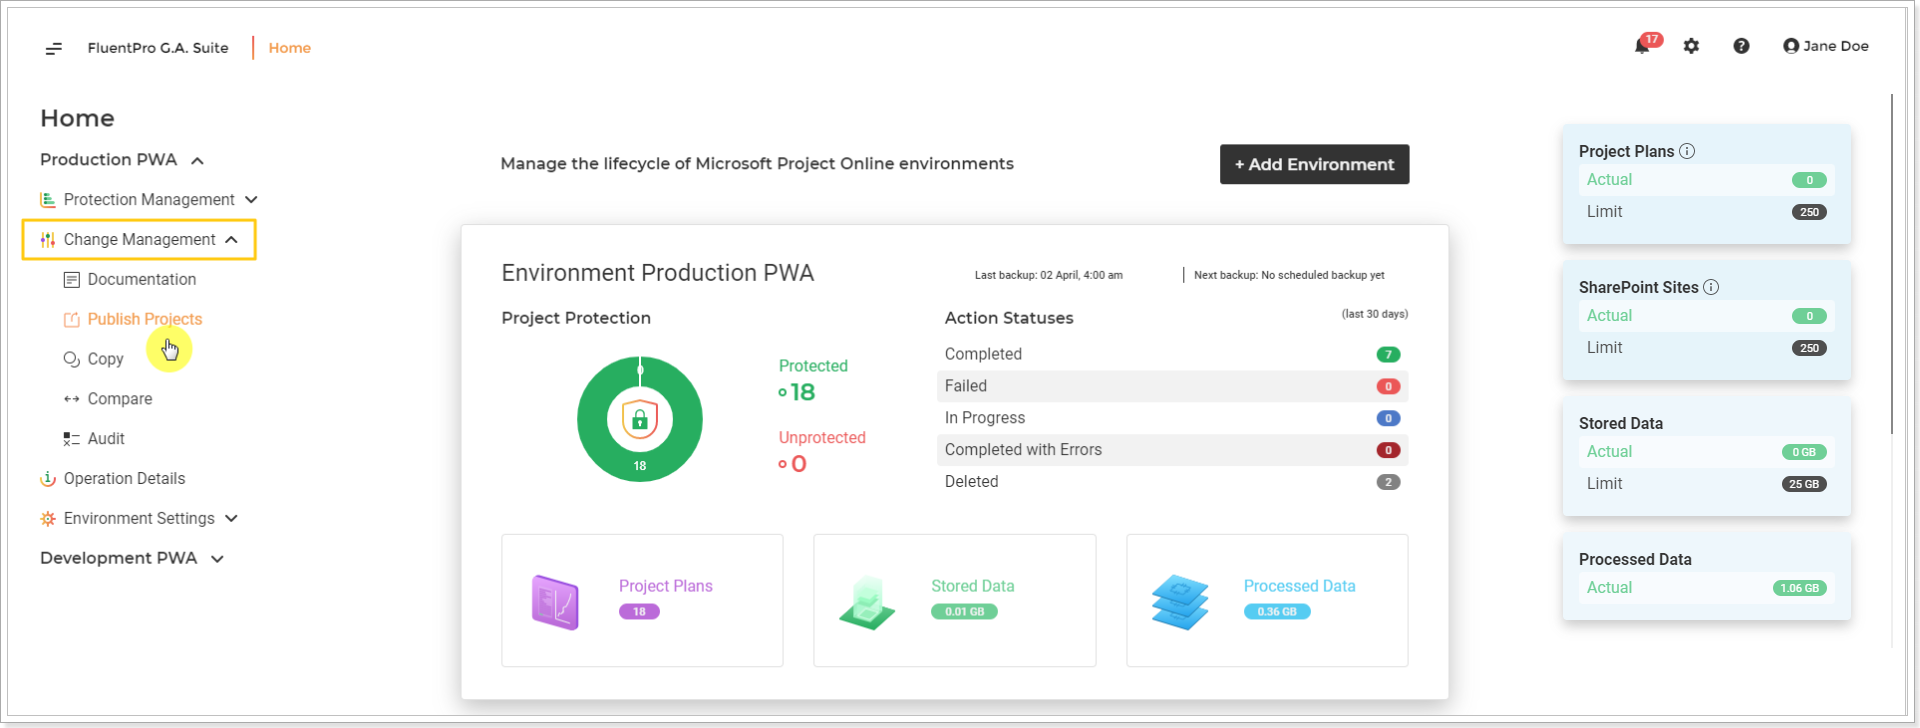
1. On G.A. Suite Homepage click on the source environment title, navigate to the Change Management section and choose Publish Projects option:
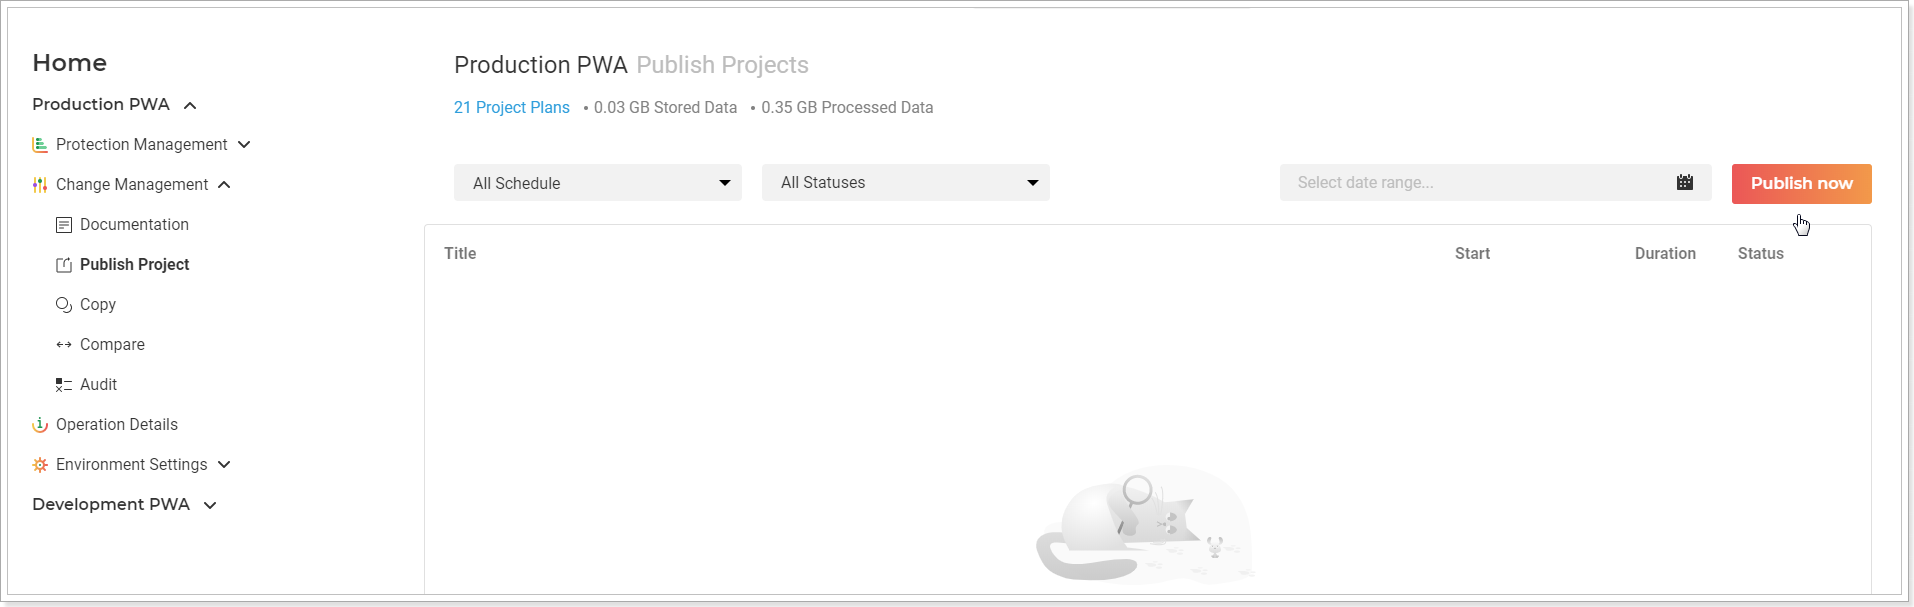
2. On the 'Publish Projects' page click on Publish now button:
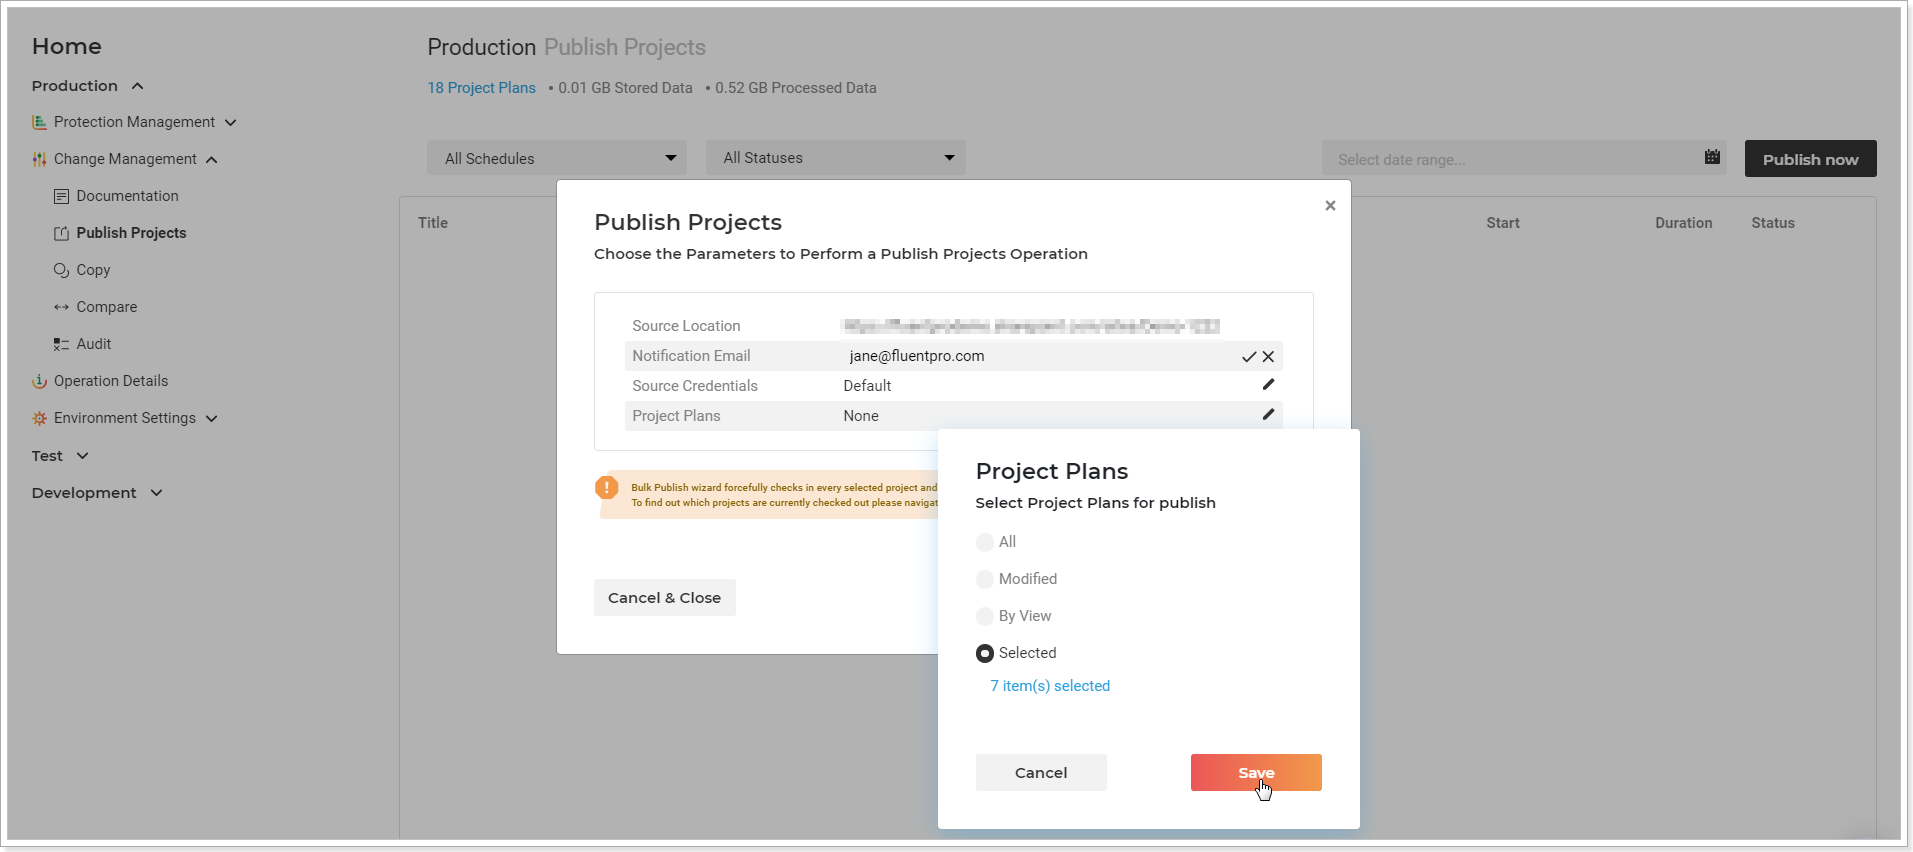
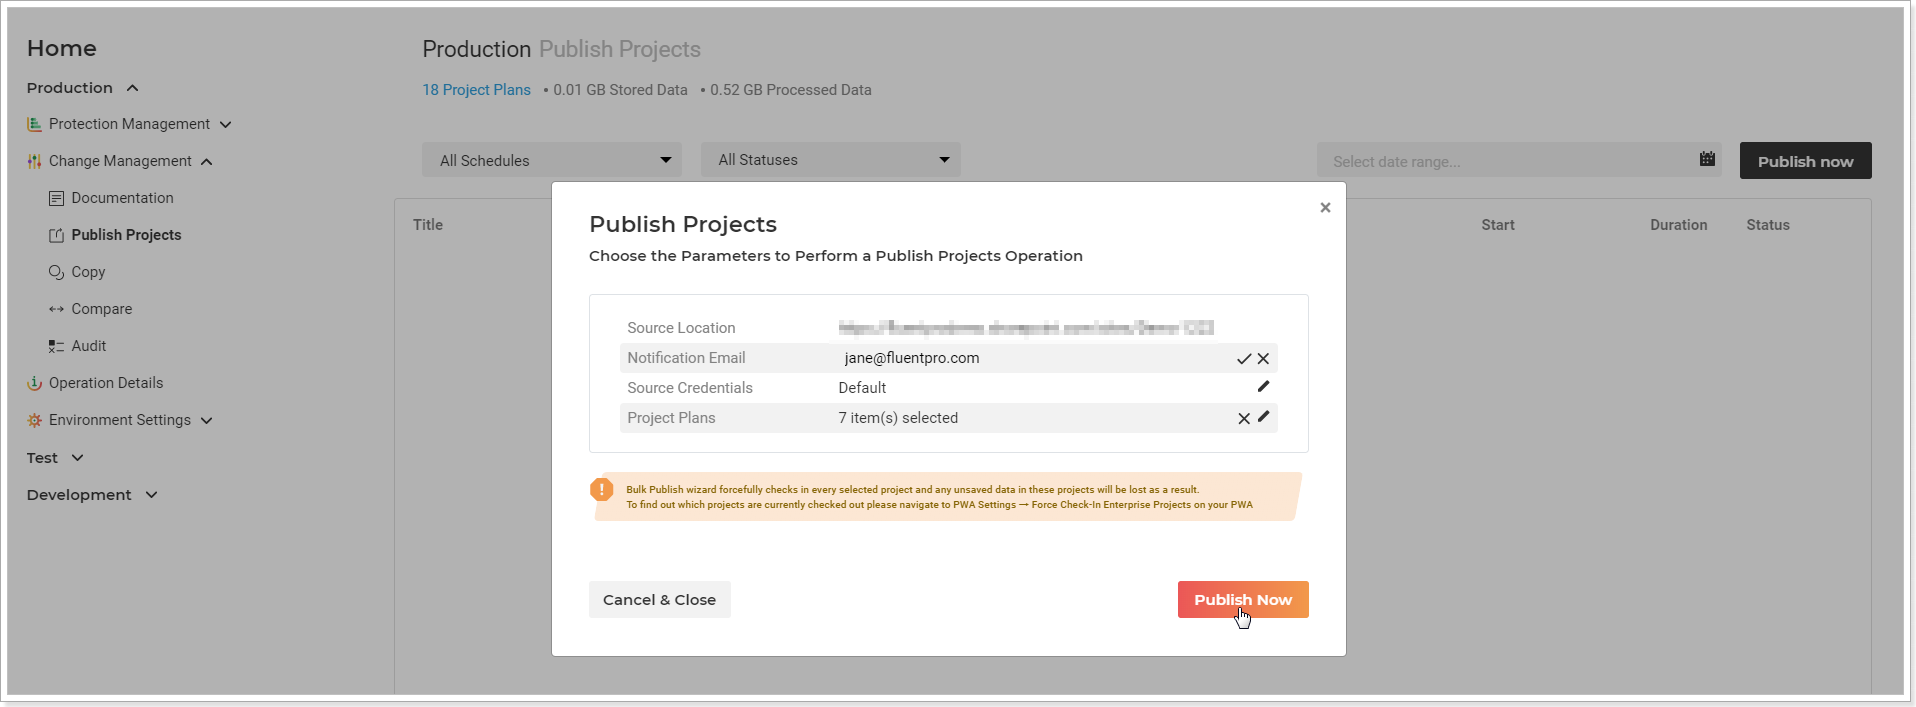
3. Provide the following information:
Source Location - the Projects will be taken from this PWA for publishing.
Notification Email - click on the pencil-like button and type in the email address, where the notification will be sent after documentation is finished.
Source credentials - click on the pencil-like button if you would like to use PWA credentials, different from those, specified on the Credentials page. Multi-factor Authentication for Office 365 users is also available. For more details refer to this article.
4. Project Plans- select the projects for publish:
all projects within Project Online environment;
only the ones, which have been modified within the specified period of time;
the projects specified in the filter of specific Project Center view. Please note: If you select the By view option it is also possible to select the Subprojects option and include subprojects into the projects publish operation as separate projects. In this case, subprojects will be published as separate projects. If this check box is not checked, subprojects will not be included in the projects publish operation.
the ignored option allows excluding certain projects from this operation.
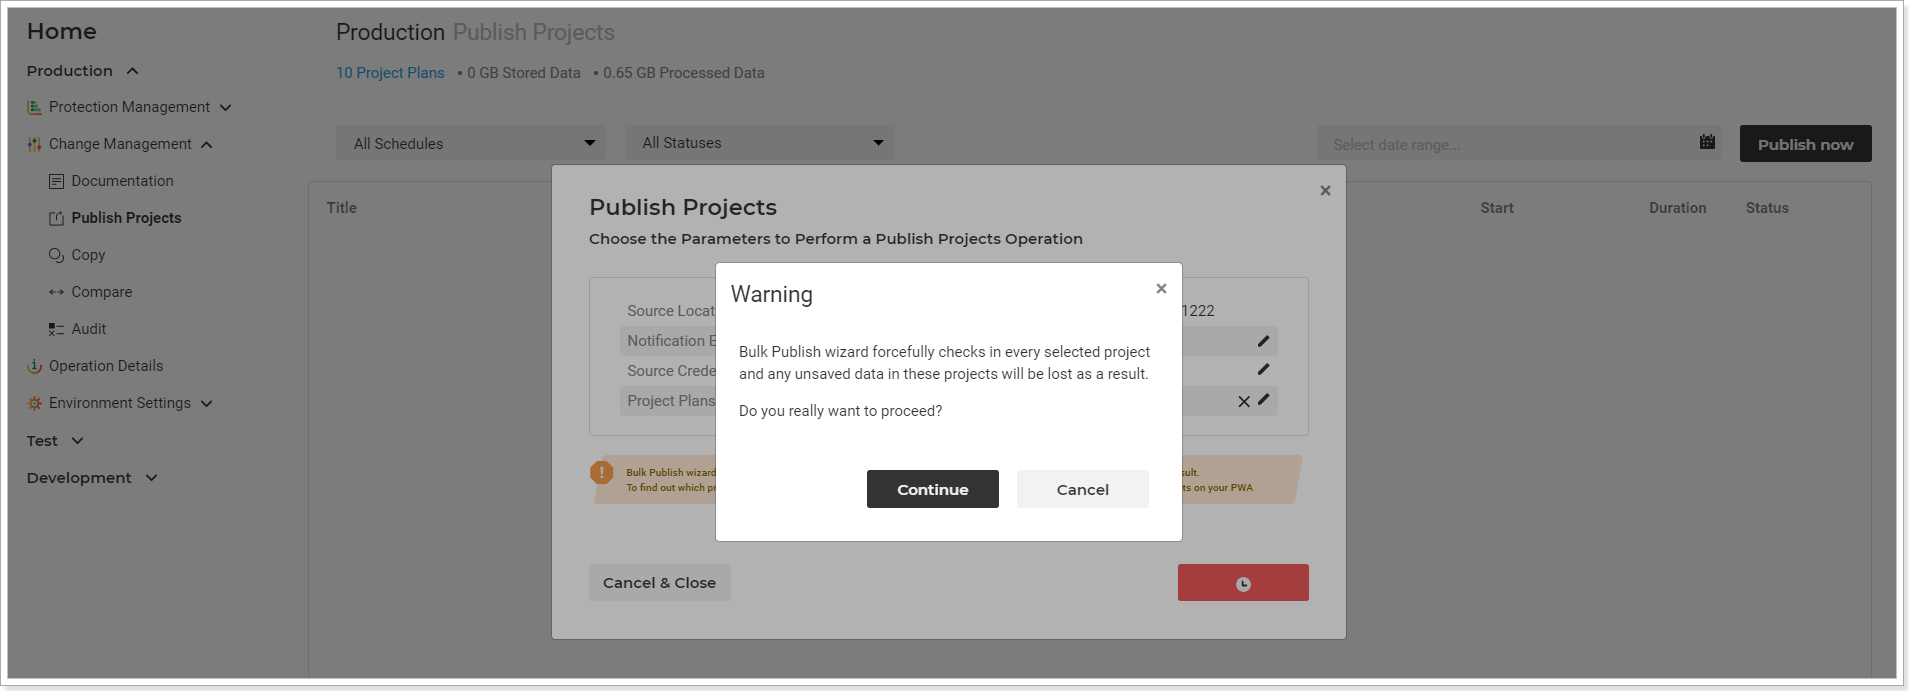
or manually selected ones. Click on the number link, select to filter the projects by the modified date or by the view. As the projects list is loaded, check the check-boxes of the required projects. Please note: You will be able to see the projects that are checked out on your PWA and decide if you would like to proceed to publish them. For the projects that are checked out on the PWA, a corresponding icon will be displayed. You can sort the Projects by this field if needed.If you click 'Add selected' to proceed, then Save to save the selection and Publish Now button to launch the publish operation, a dialogue window will appear warning you that unsaved data will be lost during republish of the projects that are checked out on your PWA. Confirm that you are sure to proceed or click Cancel and check in the required projects on the PWA before launching Publish Projects operation.Click Add Selected button.
When you are ready with the selection, click Save.
Click Publish Now button to launch the process.
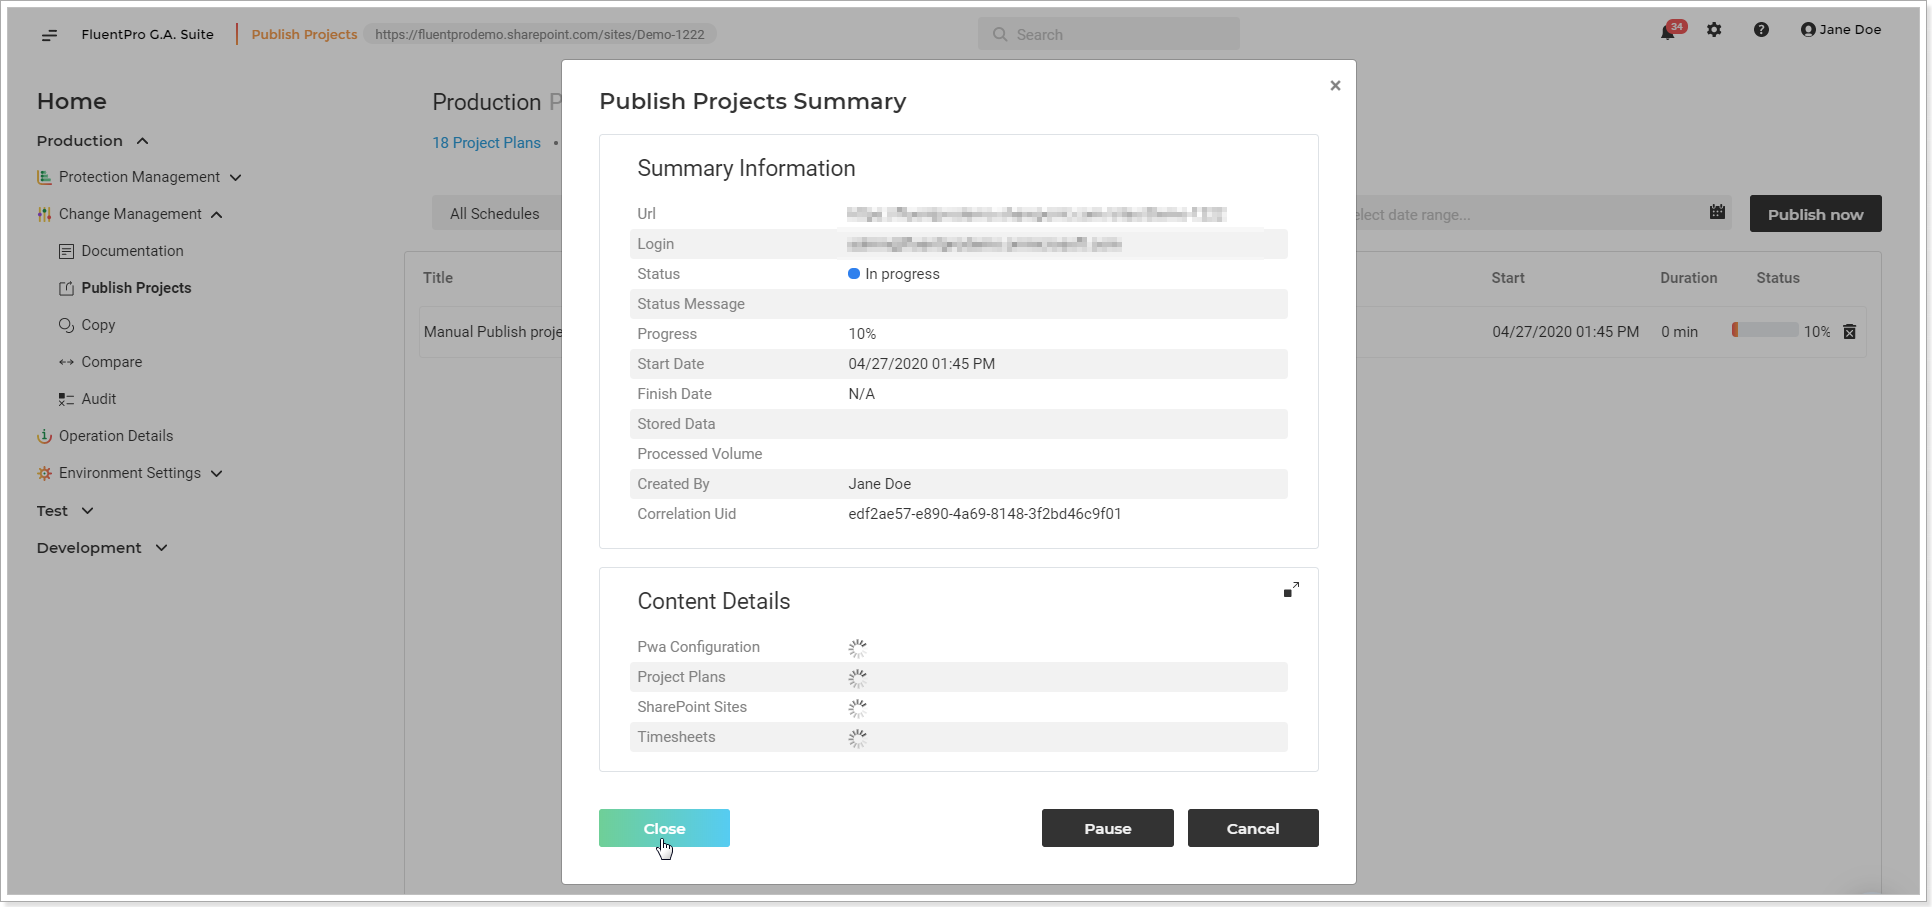
Summary information window will be opened, here you can review the details, Pause or Cancel the operation if required.
Click Close to close this window and go back to the Projects Publish page.