This article describes how to restore data from one of the backup copies created.
If you need to restore just one project, site, or configuration element, it would be preferable to follow the steps from this article. The restore process described in this article is more suitable when a user needs to restore several pieces of data. e.g. Configuration entities, a Project, and a Site.
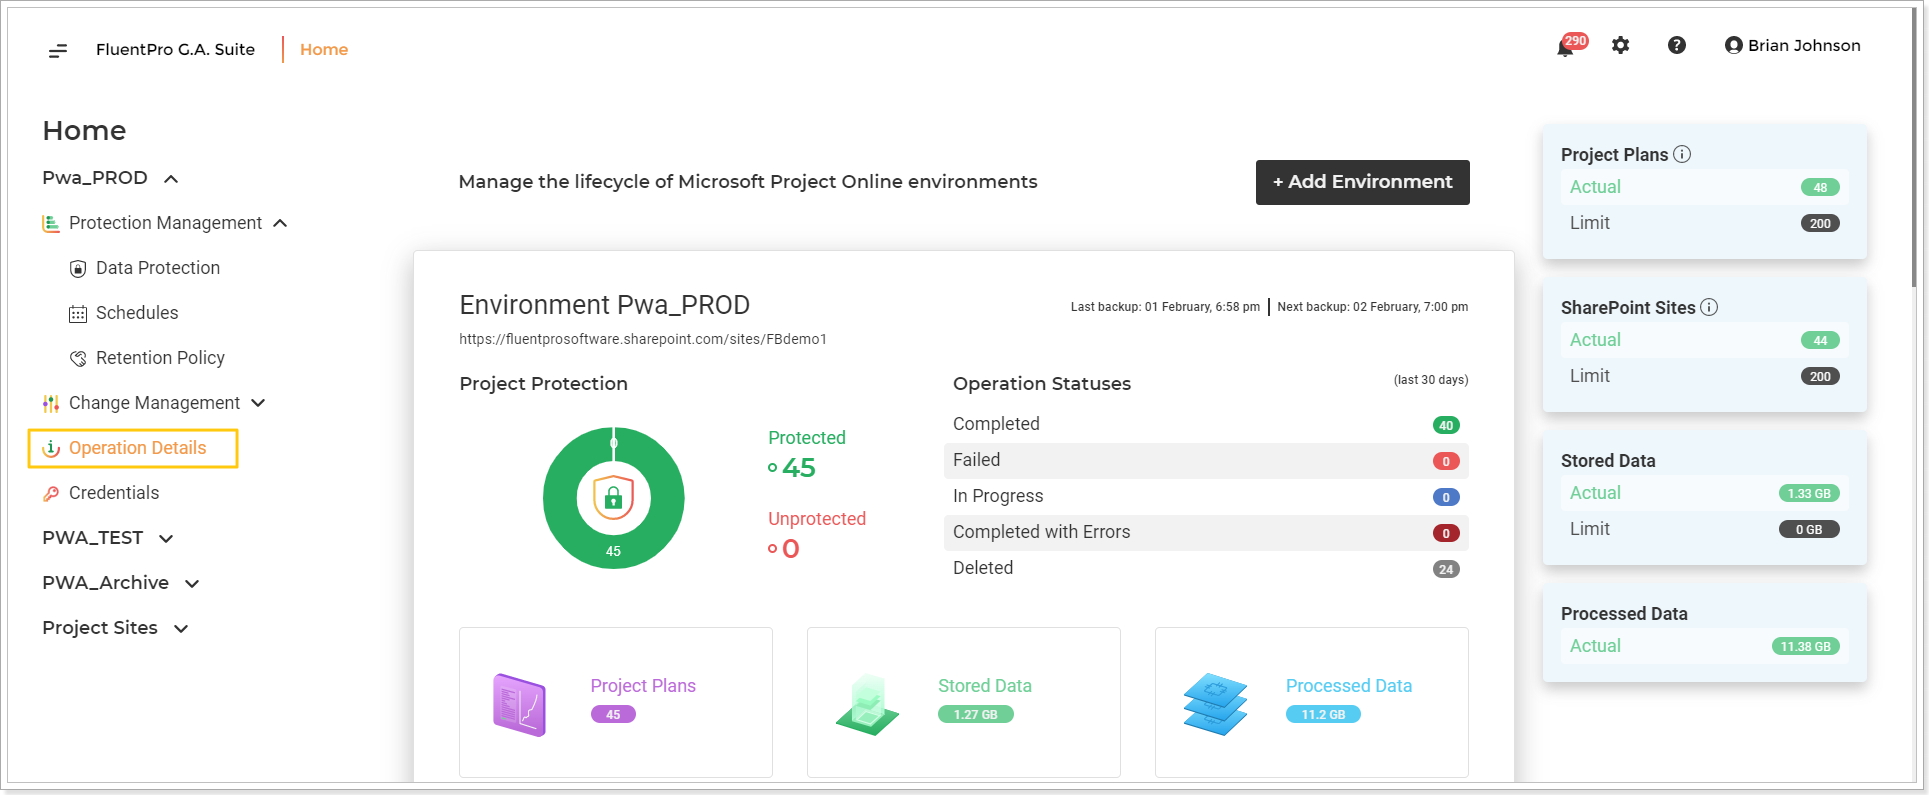
1. On the G.A. Suite Home Page, click on the environment for which you would like to perform a restore, and click on the Operation Details option.

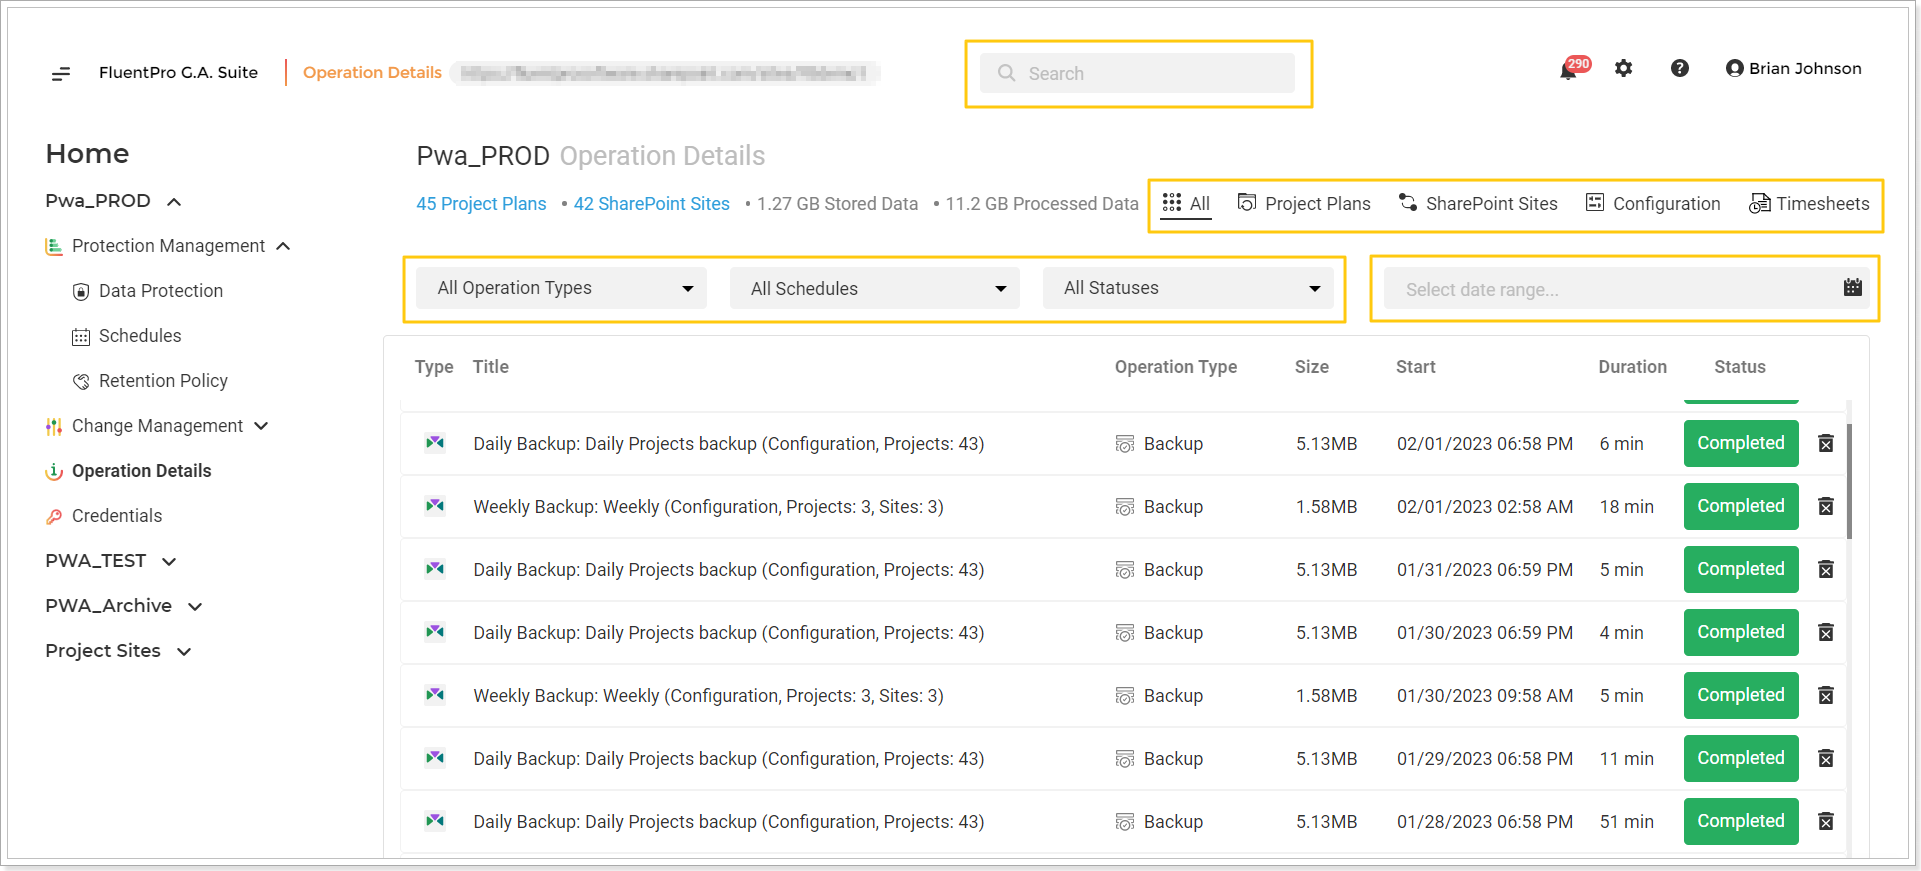
2. On the opened page, locate the needed backup copy and click on it to open the backup summary.
To find the required backup, use the filters available on the page. A user can filter the list of backups by date, the backup content, by the type of schedule, etc. Also, a user can type the name of the Project/Project Site in the search bar to find the backup with a specific project/site.

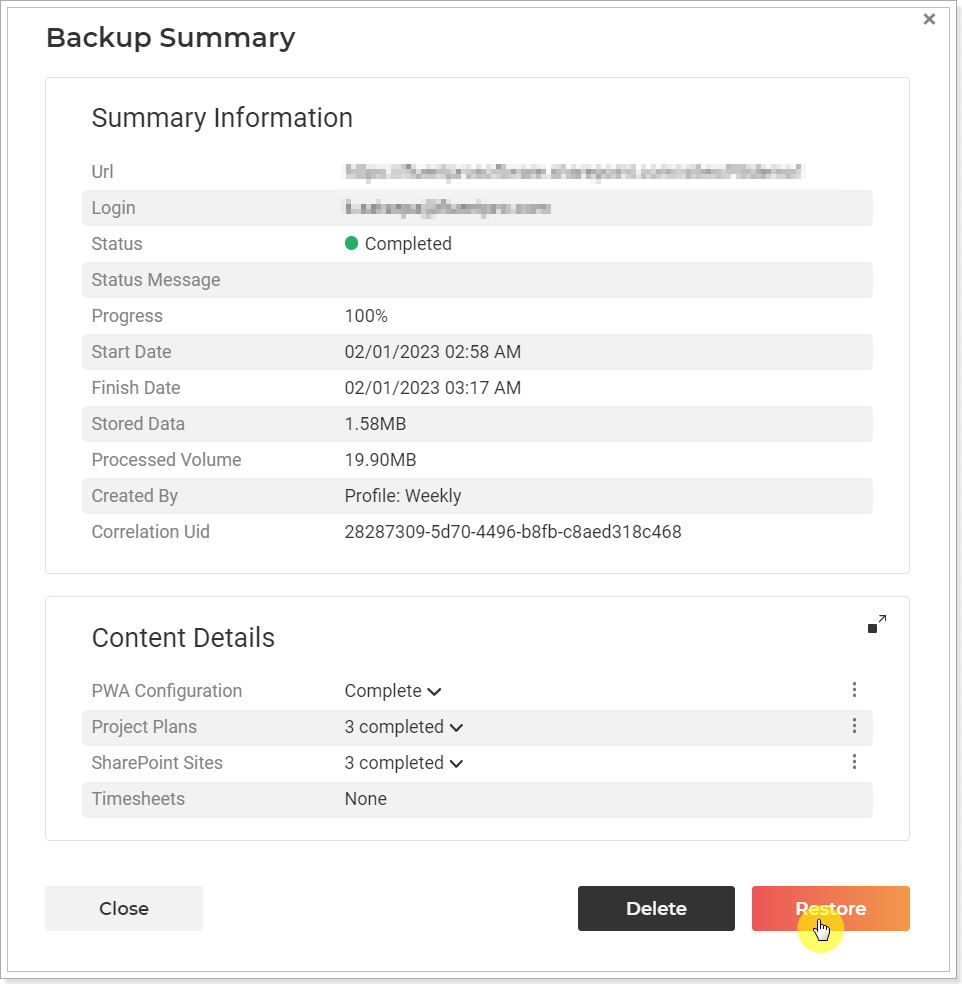
3. In the Backup Summary, you will see more detailed information on the completed backup and the Content of the current backup copy.
4. Once you've located the needed backup copy, click the Restore button in the bottom right corner of the window. Don't worry, this does not launch the restore right away. You will be offered to set the restore settings in the next steps.

5. G.A. Suite Restore option offers a large set of settings for the user to adjust. See the description for each of them below:
- Notification Email - provide the email where the notification will be sent on completion.
- Target location - by default, the data is restored to the same PWA where the backup was created from. A user can also restore data to another PWA added to G.A. Suite. For example, for test purposes.
-
Credentials - by default, G.A. Suite uses the credentials provided when connecting the PWA to G.A. Suite. These credentials are stored and may be found on the Credentials Manager or Credentials page. If you would like G.A. Suite to use a different set of credentials, use this option.
You can add multiple credentials to perform the operation and add more accounts to the accounts list.
In case of any issues with an account (permissions or access lost; password expired) during G.A. Suite operation processing, another one will be used to complete the operation successfully. Also, using the Multiple credentials option makes G.A. Suite performance faster. - PWA Configuration - click on the pencil-like button and review and select the Configuration elements to restore.
- Project Plans - click on the pencil-like button and review and select the projects to restore.
- Projects Restore Mode - if the projects are selected for restore, it is possible to select the restore mode: restore the selected projects with the same name and overwrite the existing project on the PWA, or restore a project with a new name: 'Project name_Copy'.
- SharePoint Sites - click on the pencil-like button and review and select the sites to restore.
- Delete before upload - select this option if you would like to remove projects and their sites selected for restore from the target PWA before upload. (Projects with the same name and/or project UID will be deleted. The projects will be deleted in the same way as you delete them manually).
- Preserve Resource UID - with this option turned OFF, Resource UIDs will not be preserved, Resources will be created with new UIDs (this option becomes visible as soon as resources are selected).
- Skip existing Resources - with this option turned ON, resources that already exist both on the backup file and on the PWA where data is restored will be skipped. G.A. Suite will restore over only those resources that exist on the backup file but do not exist on the PWA (this option becomes visible as soon as resources are selected).
- Restore Document/Item Versions - select this option if you need to restore the document and/or item version history.
-
Delete Document/Item Versions Before Upload - check this checkbox if these documents/items already exist on the target PWA (the PWA where you restore the data to). It is not possible to overwrite document/item versions using G.A. Suite. To upload the document/item versions to the target PWA, it is required to remove the existing documents from the target PWA.
Note: If this option is on, only the documents/items selected for upload will be deleted from the target PWA, all other documents will not be deleted.
Note: To upload document/item versions, the document/item versioning should be enabled on the target PWA. On the target PWA, open the list or library that you want to enable versioning => select Settings => Library Settings => on the Settings page, select Versioning settings => set the settings as required => select OK. If the versioning is not enabled, the last version only will be uploaded by G.A. Suite. -
Skip pages upload - Please note: If this option is OFF, before restoring SharePoint Sites, the Tenant Administrator should navigate to the SharePoint admin center -> Active Sites -> Select the site in question -> Open the Settings page -> Click Edit under the "Custom script" setting. Select "Allowed" and save the changes. This will allow the account you are using in G.A. Suite to restore site templates, custom forms, views, etc. With this option set to "Blocked", the restore will end with errors. For more details, please refer to this article.
This option allows skipping the upload of .aspx pages (in any libraries) as well as the Pages, Site Pages, Style Library, and PDP libraries during restoration. This prevents errors during the restore process. This option can be used if you are unable to manage permissions or if you don't need these pages to be restored.
Please note: Before restoring your backup, please remember that restoring Project Plans may affect the timesheets linked to tasks in these plans.
For detailed information on how Project Plans restore affects timesheets, please refer to this article.
6. As you are ready with the selection of the data to be restored and the settings, click Restore now to launch the process.

Restore summary page will be opened, where you can track the progress, Pause or Cancel it.
You can also safely close the window and review the Restore on the Operation Details page later.
