
This article describes how to use G.A. Suite to perform an on-demand manual backup of your PWA data.
1) To start the process, visit the G.A. Suite website at https://gas.fluentpro.com and log in with your Microsoft or Email account.
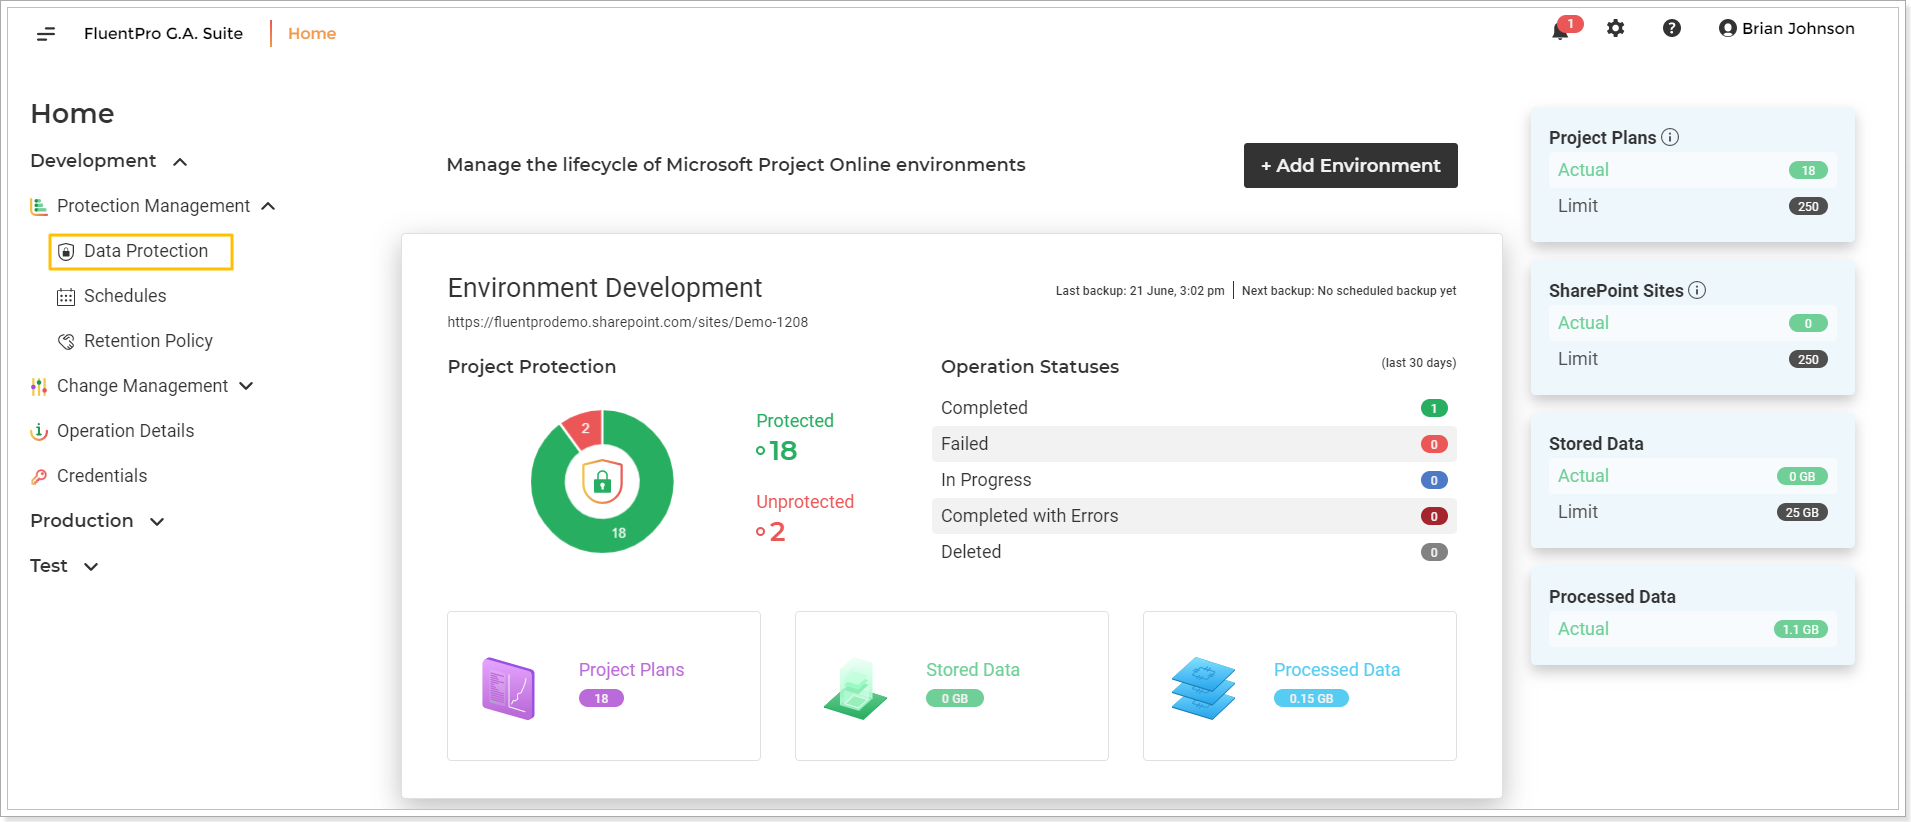
2) On the G.A. Suite Home Page click on the environment for which you would like to perform a backup, click on the Protection Management section and select the Data Protection option.
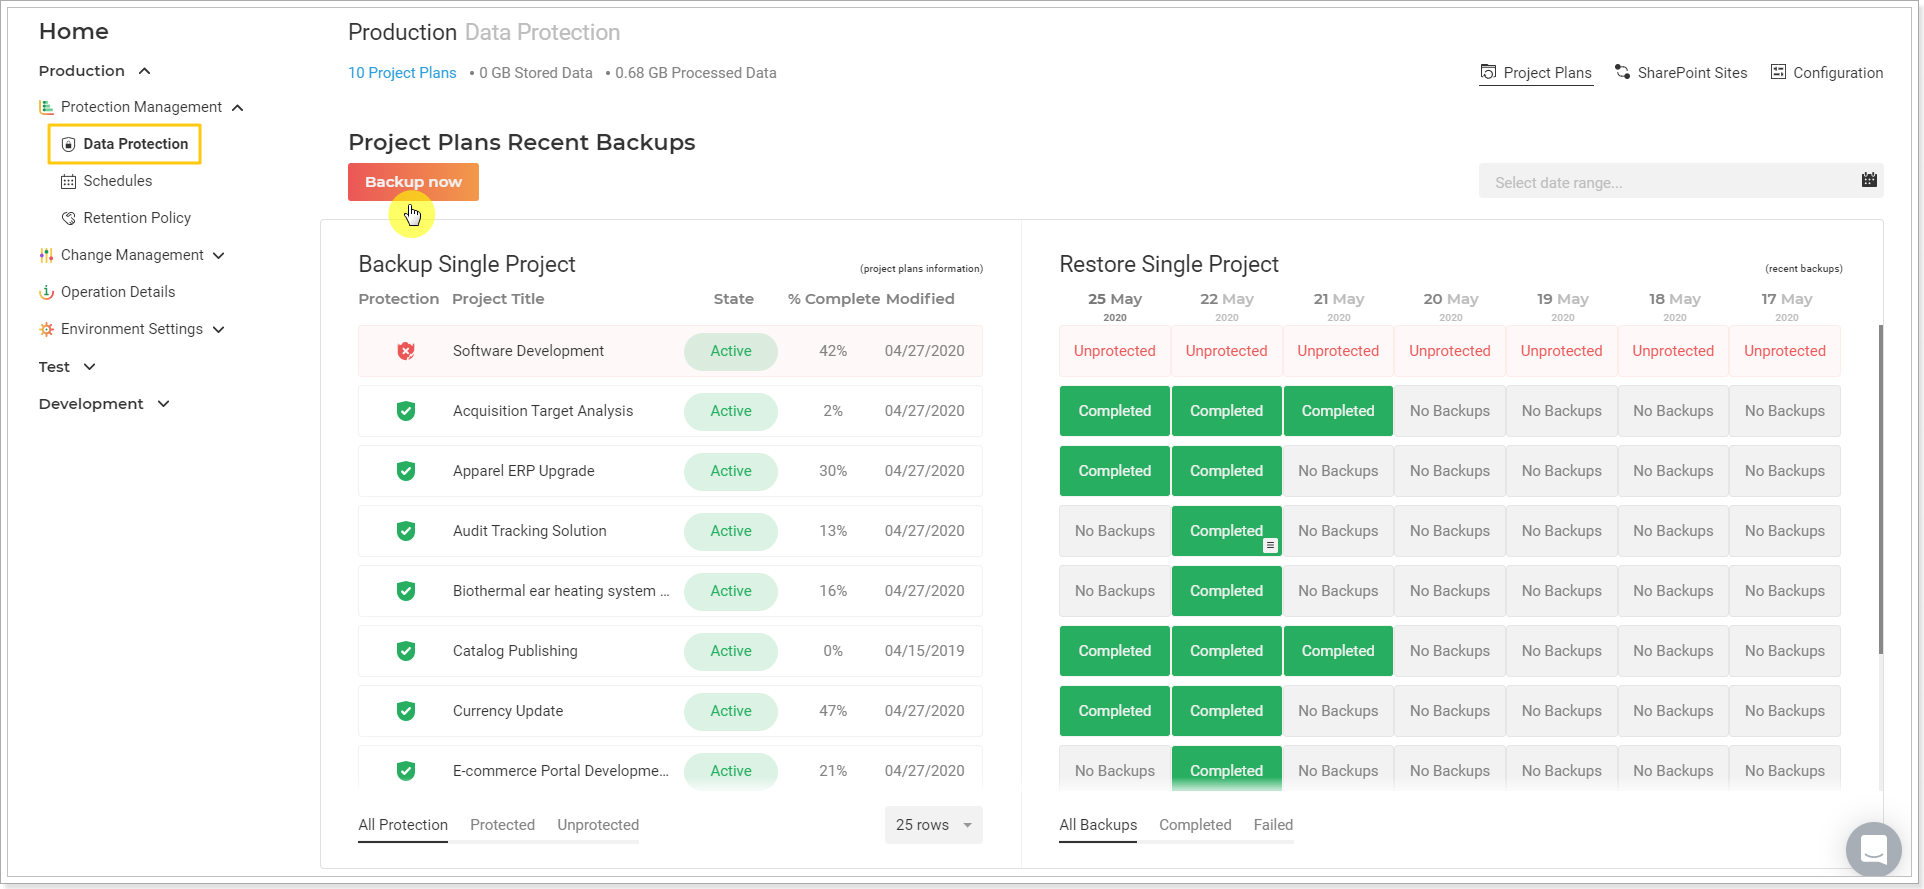
3) On the opened Data Protection page click the Backup Now button:
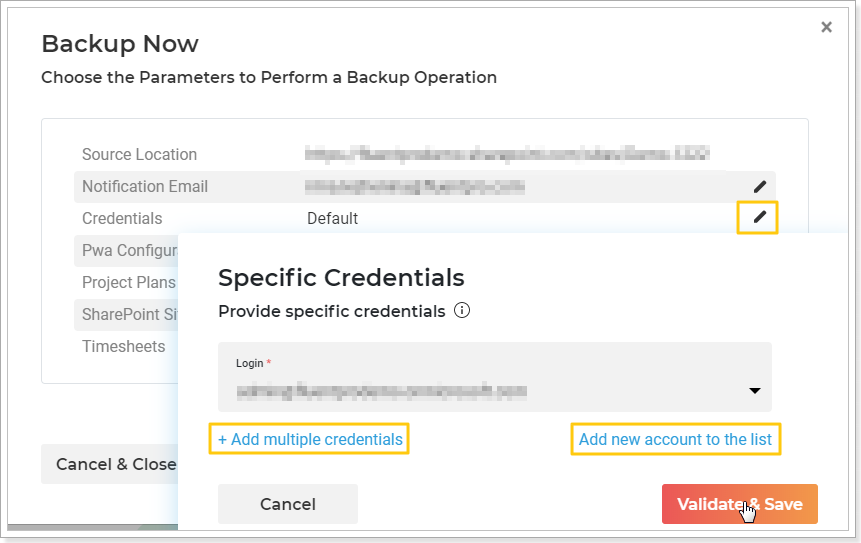
4) In the Backup Now window that appears check and edit the following information if required:
- Source location - check that the source PWA URL is correct.
- Notification Email - specify the email, where the notification will be sent on completion.
Credentials - Provide specific credentials, if needed, and validate them. Multi-factor Authentication for Office 365 users is also available. For more details refer to this article.
Please note: By default G.A. Suite uses the credentials provided when adding PWA to G.A. Suite. These credentials are stored and may be found on the Credentials Manager or Credentials page. If you would like G.A. Suite to use a different set of credentials, use this option.
You can add multiple credentials to perform the operation and add more accounts to the accounts list.
In case of any issues with an account (permissions or access lost; password expired) during G.A. Suite operation processing, another one will be used to complete the operation successfully. Also, using the Multiple credentials option makes G.A. Suite performance faster.
Next, click on the pencil-like button next to each content section to select the Content which will be included in the current backup copy:
Project Online data that can be backed up is divided into 4 sections:
- PWA Configuration - can be fully or partially backed up;
- Project Plans;
- SharePoint Sites;
- Timesheets.
PWA Configuration
'Default' radio button selected will include all PWA Configuration elements (except: Delegation, Gantt Chart Format, and Grouping Format).

'Selected' option allows you to select specific elements of configuration you would like to be backed up.
Choose the Selected option and click on the number link under it.
In the 'Selected Entities' window, check the checkboxes of the elements you would like to backup right now. Click 'OK' to confirm the selection.

Please note: You can also select specific Resources to back up. Clicking on the 'All' link next to the Resources checkbox will open the menu which allows selecting specific resources. The Resources list can be filtered by name or last modified date.
You can use additional columns (Availability, Status, Modified) to make the resource selection faster and easier. Modified and Status columns are available by default, if you need to include Availability, check the 'Display Availability columns' checkbox first. Allow some time for the information to load.
Click the 'Add Selected' button to confirm the selection.

Project Plans
All - this option will include all Projects and Project Plan Templates from the PWA into a backup copy;
Modified - the option is used to back up incremental (delta) Project data. Choosing 'Modified - Today, Last 2-6 days or a custom date (up to 30 days)' options, a backup of the Projects that were updated in the selected period will be created;
By View - this option is used to provide the name of Project Center View. The backup copy will include only the projects under the provided View in the Project Center in your PWA.
Please note: If you select the By view option, it is possible to select the Subprojects option and include subprojects into the backup operation as separate projects. In this case, subprojects will be backed up as separate projects, and it will be possible to select them separately for restore.
If this check box is not checked, then subprojects will be backed up together with master projects. In case it is required to restore the subproject, it will be needed to select the master project for restore and the subproject will be restored together with the master project and all other subprojects included in it.
Please refer to this article for more information about Master and Subprojects backup and restore.
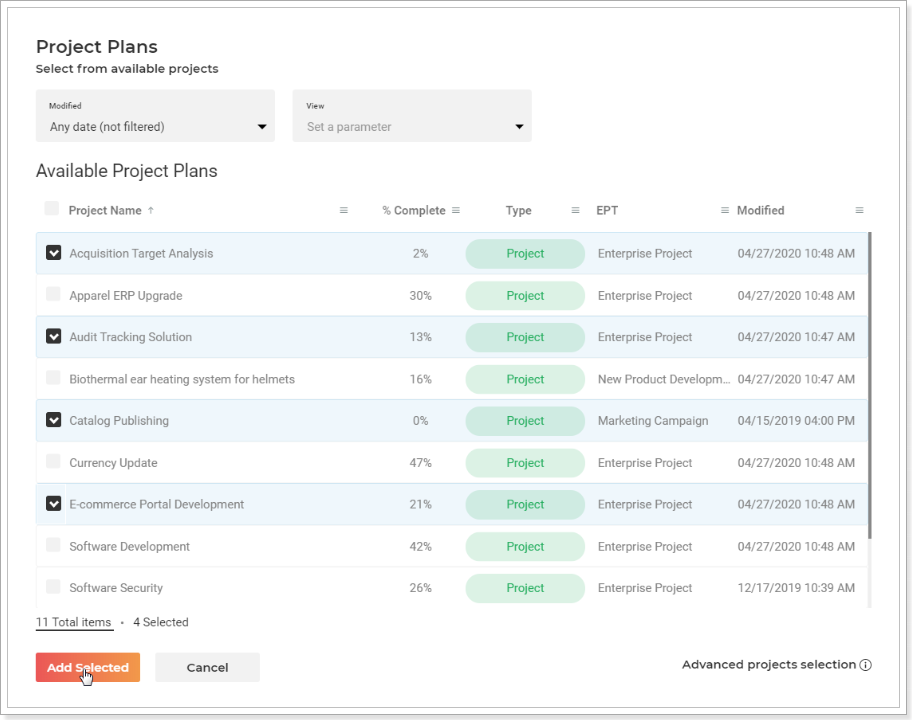
Selected - this option is used to select the projects which need to be backed up manually from the list of all projects in the user's PWA.
Check the Selected checkbox and click on the number link under it.

Allow a few minutes for the Projects to be loaded from the PWA you have selected.
Select the project you would like to back up right now. Click Add Selected button to confirm the selection and click Save on the next step.
Projects for selection can also be filtered by Project Center View. In this case, it is also possible to select the Subprojects option and load subprojects for selection as separate projects. In this case, subprojects will be backed up as separate projects, and it will be possible to select them separately for restore.

Please note: If you need to select the projects from different Project Center views, it is also possible. Select the required view, and check the checkboxes of the required projects. Then open the next view and select the projects that you need to include in this backup operation from this view as well. You will then see the total number of the selected projects by clicking on the Selected button that shows the number of projects that are currently selected for the current backup operation.
The Total Items button allows reviewing all projects loaded to the Project Plans screen.
Also, the projects can be additionally filtered out by the Project name, % Complete, Type, EPT, and Modified fields, using the button next to each field. You can provide the filtering criteria there to get faster to the projects you need.

Ignored - this option is used to exclude specific projects from the backup. The projects you select under this option will not be included in the backup. This option excludes the projects you do not need from the backup.
SharePoint Content
All - this option will include all SharePoint Sites from the user's Site Collection into a backup copy.
For selected projects - this option is used to back up the Project Sites of the Projects selected in the section above.
Modified - the option is used to back up incremental (delta) SharePoint Sites. Choosing the 'Modified - Today, Last 2-6 days' option, a backup of the SharePoint Sites that were updated in the selected period will be created.
Selected - this option is used to select the SharePoint Sites, which need to be backed up manually from the list of all Sites in the user's Site Collection. Please refer to the following article for detailed instructions - How to perform backup of specific project/-s.
Ignored - this option is used to exclude specific sites from the backup. The sites you select under this option will not be included in the backup.

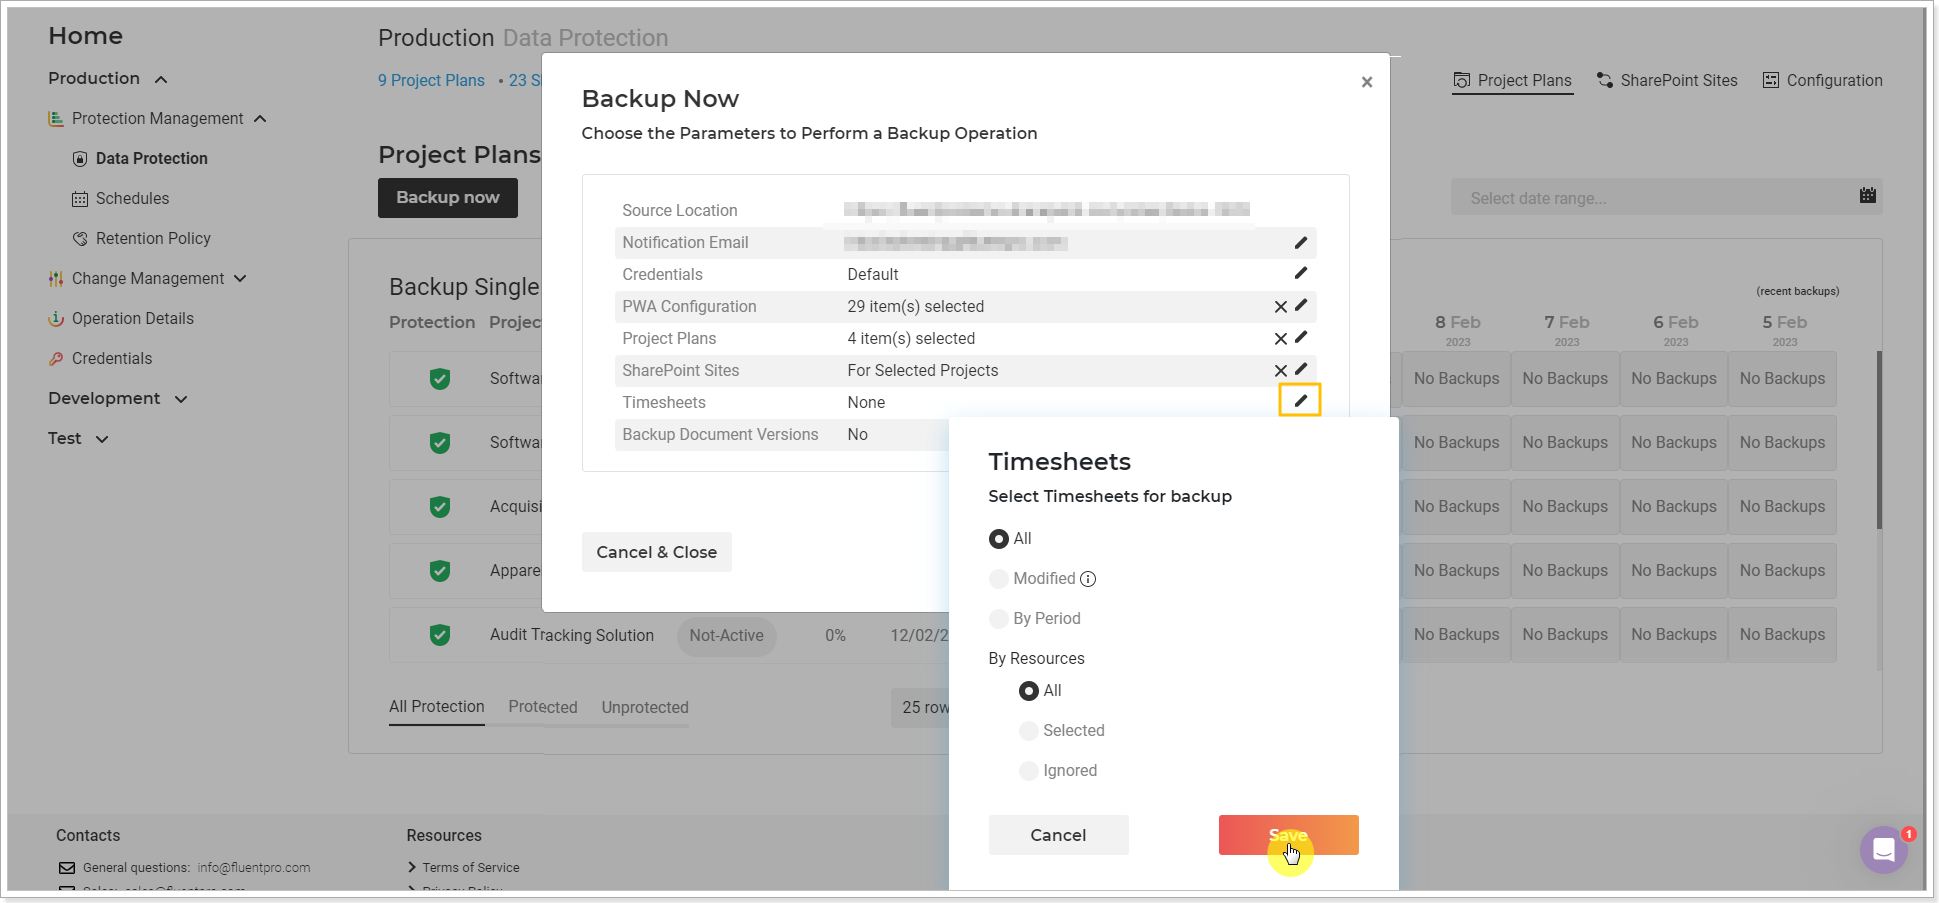
Timesheets
Click on the pencil-like button if you want G.A. Suite to create a backup copy of Timesheets.
All - this option will include all Timesheets into a backup copy.
Modified - this option is used to back up incremental (delta) Timesheets. Choosing the 'Modified - Last ... days' option, a backup of the Timesheets that were updated in the selected period will be created.
By Period - this option is used to include the Timesheets for the selected period in the backups schedule.
By Resources - using this option, you can select the Timesheets by resources. Using the Selected option, you can include the timesheets for the selected resources only. If the All option is selected, you can use the Ignored option to deselect specific resources, and they will not be included in the backup copy.
Please refer to the following article for detailed information about Timesheets backup and restore - Timesheets Backup & Restore.
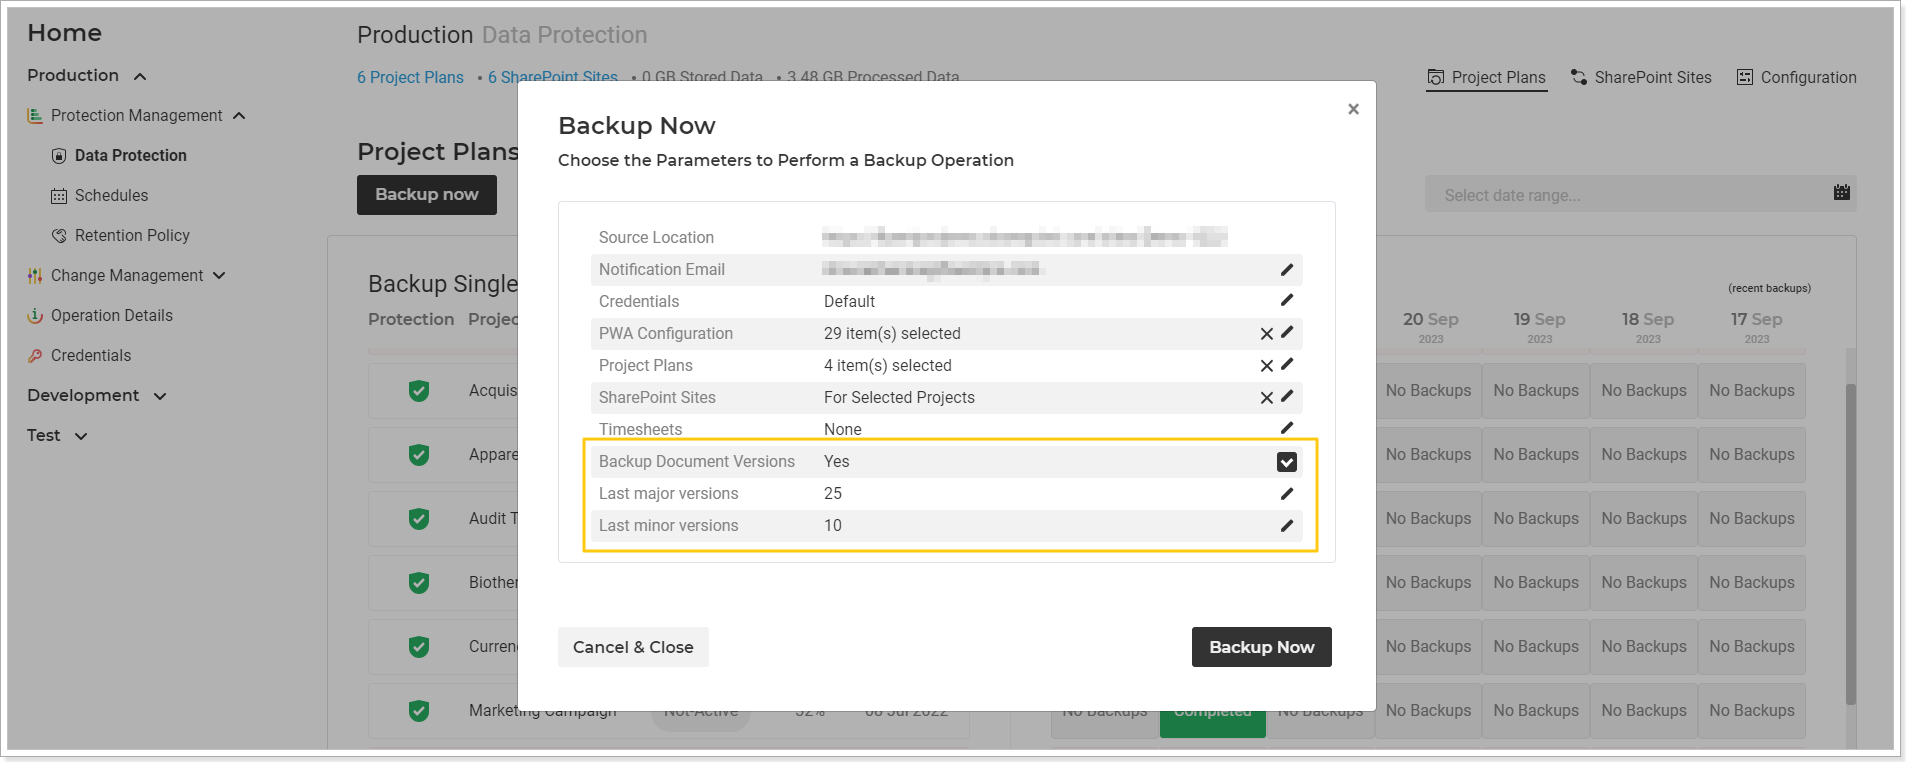
Backup Document/Item Versions - select this option if you need to migrate the document and/or item version history.
It is also possible to select the number of the latest item versions (major and minor) that you need to include in the backup.
If you type in the number for major and minor versions, 25 for example, only 25 latest versions will be included (25 major versions and 25 minor versions for each major one). If you type in 25 for major versions and 10 for minor versions, 25 latest major versions will be backed up, and 10 minor versions for each major one.
Please note: Document ID field values and values of the "Modified By" field are currently not supported for backup.
5) Click the Backup Now button to launch the backup process:
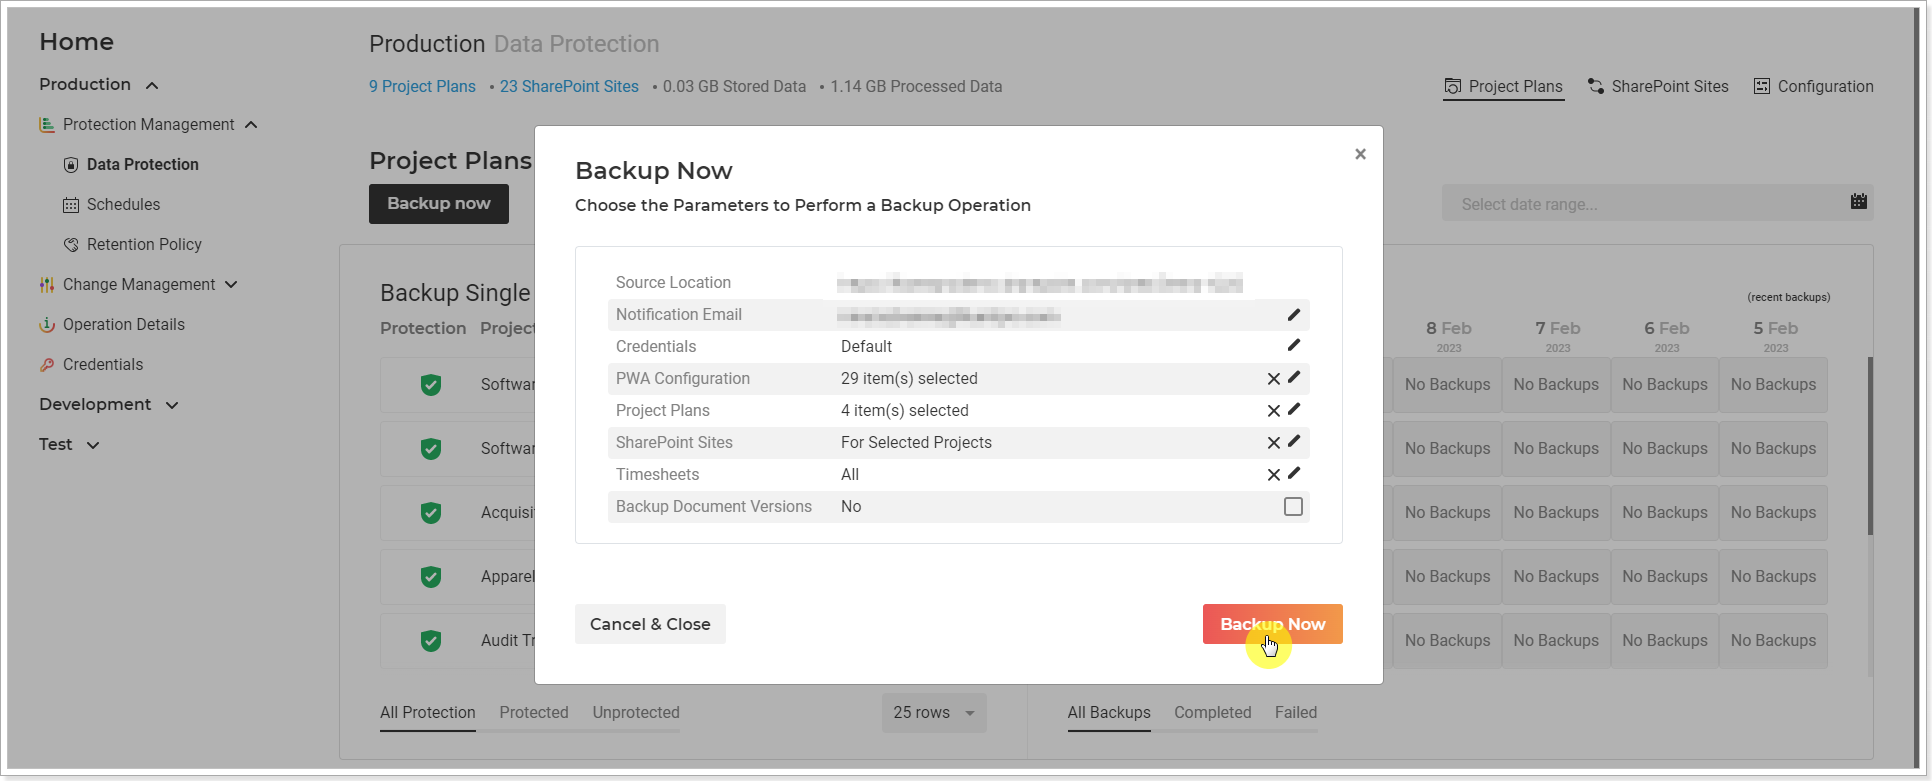
Backup Summary screen will be opened where you can review the information for the launched operation. You can Cancel and Pause the operation if required.
6) Click Close to return to the Data Protection page.
The operation will appear on the Operation Details page at once, and you can track progress there.
It is possible to sort the list of operations by the operation type, by status or/and by date range.
Also, the View options on the right allow you to select and review all operations at once, the operations of the Project Plans, SharePoint sites, or Configuration only.