
Account (PWA) Permissions option can be used for two main purposes:
1. Adding new users to your tenant in G.A. Suite.
2. Managing permissions for the selected users.
Adding new users to your tenant in G.A. Suite.
1) Visit the G.A. Suite website at https://gas.fluentpro.com and log in with your account.
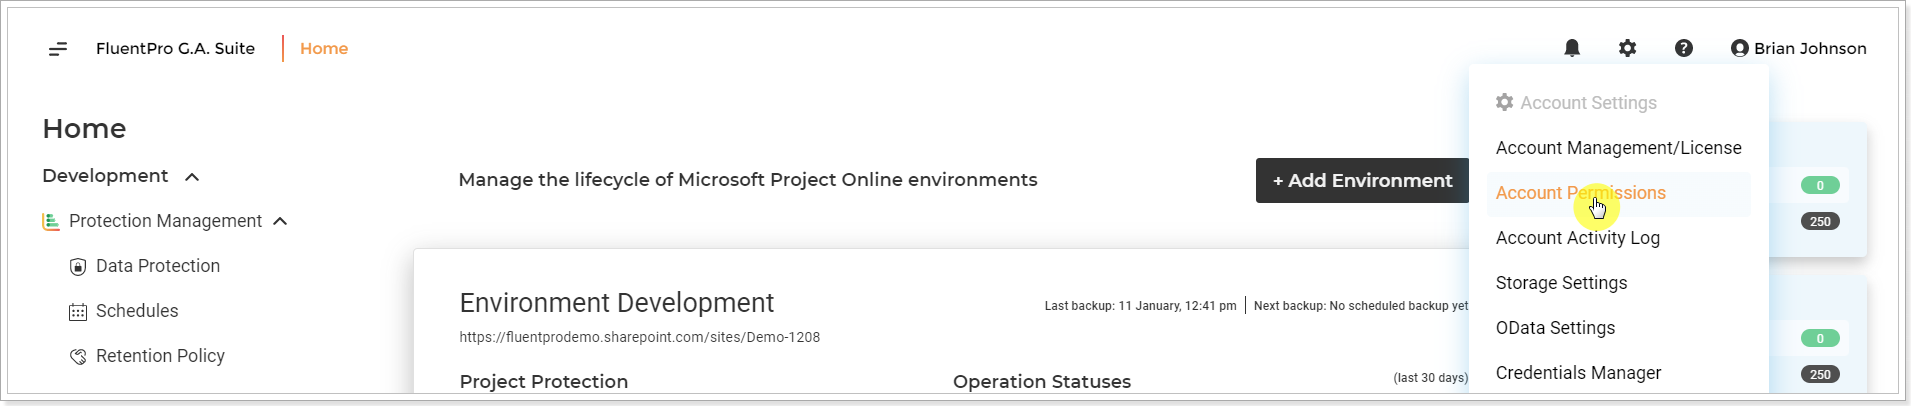
2) In the G.A. Suite Home Page click on the gear button in the right upper corner of the page and select the Account permissions option.
3) On the opened page, click Invite to add users to your G.A. Suite account:

4) On the opened page, provide the details of a user you would like to invite:
- First Name
- Last Name
Send Invitation - check the checkbox to send an email invitation to a person.
Login does not equal to email? - check the checkbox if a user will be using a login different from the email you are sending the invite to. Once you check the check-box additional 'Login' field will be displayed, where you can provide login information.
Click Invite once you are done.

5) After you click Invite, a new User will be added to your G.A. Suite, and an invitation will be sent to the specified email address.
The invited user can follow the link from the letter to access G.A. Suite.
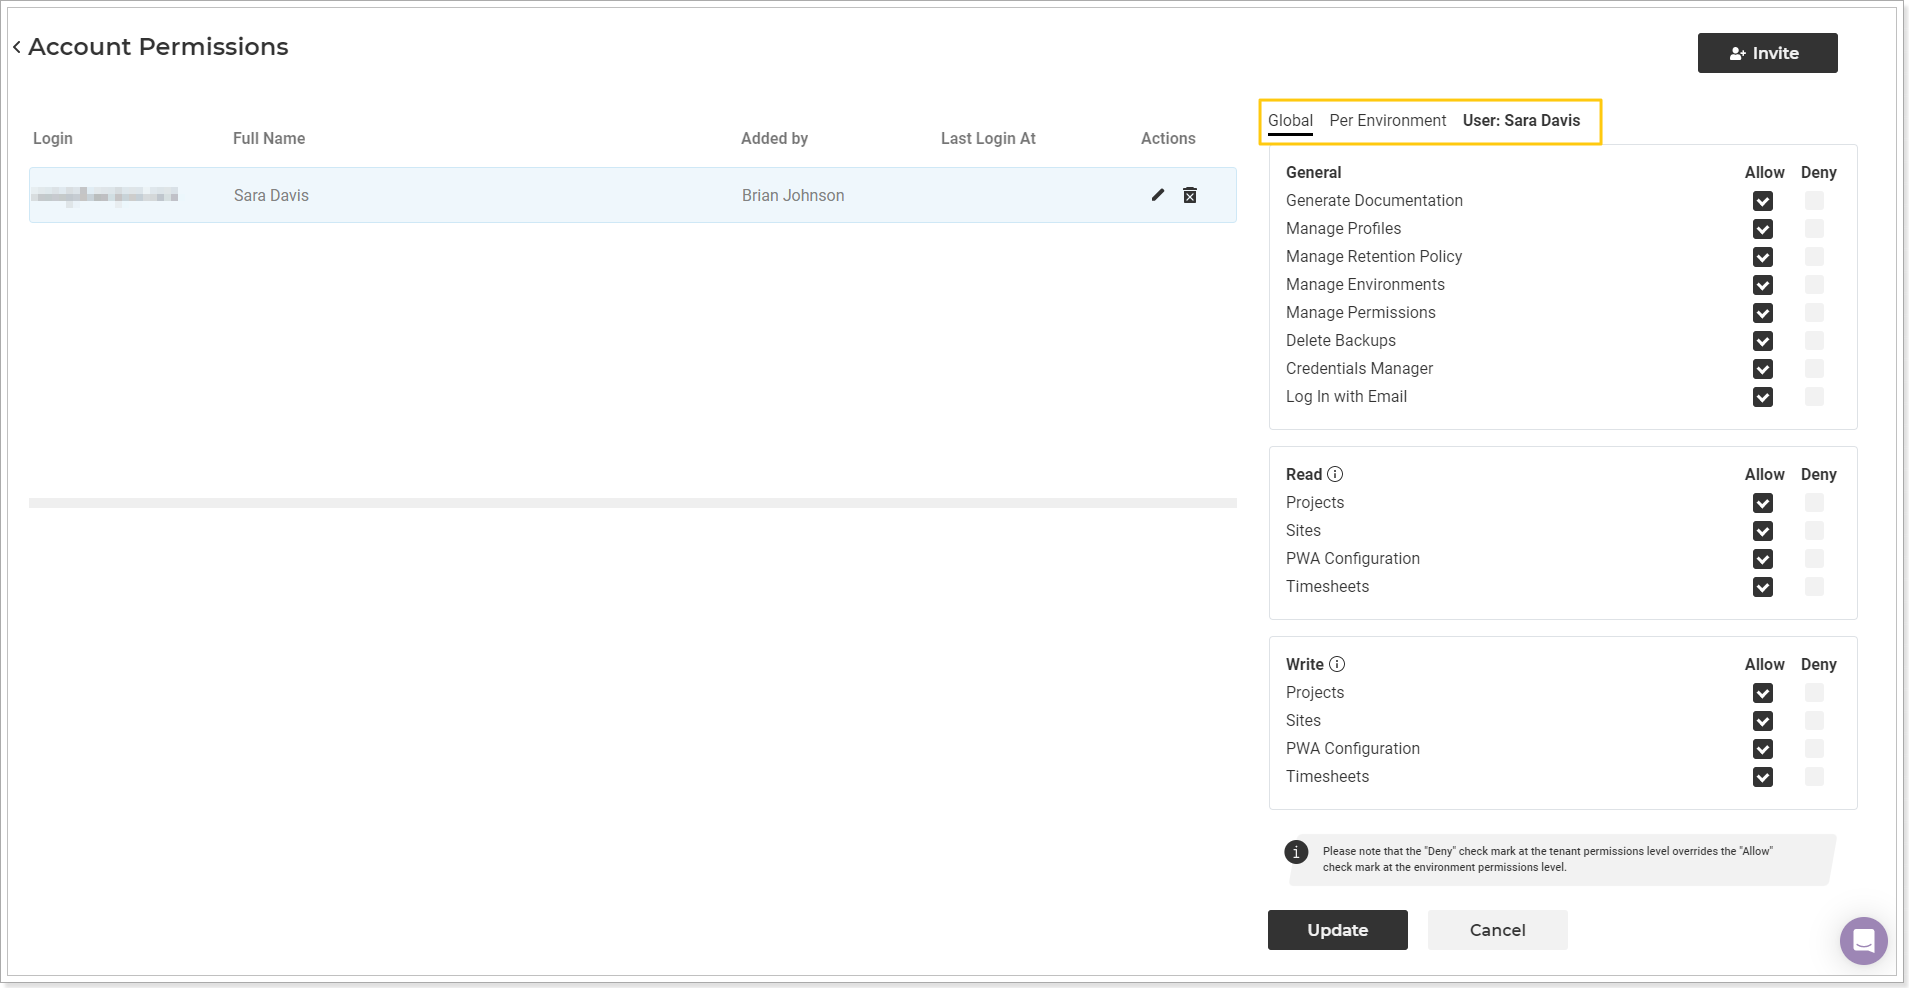
6) Click on the user to open the list of permissions for this particular user.
Choose "Allow" or "Deny" permission for a particular action. If none is selected, "Deny" permission is applied by default. Click Update to apply the selected permissions to the user.
Managing permissions for the selected users.
G.A. Suite allows managing permissions for a particular user. You can set up global (tenant-level) permissions and permissions per environment (PWA-level) for a particular user.
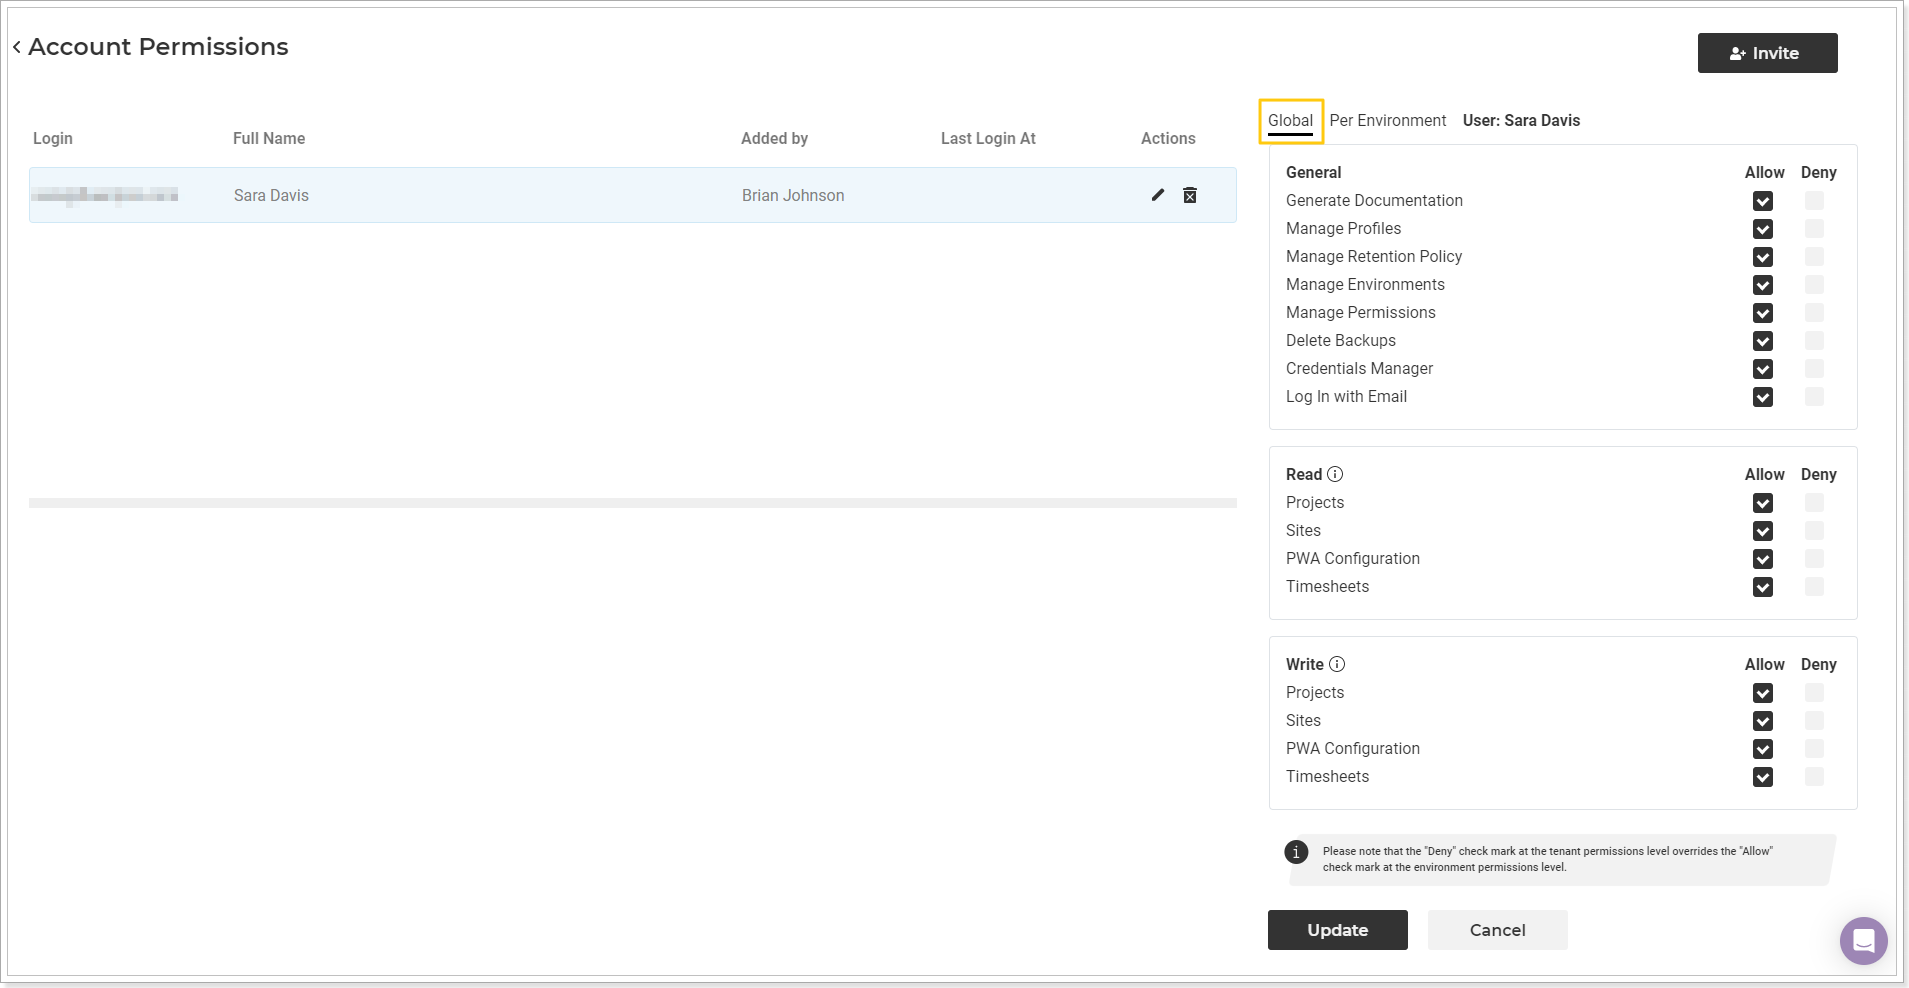
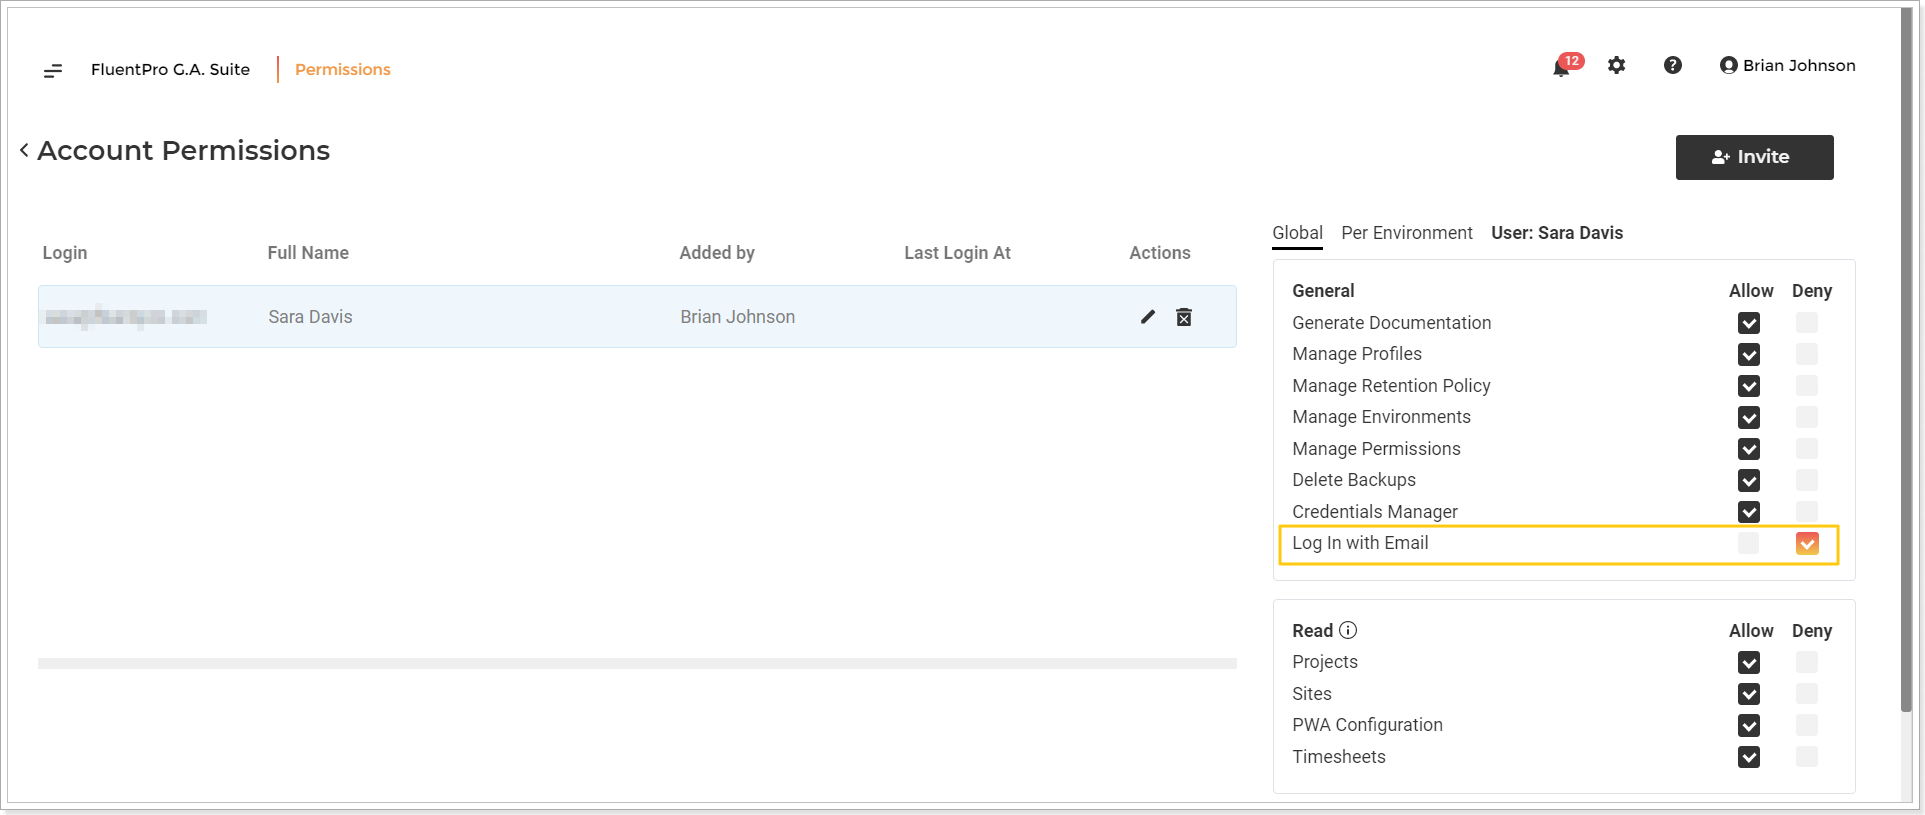
1. Global permissions can be accessed once you click on a particular user on the left.
'Credentials Manager' permission allows users to edit credentials on the Credentials and Credentials Manager pages and add credentials using the 'Add new account to the list' option.
Click Update to apply the selected permissions to the user.
2. Per environment permissions can be accessed once you press the corresponding Per environment button.
Select the required PWA from the list of your environments (PWAs).
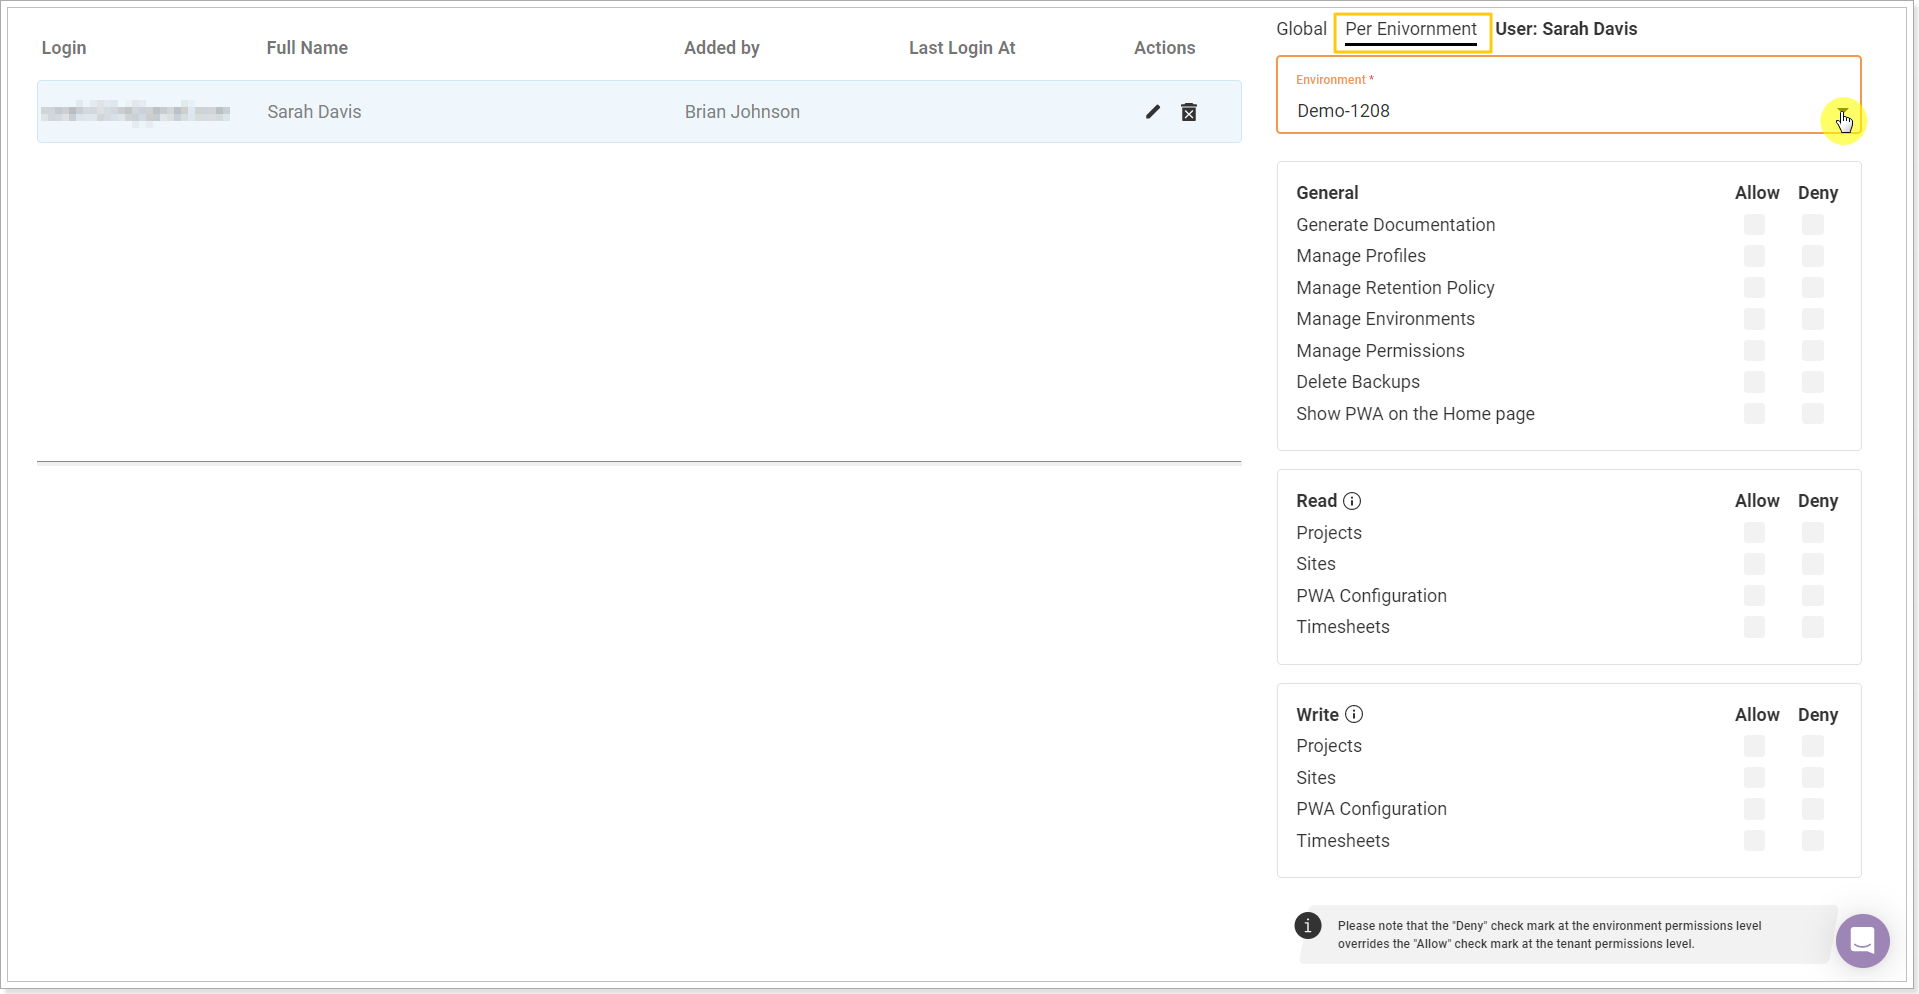
By selecting a particular PWA from the list, you can set specific G.A. Suite permissions for the currently selected user.
The 'Show PWA on the Home page' option allows showing/hiding the PWA for the selected user. If the PWA is not allowed, the user will not see it on the homepage. Also, the PWAs that are not allowed for the user will not be available for performing G.A. Suite operations. By default, all PWAs are available for all users.
Click Update to apply the selected permissions to the user.
To get back to managing global permissions, press the Global button.
Forbid users to log in with Email
It is possible to forbid a user to log in to G.A. Suite with the Email option on the Account Permissions page. In this case, users can only log in using the Office 365 option.
The 'Log in with Email' option is turned on by default. To forbid users from logging in with Email, click 'Deny' for all required users.
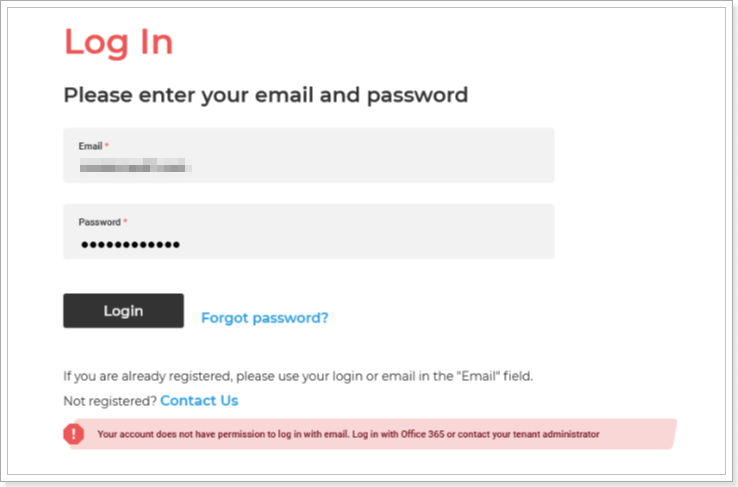
In this case, users who try to log in with the Email option will receive a 'Your account does not have permission to log in with email. Log in with Office 365 or contact your tenant administrator' message.
Some permission peculiarities
1. If neither the "Allow" nor "Deny" right is chosen for the global permissions, "Deny" is automatically applied.
2. If neither the "Allow" nor "Deny" right is chosen for the per-environment permissions, global permissions are applied.
3. "Deny" right is superior to "Allow" right. This means:
- If "Deny" is selected on a global level, no per-environment-level "Apply" would work;
- If "Apply" is selected on a global level, per-environment-level "Deny" will be superior for the selected PWA.
4. Global permissions will be applied to all newly added environments (PWAs).
To edit user information, click on the pencil-like button next to the user you want to edit information for.
To delete a user account, click the delete button.
