To start using FluentPro G.A. Suite service it is required to sign up to the application and register an account. The personal link for sign-up is provided by FluentPro Customer Success Team.
As you sign up for G.A. Suite, a G.A. Suite tenant will be created. Global Administrator rights will be assigned to the registered G.A. Suite account, and you will be able to invite other users to the registered G.A. Suite tenant later as needed.
1. Open the G.A. Suite application by the link you receive from the Customer Success Team.
2. On the Sign Up page, select the Authentication type to log in to G.A.Suite.
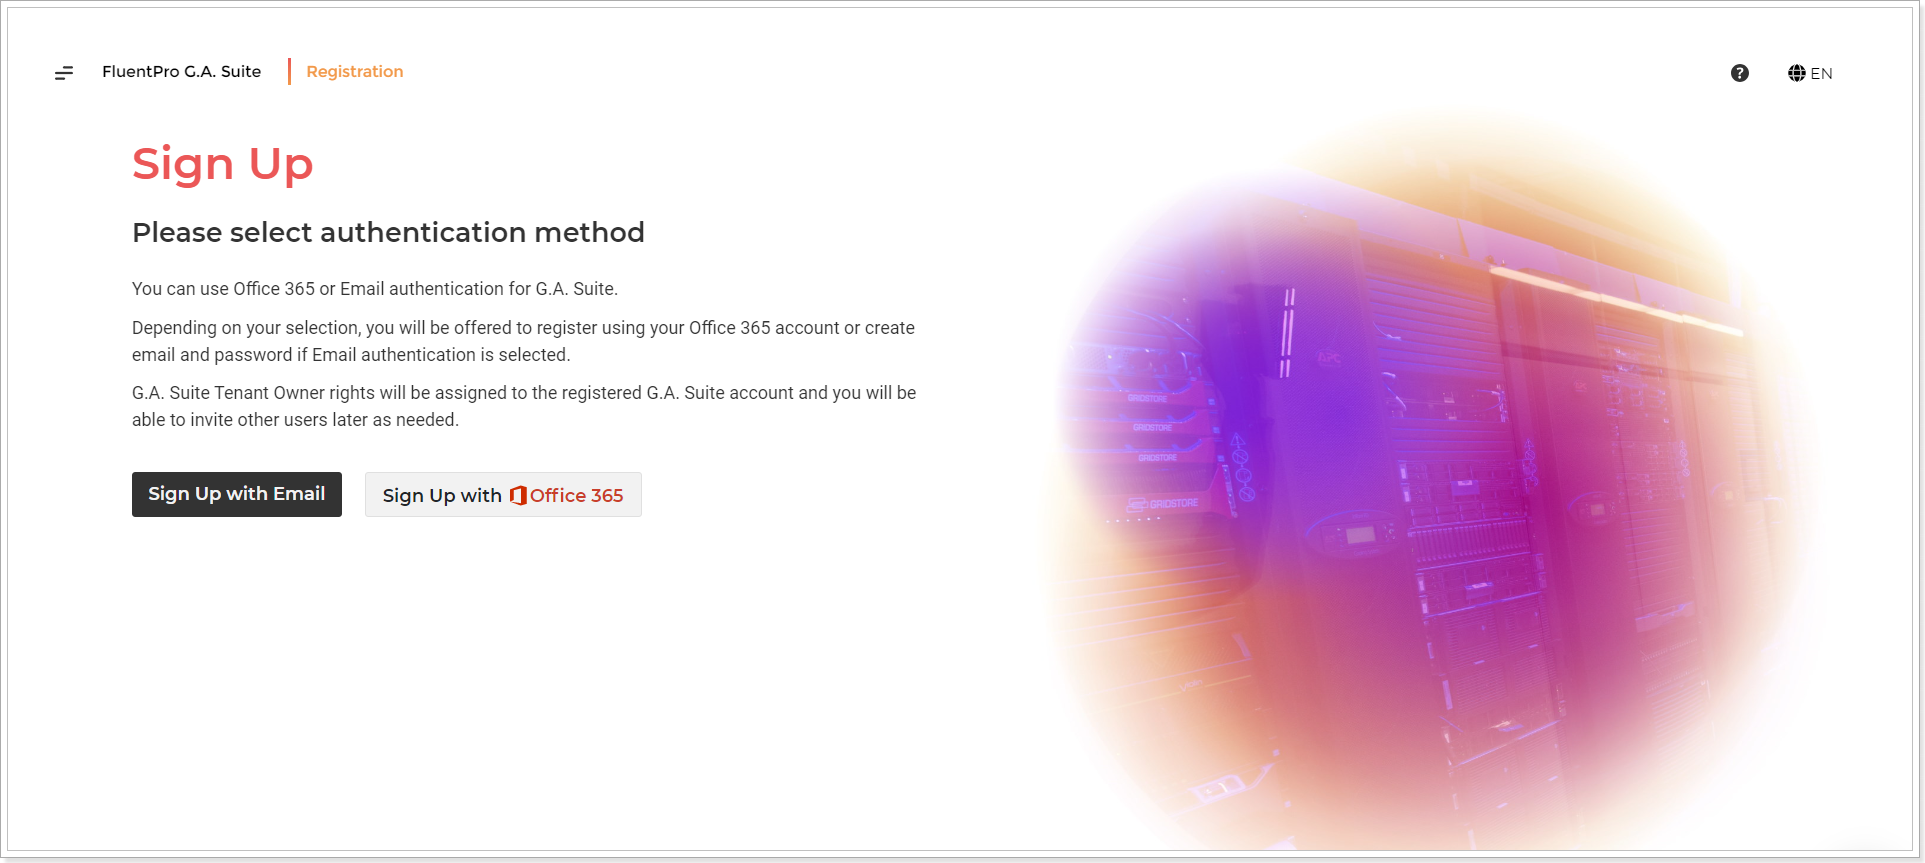
You can use Office 365 or Email authentication for G.A.Suite.
Depending on your selection, you will be offered to register using your Office 365 account or create an email and password combination if Email authentication is selected.
Global Administrator rights will be assigned to the registered G.A. Suite account, and you will be able to invite other users to the registered G.A. Suite tenant later as needed.
Please note: Opening G.A. Suite for the first time, your user interface will be in English or French depending on your Browser Language. You may always change G.A. Suite language using the Language selector in the right upper corner of the page.

Office 365 authentication type
To sign up for G.A. Suite using your Office 365 account, perform the following:
1. Click the 'Sign up with Office 365' button.
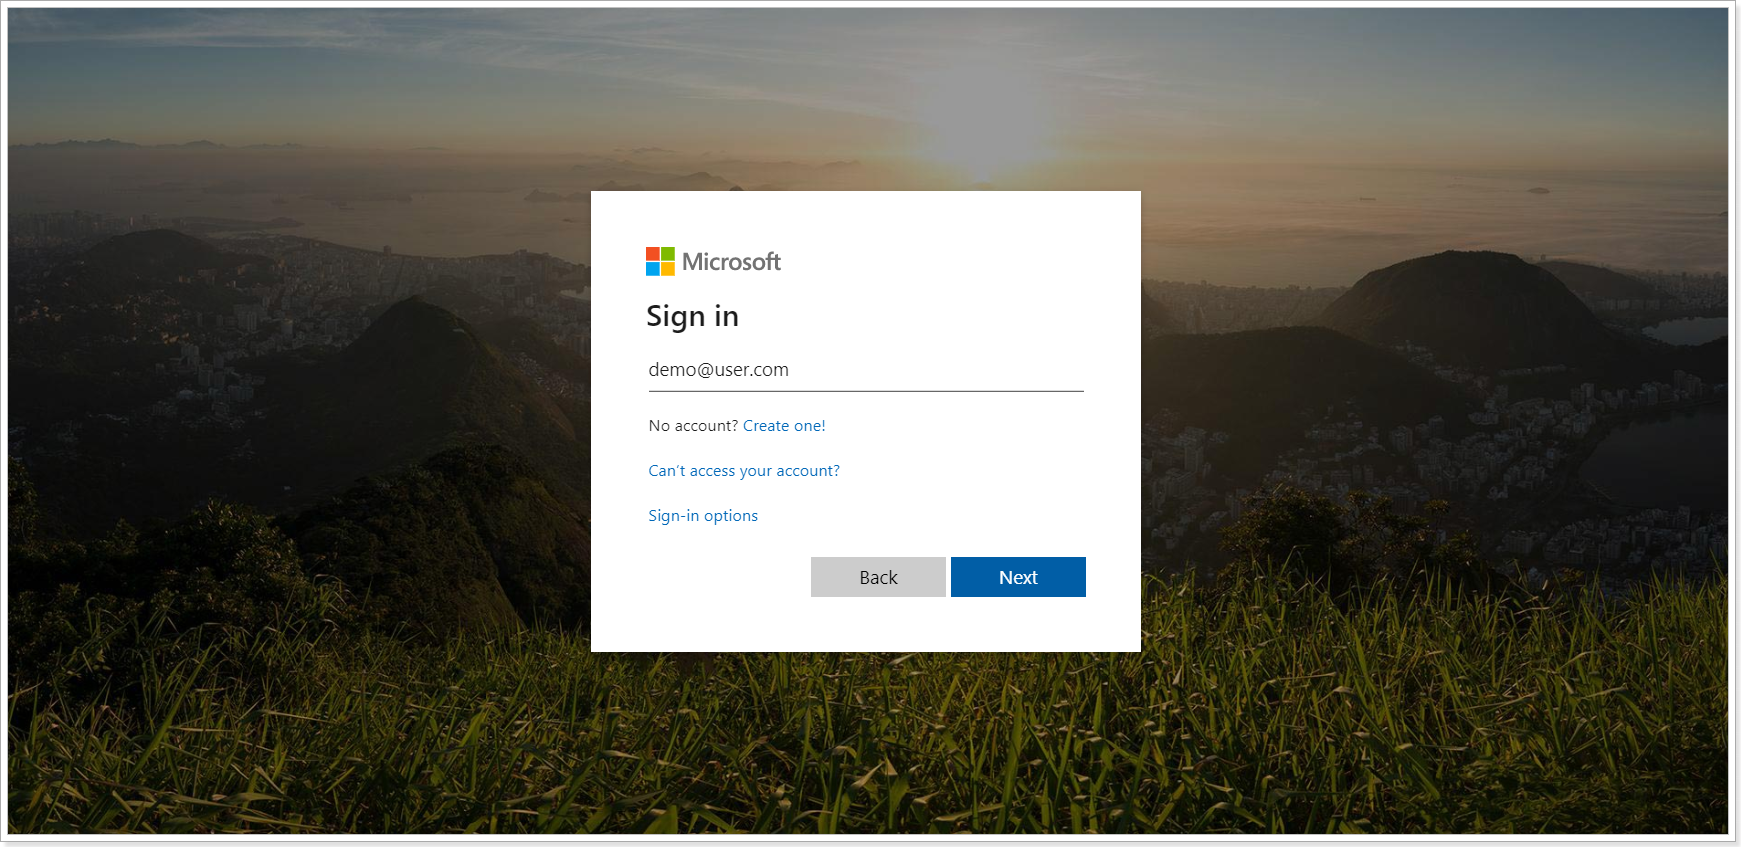
2. On the Office 365 login page, select the account you will use to log in to G.A. Suite.
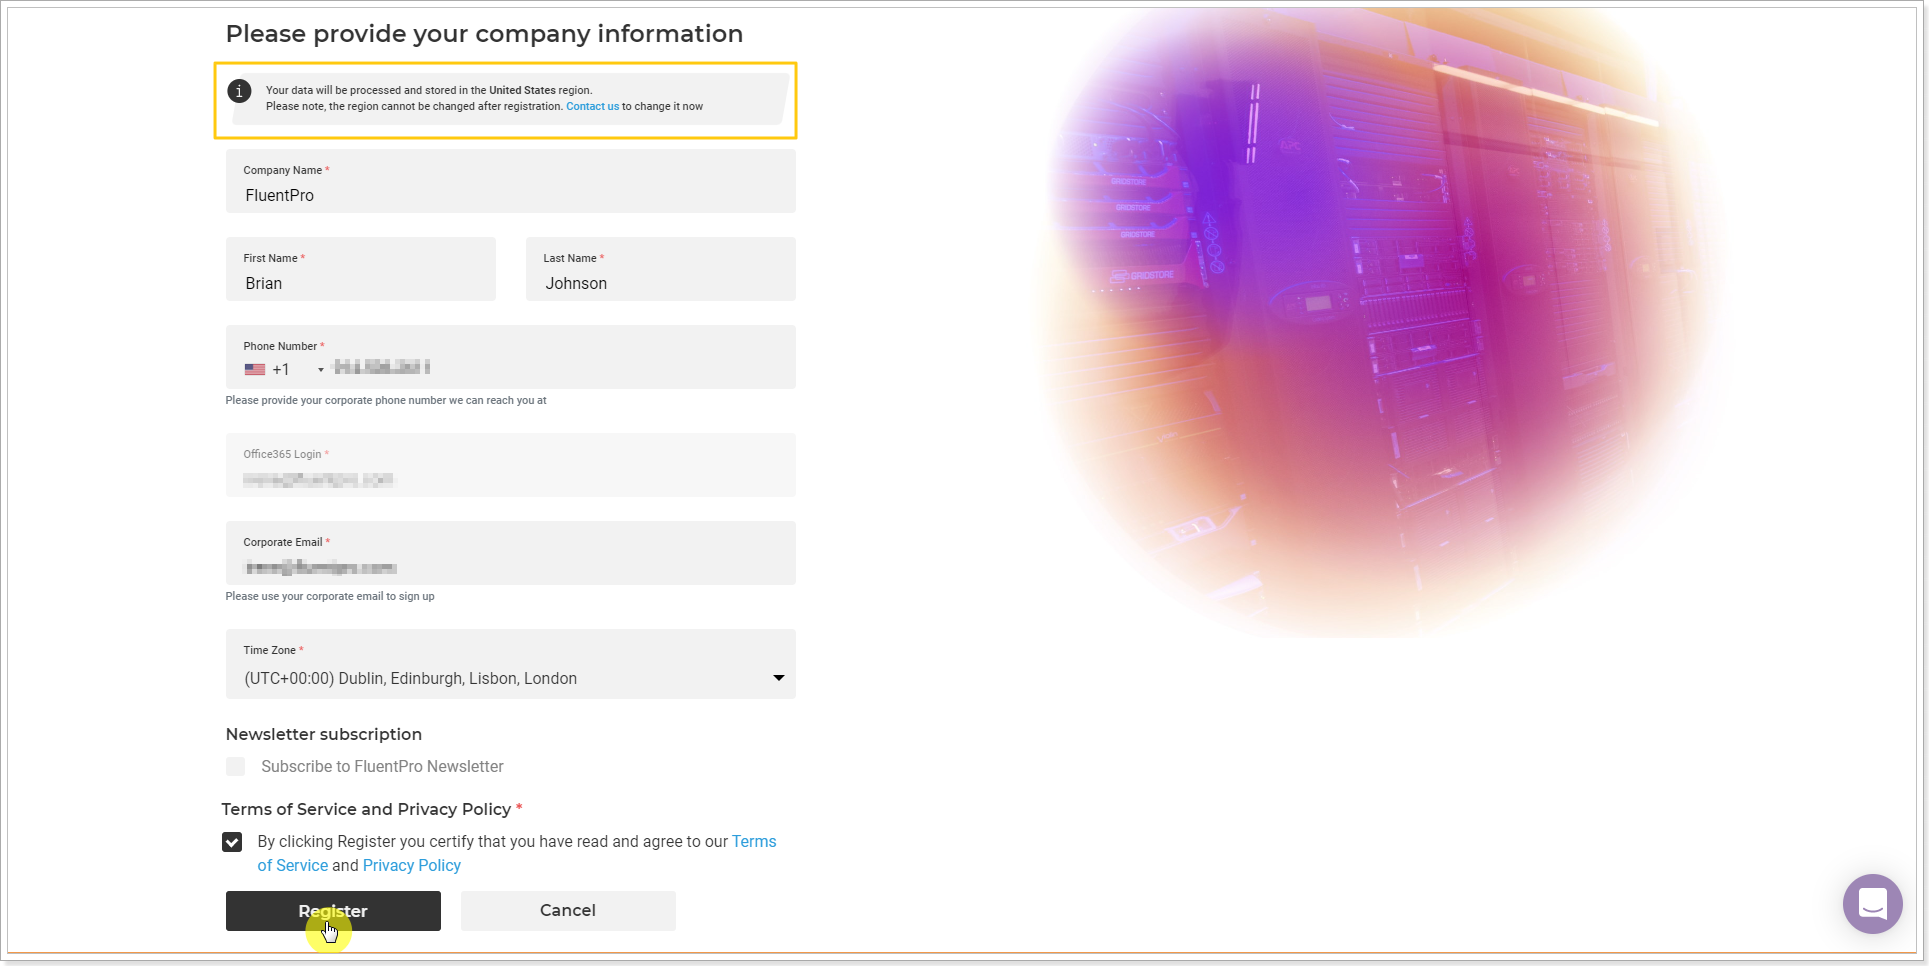
3. You will get to the page where you need to provide your company information at once. Provide the required information, confirm that you agree to the Terms of Service and Privacy Policy, and click the 'Register' button.
Please note: It is possible to select the region where the data will be stored and processed in FluentPro Azure Storage: either in the European Union region, Azure West US 2 region, Azure Canada Central region, United Kingdom region, or Australia Central region. The region is selected at product purchase and cannot be changed later.
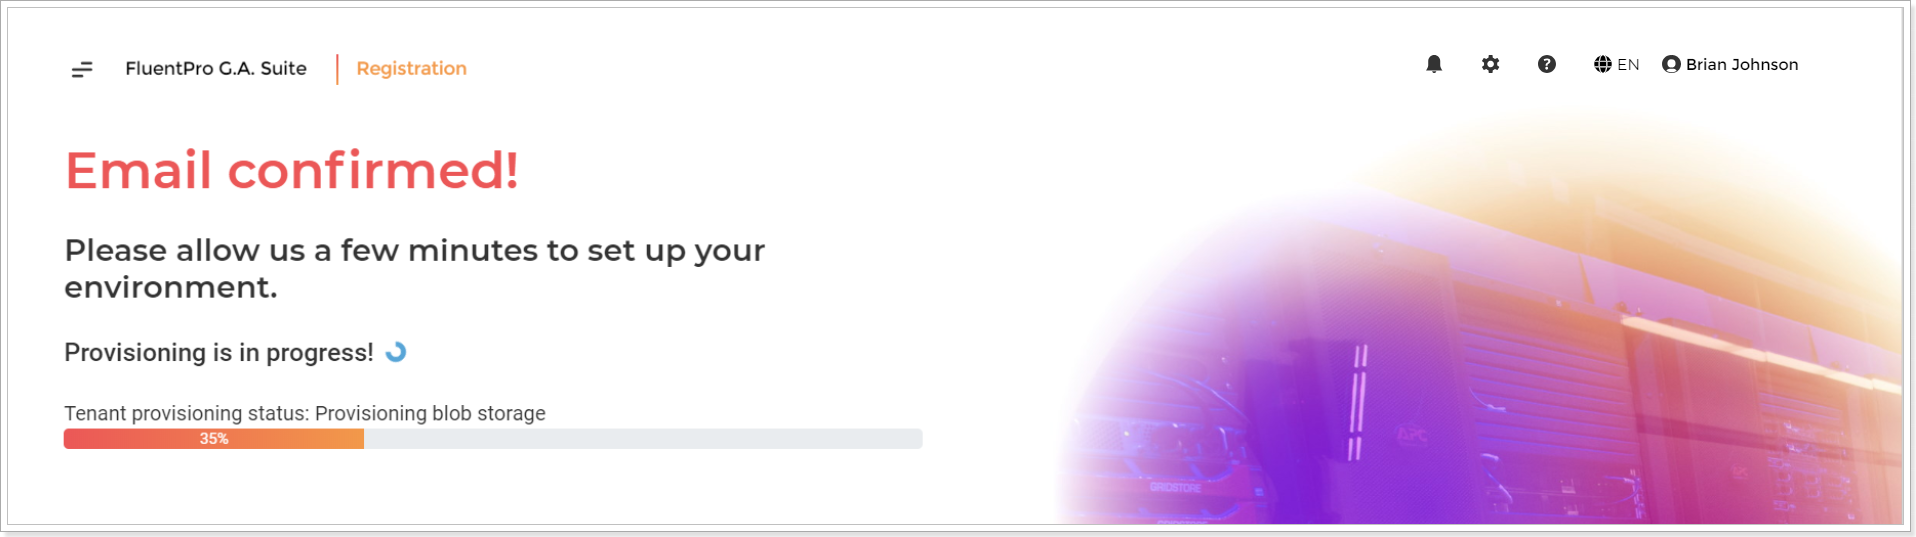
4. An email with a confirmation link will be sent to your email address. To complete the sign-up process, please follow the confirmation link you received.
If you do not receive a confirmation email, please check your spam folder and verify that you entered a valid email address in our sign-up form.
5. Allow G.A. Suite a few minutes to provision an account for you.
6. On the next page, read the information, review G.A. Suite onboarding videos, if needed, and click 'Continue' to start configuring your first backup.
Multi-factor Authentication for Office 365 users is also available.
As you Sign up for G.A. Suite, you can use Office 365 accounts with multi-factor authentication enabled. The steps to sign up with multi-factor authentication will be the same as described in this article.
Email authentication type
To sign up for G.A. Suite using your Email, perform the following:
1. Click the 'Sign up with Email' button.
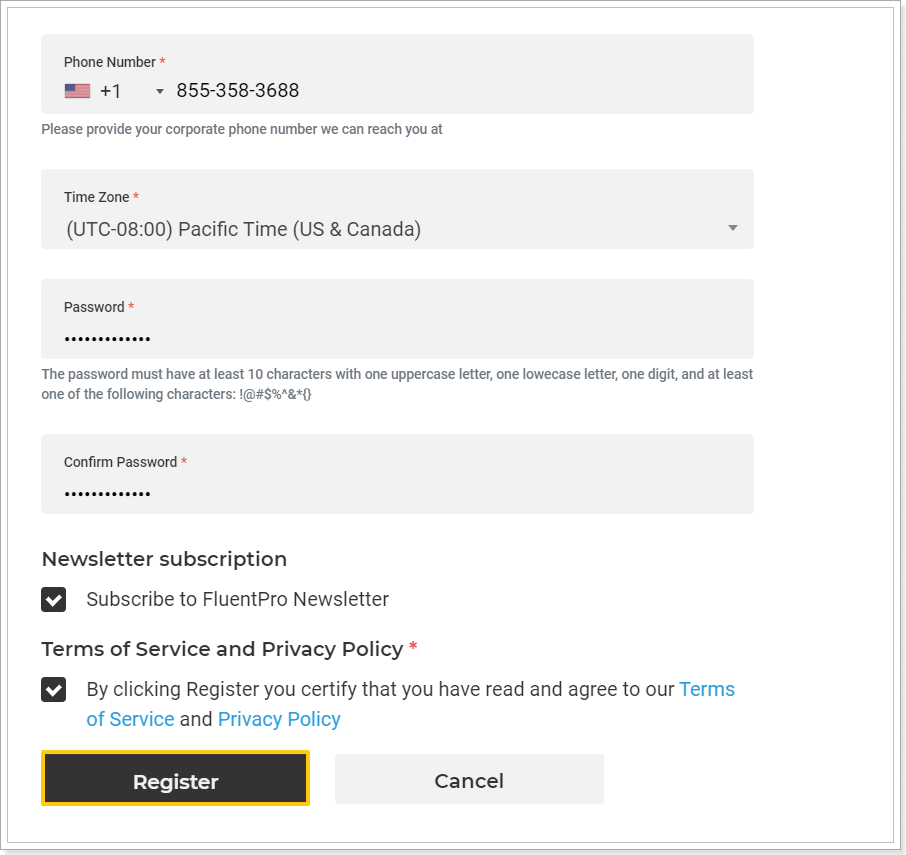
2. On the next step, provide your company information and create a password you will be using to sign in to G.A. Suite.
Please note: It is possible to select the region where the data will be stored and processed in FluentPro Azure Storage: either in Azure West US 2 region, Australia Central or Azure Canada Central region. The region is selected at product purchase and cannot be changed later.
Confirm that you agree to the Terms of Service and Privacy Policy and click the 'Register' button.
3. An email with a confirmation link will be sent to your email address. To complete the sign-up process, please follow the confirmation link you received. If you do not receive a confirmation email, please check your spam folder and verify that you entered a valid email address in our sign-up form.
4. Allow G.A. Suite a few minutes to provision an account for you.
5. On the next page, read the information, review G.A. Suite onboarding videos, if needed, and click 'Continue' to start configuring your first backup.
Please note: If you sign up to G.A. Suite using Office 365 account, you can use both Office 365 or Email options to log in to G.A. Suite later on. If you signed up to G.A. Suite using an Office 365 account and then selected the Email option to log in, you will need to provide the Office 365 email that you used to sign up and create a password that will be used to log in to G.A. Suite.
If you signed up using the Email option and provided Office 365 email, you can later log in using the Office 365 option, entering the same email you used to sign up.
On-Boarding Wizard
As you sign up to G.A. Suite, the onboarding wizard will be opened at once, using which you will be able to add your first PWA and schedule your first backup.
To add your first PWA environment to G.A. Suite and schedule your first backup, perform the following:
1. Click the 'Add PWA Environment' button.

2. Provide PWA URL and credentials and click the 'Verify Account' button.
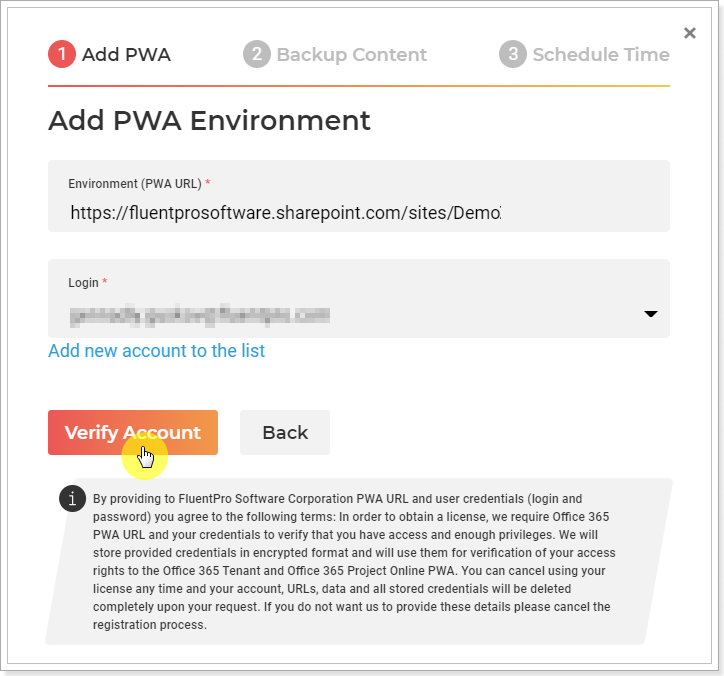
Please note: The PWA account should be a member of the PWA Administrators group and have Site Collection Administrator rights.
Office 365 accounts with multi-factor authentication enabled can also be used. To find the details on how to use accounts with multi-factor authentication, please follow this link.
Please note: G.A. Suite cannot establish a connection to Project Online tenants with ADFS (Active Directory Federation Service) enabled. For detailed information on how to add PWA to G.A. Suite with ADFS enabled, please refer to this article.
3. After your PWA is successfully verified, it can be added to G.A. Suite. Click 'Activate' to proceed and apply a license to the provided PWA.
4. Select backup content.
PWA Configuration can be selected using the 'Default' option, using which everything except Delegation, Gantt Chart Format, and Grouping Format will be chosen, or partially checking the 'Selected' checkbox and selecting the required PWA Configuration elements in the window that appears.
For Projects, several options are available:
All - this option will include all Projects and Project Plan Templates from the PWA into a backup copy;
Modified - this option allows performing a backup of incremental (delta) Project data. Choosing 'Modified - Today, Last 2-6 days or a custom date (up to 30 days)' options, a backup of the Projects that were updated in the selected period will be created:
By View - this option allows users to provide the name of Project Center View. The backup copy will then include only the projects which fall under the provided View in the Project Center on your PWA.
Please note: If you select the By view option, it is also possible to select the Subprojects option and include subprojects into the backup operation as separate projects. In this case, subprojects will be backed up as separate projects, and it will be possible to select them separately for restore.
If this check box is not checked, then subprojects will be backed up together with master projects. In case it is required to restore the subproject, it will be needed to select the master project for restore, and the subproject will be restored together with the master project and all other subprojects included in it.
Selected - this option allows selecting the projects which need to be backed up manually from the list of all projects in the user's PWA. Click the number link button to load the project list for selection.

Ignored - this option is used to exclude specific projects from the backup. The projects you select under this option will not be included in the backup. This option is useful to exclude the projects you do not need anymore. For example, you can select the 'All' option and exclude unnecessary projects. In this way, newly created projects will be included to the backup schedule automatically.
For SharePoint Sites, several options are available:
All - this option will include all SharePoint Sites from the user's Site Collection into a backup copy;
Modified - the option allows performing a backup of incremental (delta) SharePoint Sites. Choosing the' Modified - Today, Last 2-6 days' options, a backup of the SharePoint Sites that were updated in the selected period will be created.
Selected - this option allows selecting the SharePoint Sites, which need to be backed up manually from the list of all Sites in the user's Site Collection. Please refer to the following article for detailed instructions - How to perform a backup of a specific project/-s.
For selected projects - this option allows backing up the Project Sites of the Projects, which were selected in a section above.
Ignored - this option is used to exclude specific sites from the backup. The sites you select under this option will not be included in the backup.
Timesheets are also available for selection.
SharePoint document versions can also be included for backup.
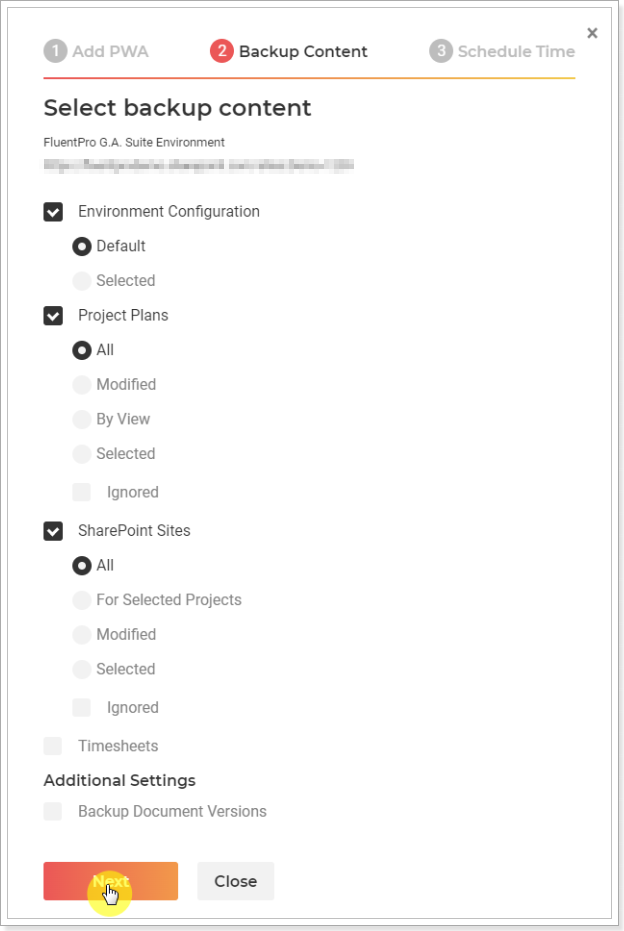
5. Click 'Next' to proceed.
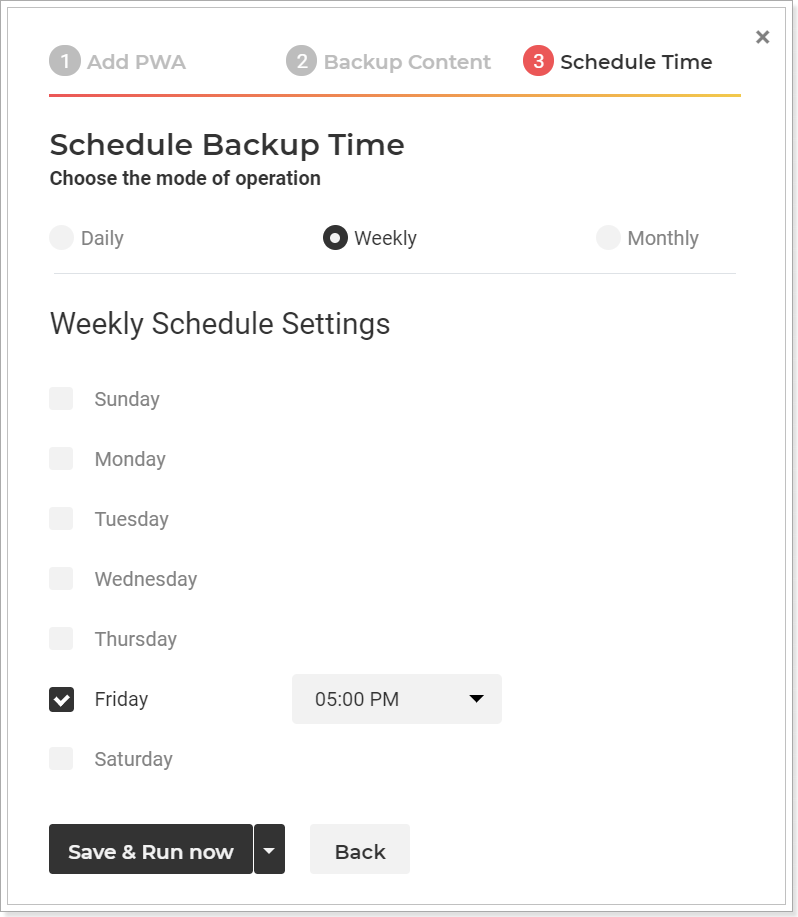
6. Schedule backup time by selecting the type of backup: Daily, Weekly, Monthly. Select the day and time when the backup will take place and click the 'Save and Run now' or 'Save' button.
7. Your first backup schedule will be created and launched. You will be redirected to the Backups page where you can track backup progress and status.
Click 'Ok" to complete and close the wizard.
On the Backups page, you can track the progress of the backup you have launched, launch another backup or restore as required.