
After PWA Projects are in place in the target PWA, the next step is to upload SharePoint content - Project Sites - using the 'Upload SharePoint Sites' wizard.
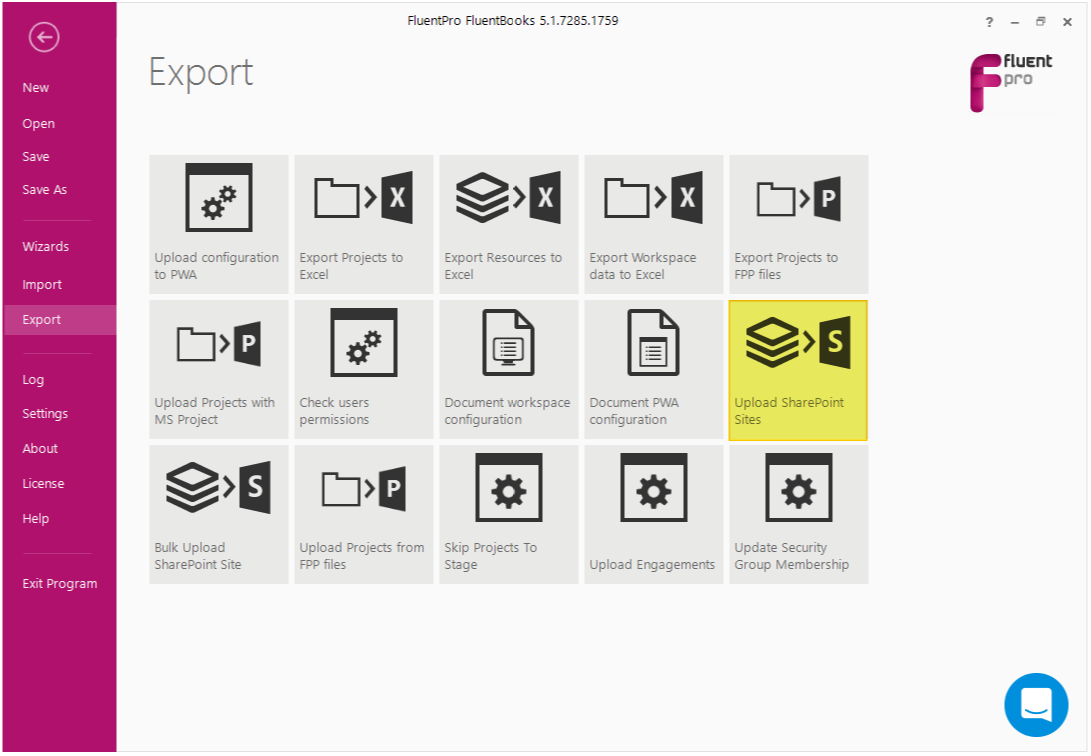
1) Select the Export option from the File menu and then the ‘Upload SharePoint Sites’ wizard.
Please note: Before uploading SharePoint Sites, the Tenant Administrator should navigate to the SharePoint admin center -> Active Sites -> Select the site in question -> Open the Settings page -> Click Edit under the "Custom script" setting. Select "Allowed" and save the changes. This will allow the account you are using in FluentBooks to upload site templates, custom forms, views, etc. With this option set to "Blocked", the upload will end with errors. For more details, please refer to this article.
2) Specify the Root Site URL of the target PWA, login credentials.
Turn the setting “Load sites from separate workspace file” on if you downloaded SharePoint sites with “Save each site into separate workspace file” setting turned ON. In the Folder field specify the path to the folder where sites were downloaded.
Turn on "Users Mapping" setting if your source and target PWAs are in the different tenants/farms.
Enable other settings as needed. For more information about upload settings please refer to the article.
Click Next to load the Sites list.
Note: If you downloaded SharePoint sites with “Save each site into separate workspace file” turned OFF (all sites were saved into one workspace), open the workspace firstly.
In the workspace select all the Subsites that need to be uploaded to the target PWA by checking their checkboxes. Root PWA Site checkbox may be left unchecked since this site was uploaded as the very first step of the Upload step of migration.

Only after that start the 'Upload SharePoint Sites' wizard.
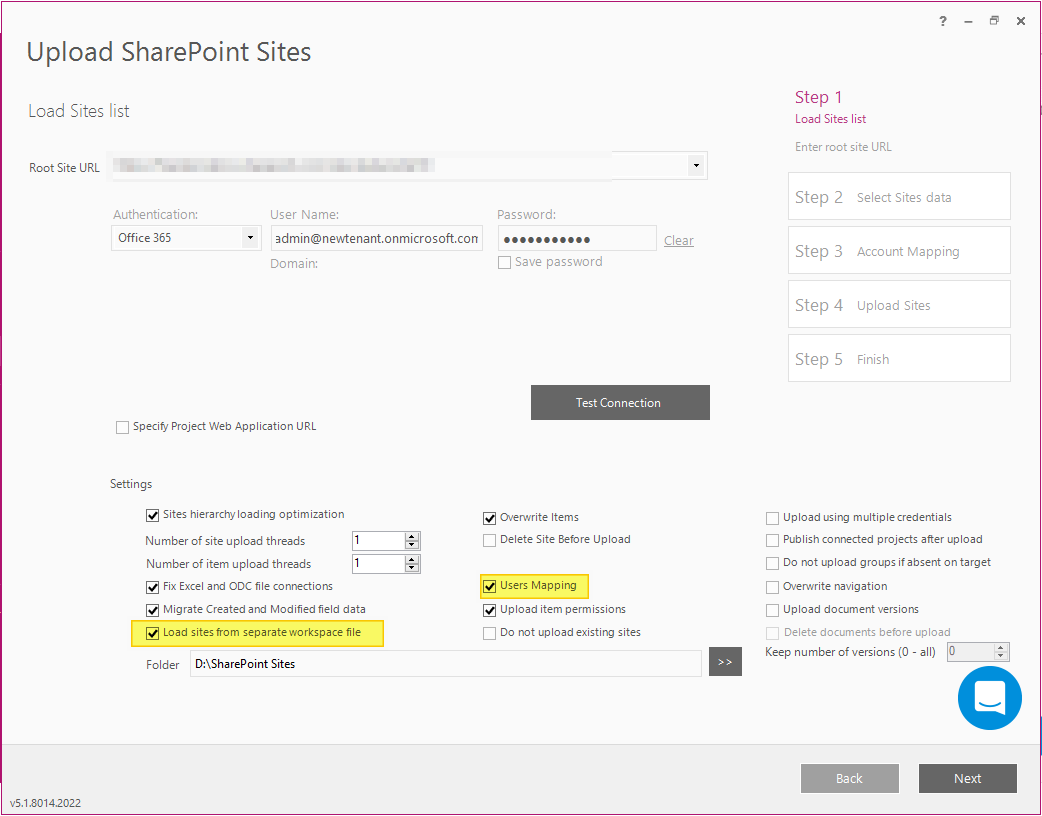
3) In the loaded list, select the Subsites to be exported to the target PWA and click Next to proceed.
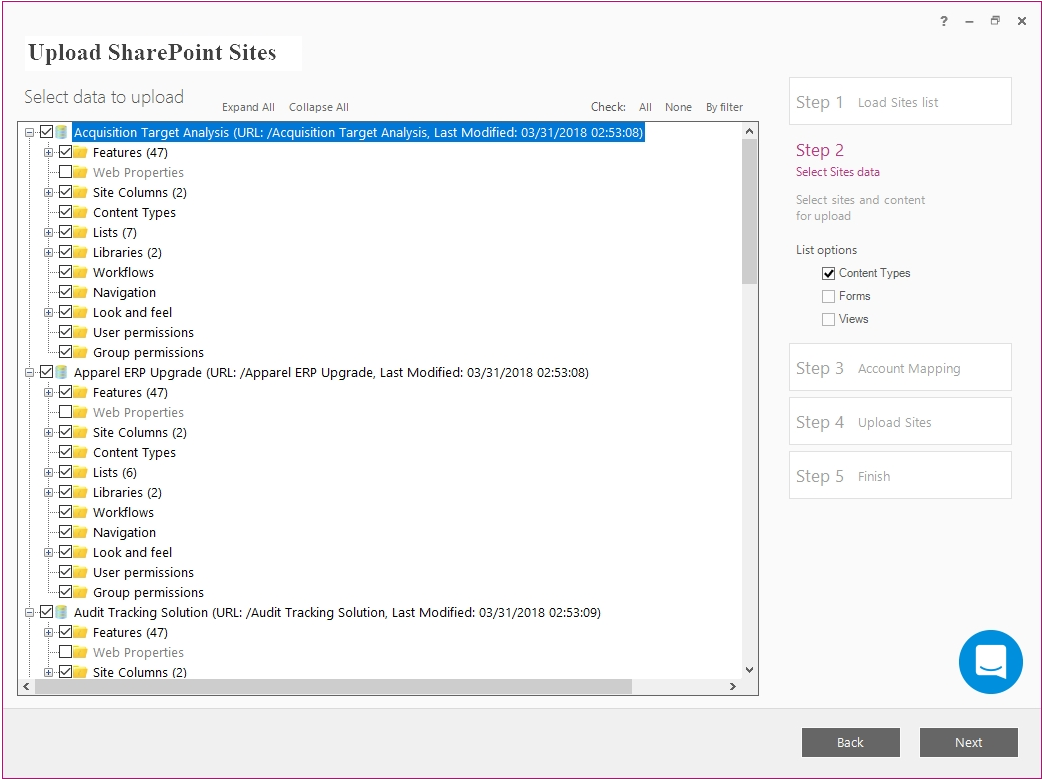
4) If Users Mapping is turned OFF you will go straight to the Sites Upload step, where you will be able to check that the URLs and Site Templates are correct.
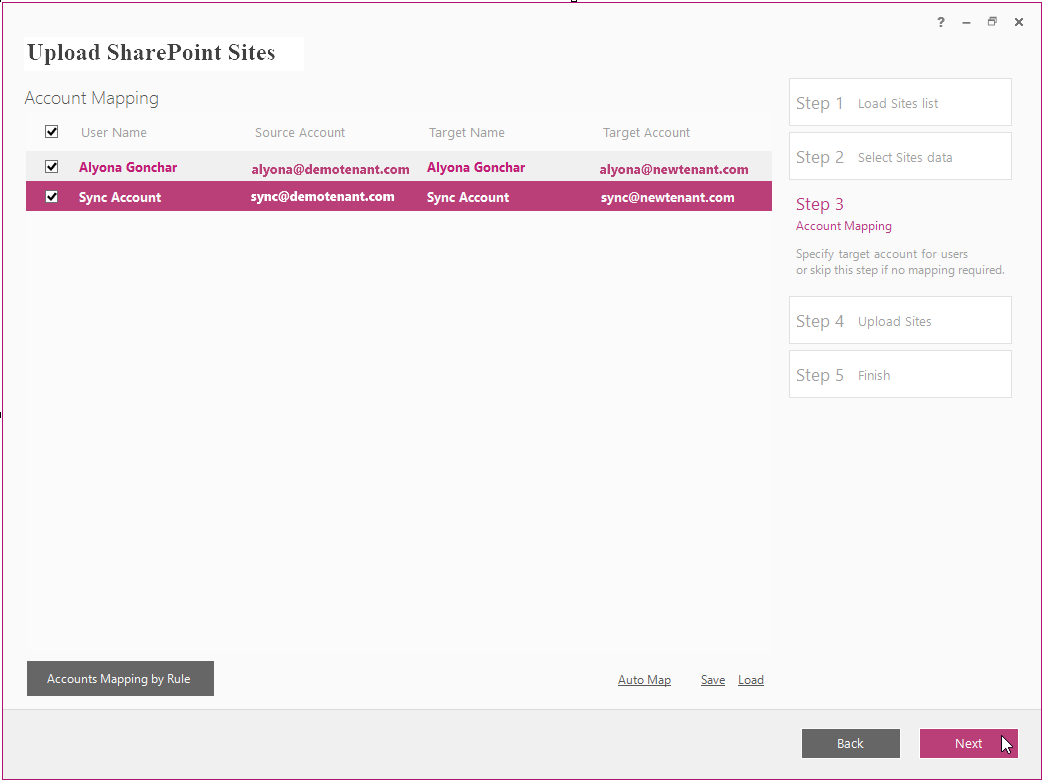
5) If Users Mapping is turned ON FluentBooks will load accounts from the source PWA.
Please refer to the User Account Mapping article to find information on when Account Mapping is required.
Save - you can use this option to save the mapping results for future migrations. The file will be saved in XLSX extension.
Load - in case you have previously saved a user mapping file, choose this option to load it.
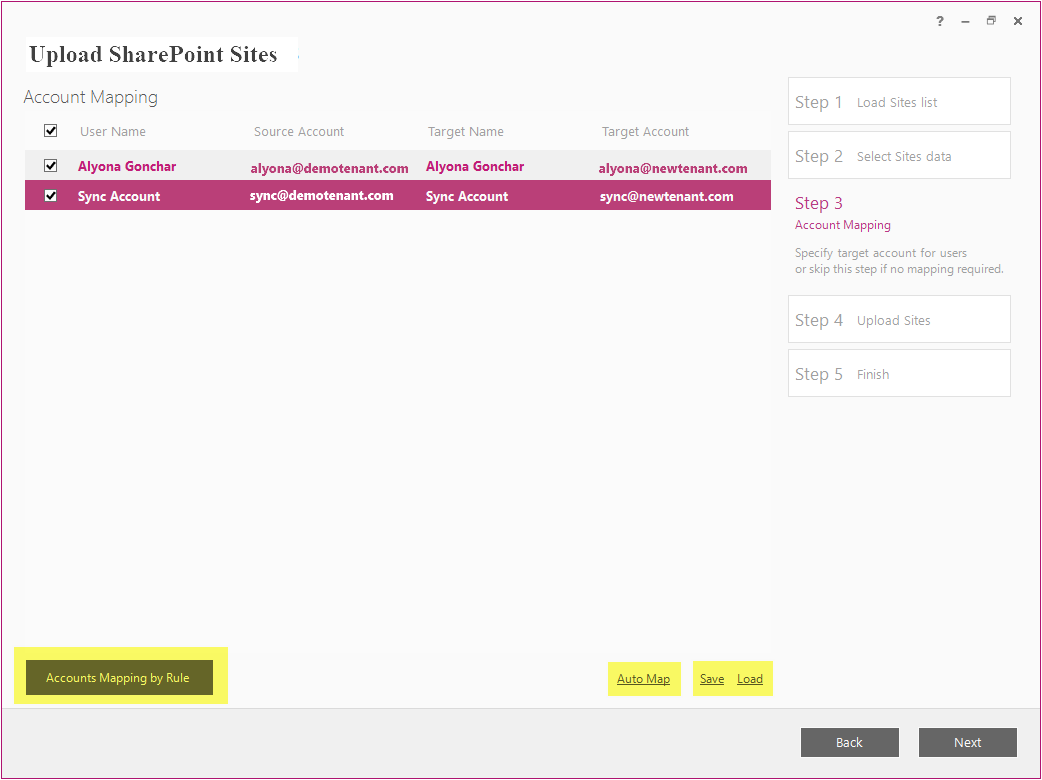
FluentBooks provides two other ways to map accounts:
1. Accounts Mapping by Rule
This option allows to perform a bulk update of the target accounts and to set either ‘Target domain’ or ‘Target Office 365 tenant’ login type for all target accounts at one go.
Click the “Accounts Mapping by Rule” button, select either of the rules, and provide the domain or Office 365 tenant.
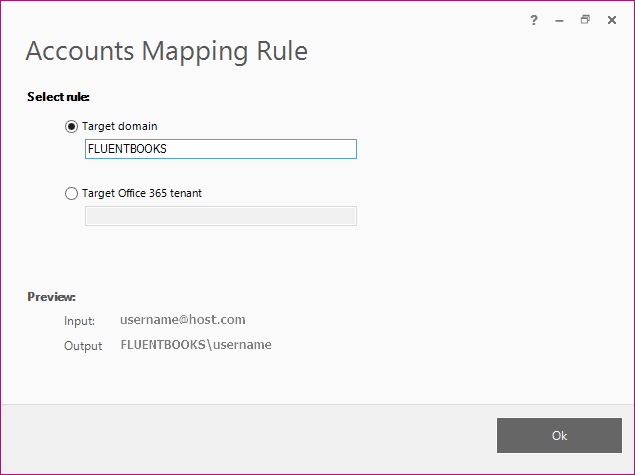
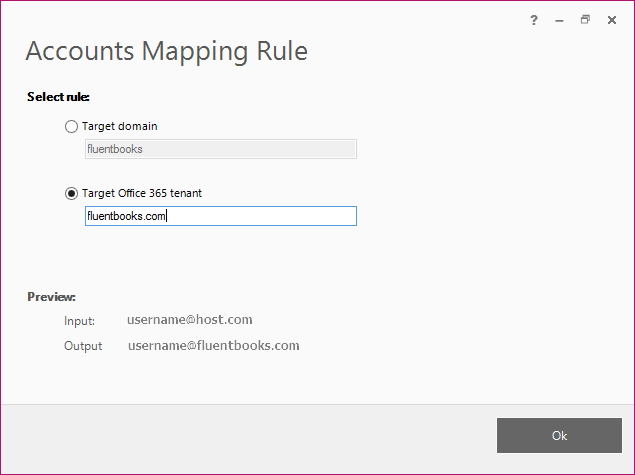
The preview section will show how the accounts will look like after the rule is applied.
Click OK to apply the selected rule.
2. Auto Map
If you choose this option FluentBooks will load the target users and attempt to map them automatically by names.
Update the mapping if needed.
Target account can be edited manually, to do this double-click the target account name, and it will become editable, click Enter key to confirm the changes.
If there is no corresponding user on the target PWA, then the line with such user will be left blank.
Click Next after you finished user mapping to proceed with sites upload.
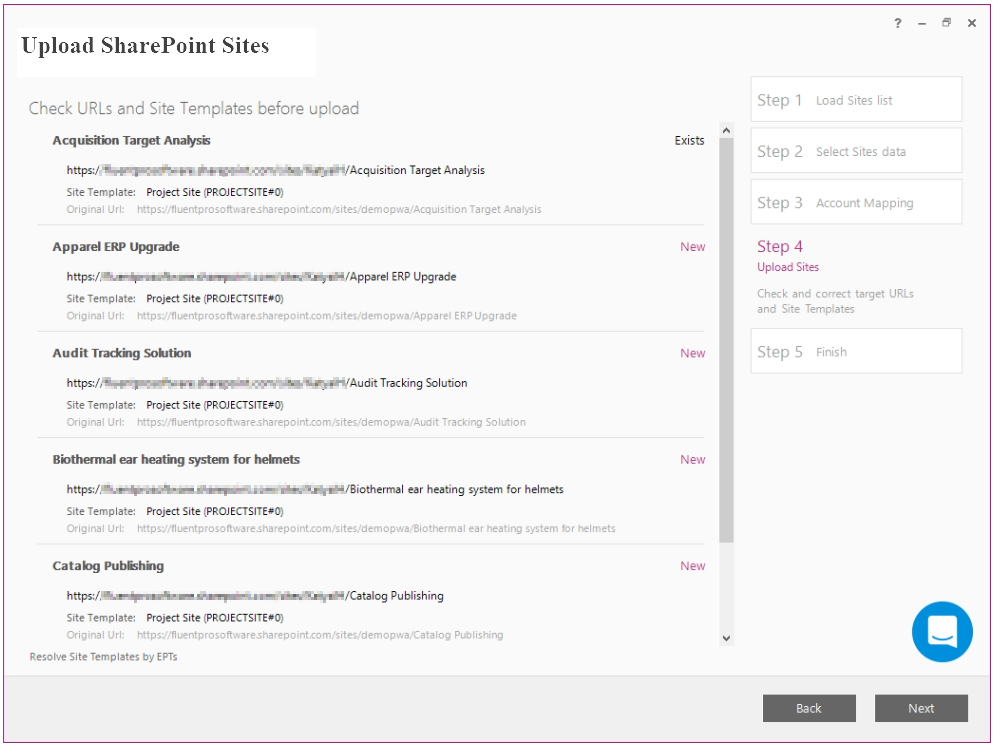
6) Check that the correct URLs and Site Templates are shown.
Change the URL and the Site Template if necessary.
If custom templates should be applied to the sites, click the Resolve Site Templates by EPTs option. FluentBooks will check the site templates specified for EPTs on the target PWA and will set these site templates for the project sites that are being exported.
Note: The site template of the existing site cannot be changed either by FluentBooks or manually.
Click Next to start the upload process.
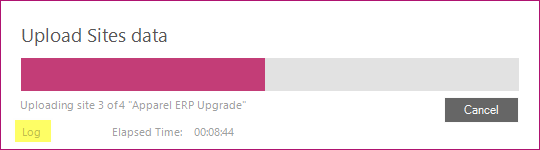
7) Allow the wizard some time to upload SharePoint Sites data.
Log option allows viewing the log records in real-time during the upload process.
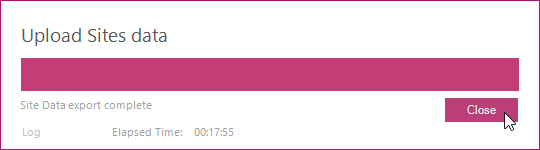
Click Close after the upload is completed.
8) Upload Summary shows the SharePoint Sites that are exported to the target PWA.
Export to Excel the summary.
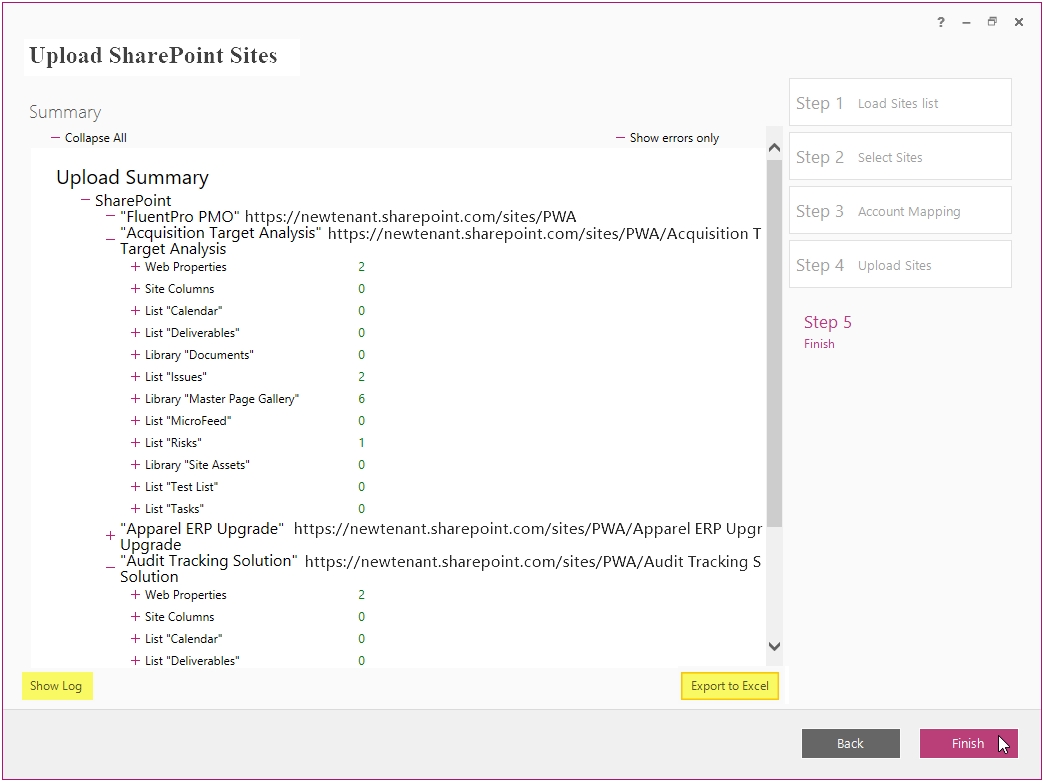
Click Finish to close the wizard.