
The next step after downloading PWA configuration and Projects is to download the SharePoint content from the source PWA using the 'Download SharePoint Sites' wizard.
1) Select the Import option from the File menu and then the ‘Download SharePoint Sites’ wizard.

Note: User account that is used by FluentBooks when migrating SharePoint content should have Site Collection Administrator and PWA Administrators rights. If the user account does not have Site Collection Administrator rights, then FluentBooks will not be able to create a new Site. The existing Site might be updated successfully, but it is strongly recommended to use a user account with Site Collection Administrator rights to avoid unexpected issues.
Make sure the ‘Load Site Hierarchy’ and 'Save each site into separate workspace file' checkbox is selected, specify the output folder where the SharePoint Sites will be saved.
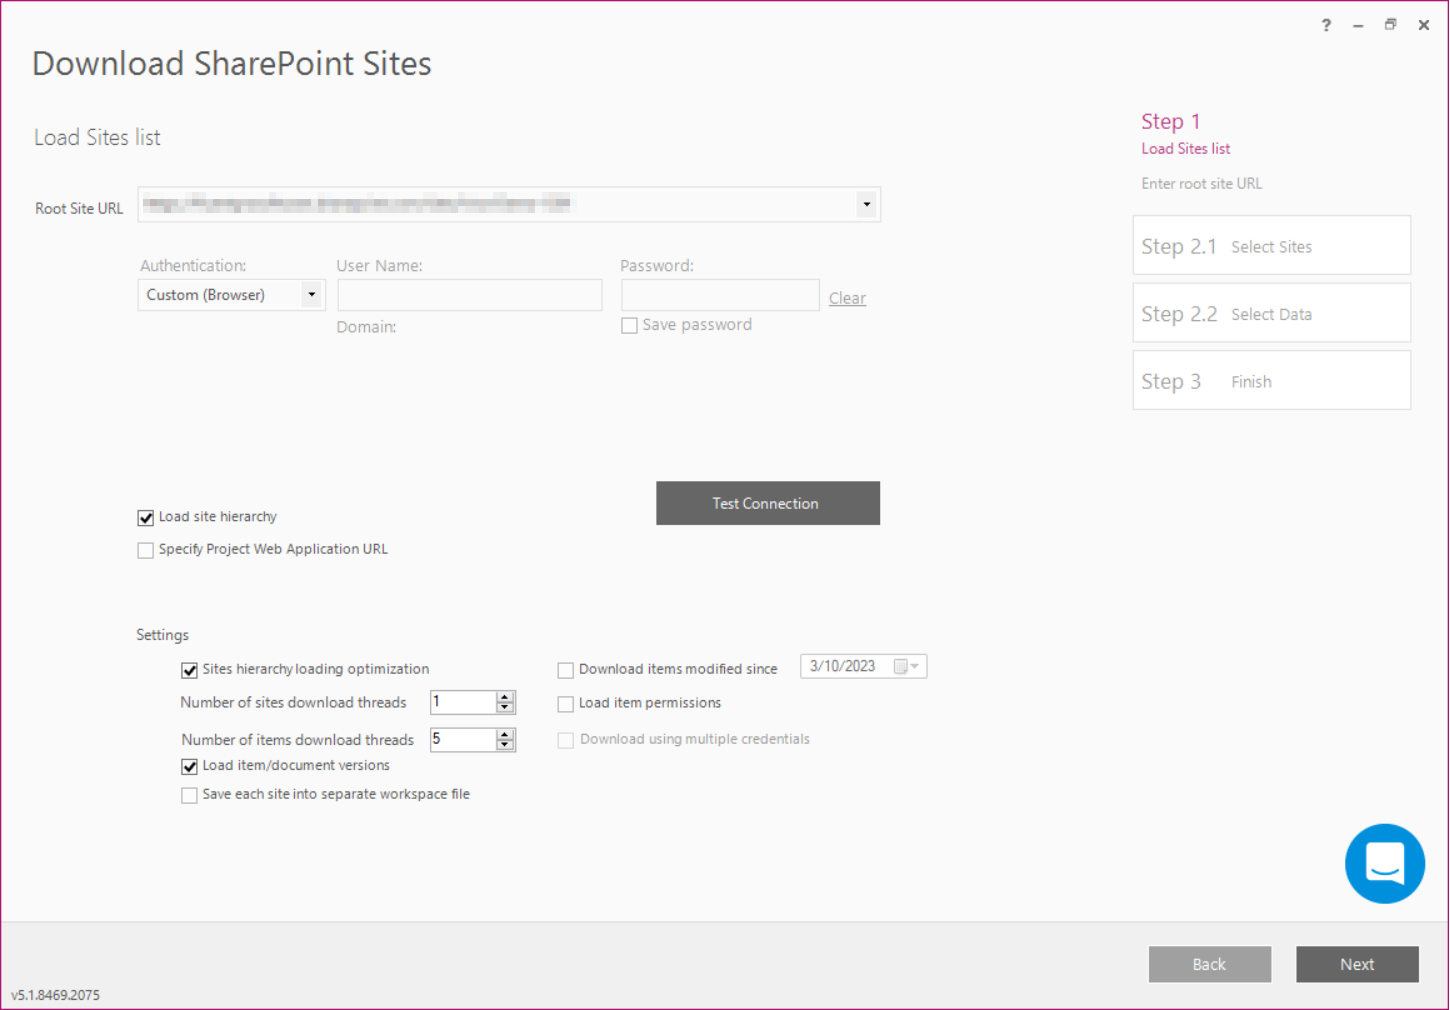
Modify other settings if necessary and click Next.
| Setting | Description |
|---|---|
| “Load site hierarchy” | check this checkbox if you want to import sub-sites from the provided Root Site Url. |
| “Specify Project Web Application URL“ | check this checkbox if PWA URL differs from the Site-Collection URL, specify PWA URL in the field that appeared after checking the checkbox. |
| “Sites hierarchy loading optimization” | check this checkbox to optimize the loading of sites hierarchy, this setting allows to create multiple download threads to speed up the process. |
| "Number of download threads" | by default, the number of threads is set to 1. This number can be increased to speed up the download process. When downloading from Project Server 2010/2013/2016 (On-Premises), the number of threads can be increased up to 5 threads. When downloading from Project Online, the number of threads can be increased up to 3 threads (recommended setting is 2 threads). NOTE: increasing the number of download threads will also elevate memory usage, especially for large sites |
|
"Load item/document versions" |
check this check-box to download the documents versions and list items versions to FluentBooks Workspace |
| "Save each site into separate workspace file"* | check this check-box, to save each SharePoint site into a separate workspace instead of creating a workspace that contains all sites. Provide a path to a folder to which workspaces with sites will be saved. |
| "Download items modified since "mm/dd/yyyy" | check this checkbox to download only items/documents, which were modified after the specified date. |
| "Load item permissions" | check this checkbox to download unique permissions of lists/items |
| "Download using multiple credentials" | Check this checkbox if you have a big number of SharePoint Sites to download (100 and more and each site has a lot of information) and you have several accounts with the required permissions that can be used to download SharePoint Sites in several threads. When the checkbox is checked, you can add 4 more accounts with the required permissions that will be used to login to the source PWA and download the sites. Each account will be used to download 6 sites (max), and all the accounts will be used simultaneously. As a result, if you provide 4 additional accounts, 30 (max) sites will be downloaded at once. Also, it is required to set the number of download threads. If you add 4 more accounts then 30 is a maximum number of threads. If you add less accounts, provide the number of threads accordingly (6 threads for each account max). This option helps to avoid throttling while downloading a big number of SharePoint sites. |
*We recommend to turn the Save each site into separate workspace file setting ON when importing large number of SharePoint sites.
With this setting turned ON, FluentBooks will save each downloaded site to a separate workspace on the go, and will also create an index workspace containing sites structure information.
The approach of saving sites to separate workspaces rather than into one prevents the necessity of re-importing all sites if anything goes wrong at the end of the import process or while saving a single workspace containing all sites data, as well as speeds up the process of opening workspaces during SharePoint sites upload, as opening a large workspace containing a significant number of site can be quite time consuming.
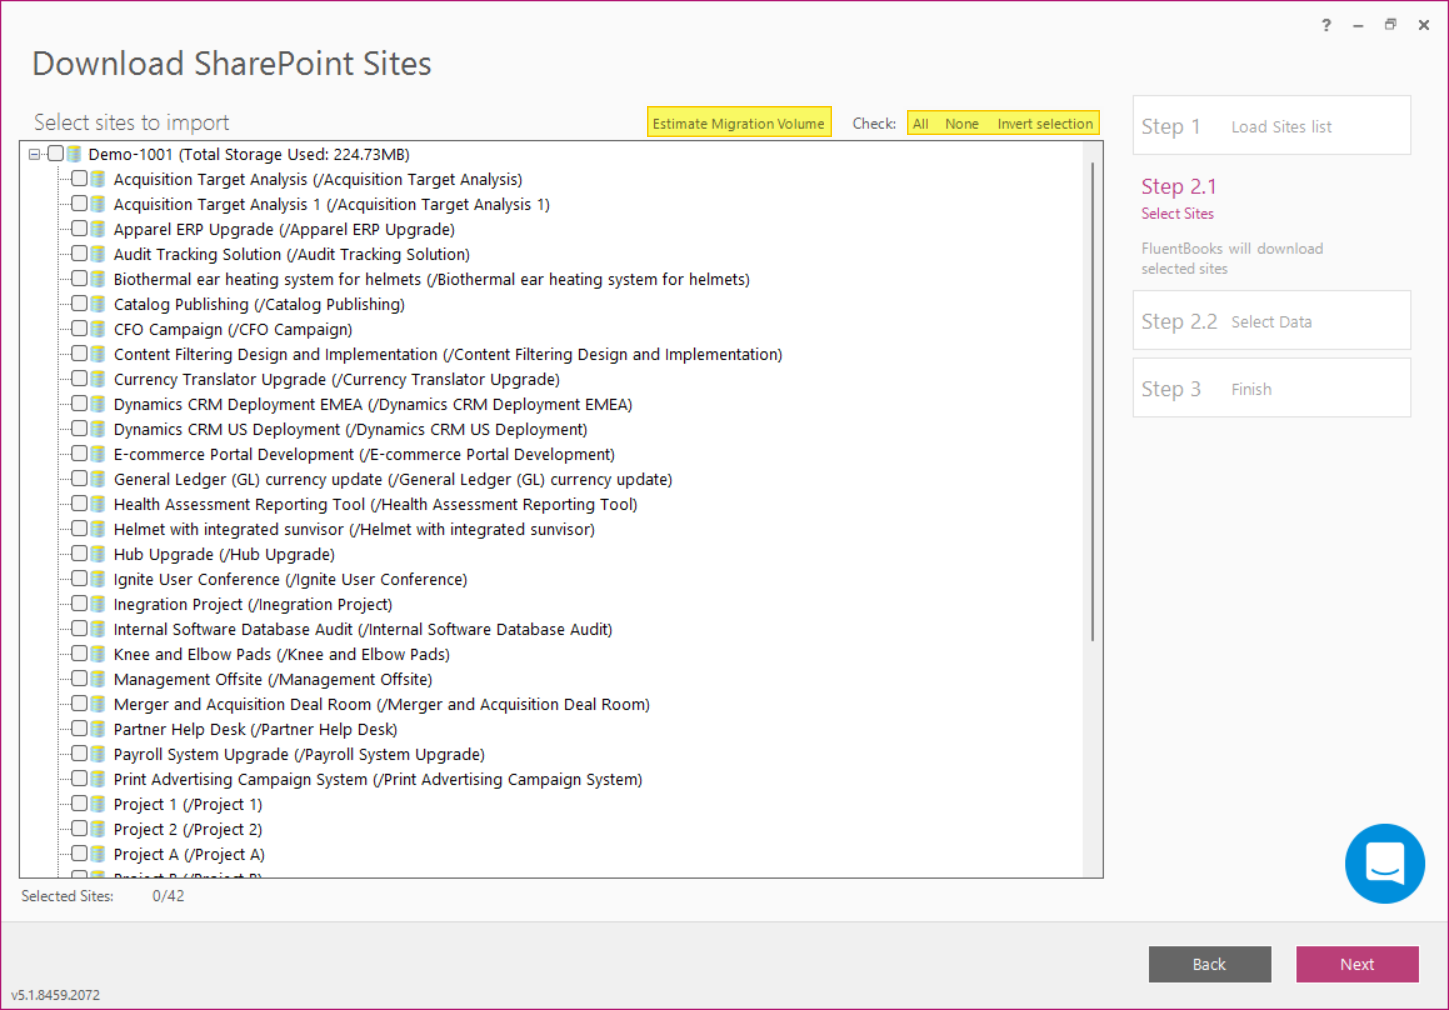
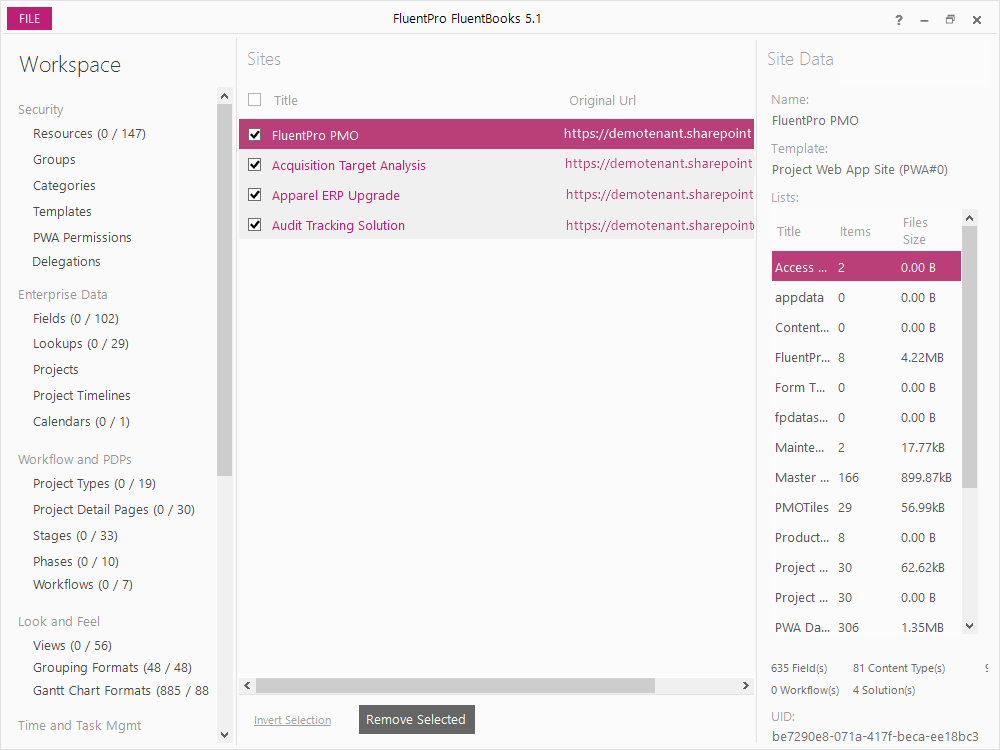
3) Select the SharePoint Sites to be imported from the source PWA by checking their check-boxes or using Check: All, None, Invert selection options and click Next to proceed.
Please note: On this step, you can use the Estimate Migration Volume option to see the size of selected SharePoint sites.
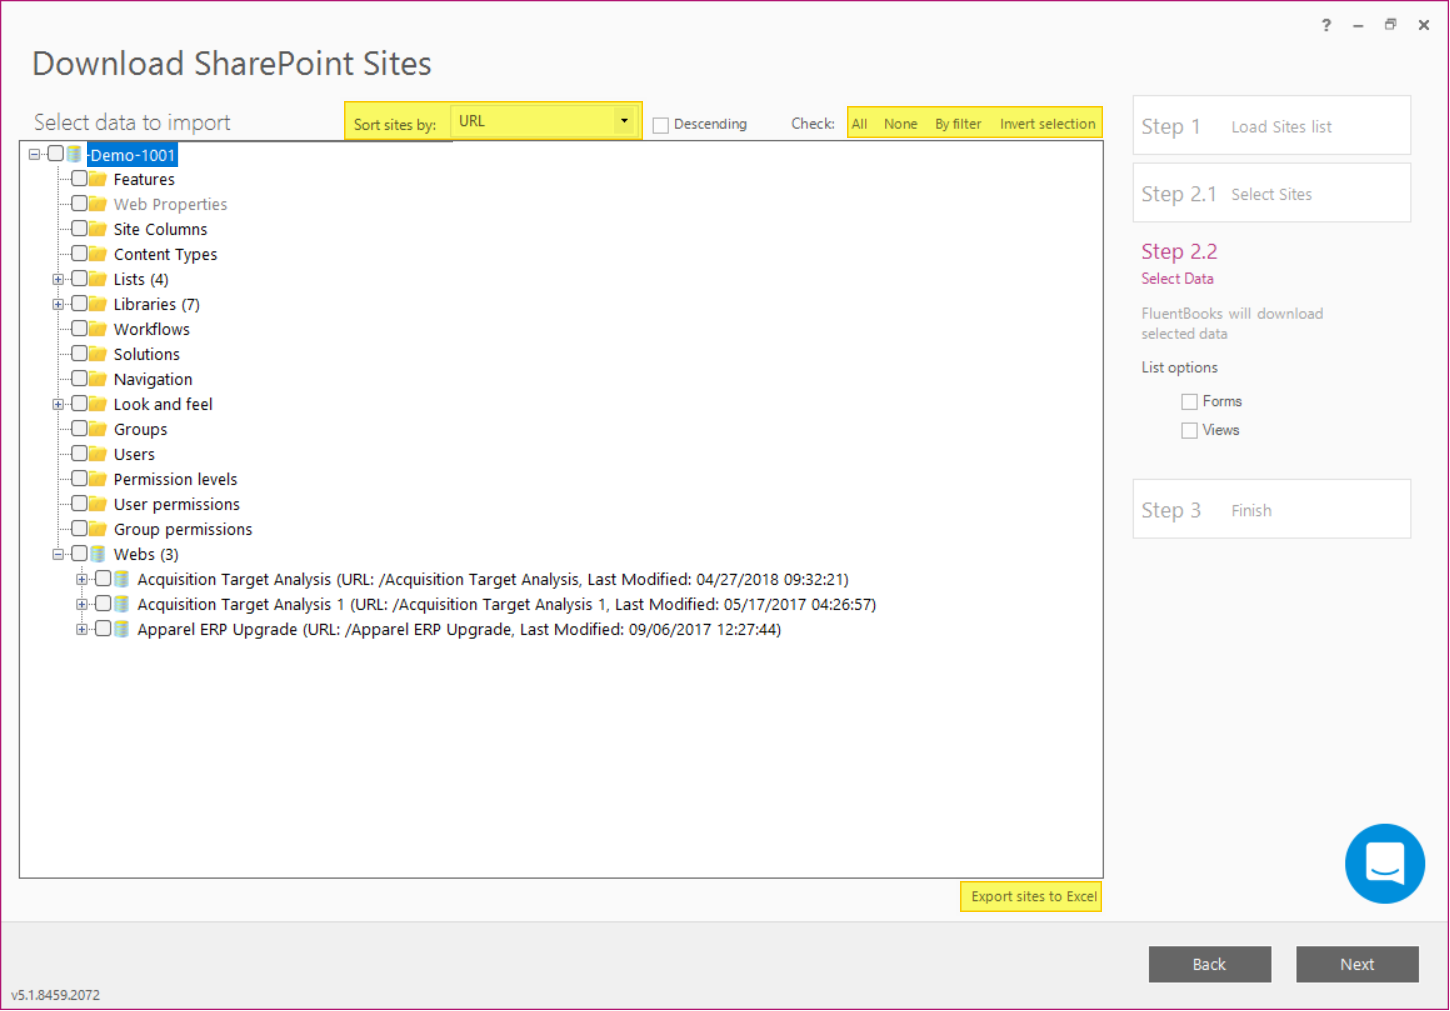
4) Select the SharePoint Sites data to be imported from the source PWA by checking the check-boxes next to the elements.
The Export sites to Excel option allows exporting the list of sites and the Last Modified Dates field values to Excel.
Check All / None options allow checking a selection of sites in one go. By filter option allows selecting / clearing specific data for each selected site (e.g. select only specific lists, etc).
Use the Sort sites by option to sort the sites in the list as needed.
Click Next to start the import process.
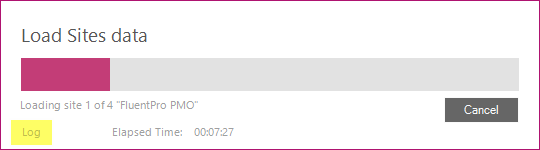
5) Allow the wizard some time to download SharePoint Sites data.
Log option allows viewing the log records in real-time during the download process.
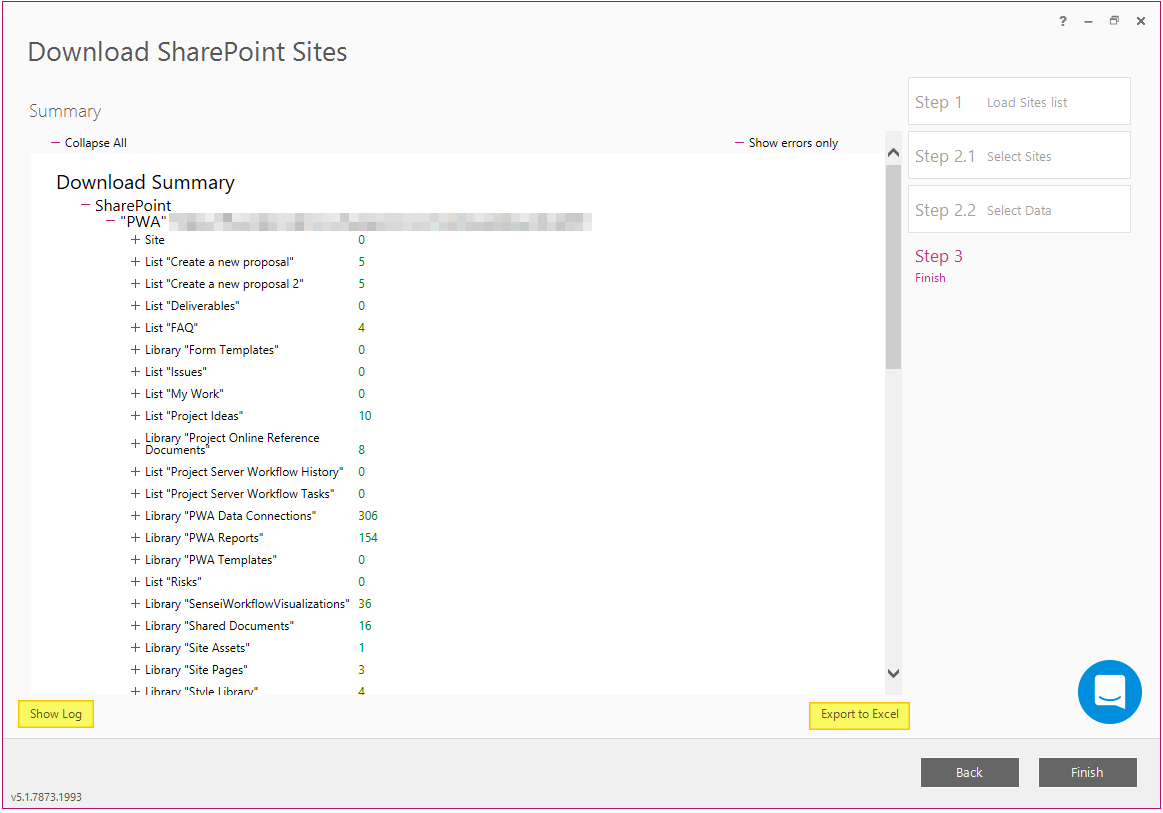
6) Download Summary displayed after the import process is finished will show the SharePoint Sites that were imported from the source PWA.
Export Download Summary to an Excel file using Export to Excel option.
Show Log option allows viewing the log records after the download process is completed.
Click Finish to close the wizard.
In case the option ‘Save each site into separate workspace file’ was not selected, all the sites will be downloaded to the current FluentBooks workspace. Make sure to save the downloaded data using the File >> Save As option. This file will be used later during the Upload step of migration.
Proceed to the next step - Upload the data to the target PWA. The very first step here will be Upload of root PWA Site Settings and Content.