
Next step is to compare Projects and Project Plan Templates using ‘Compare Project Plans’ wizard.
1. To start the wizard, click File → Wizards → Compare Project Plans
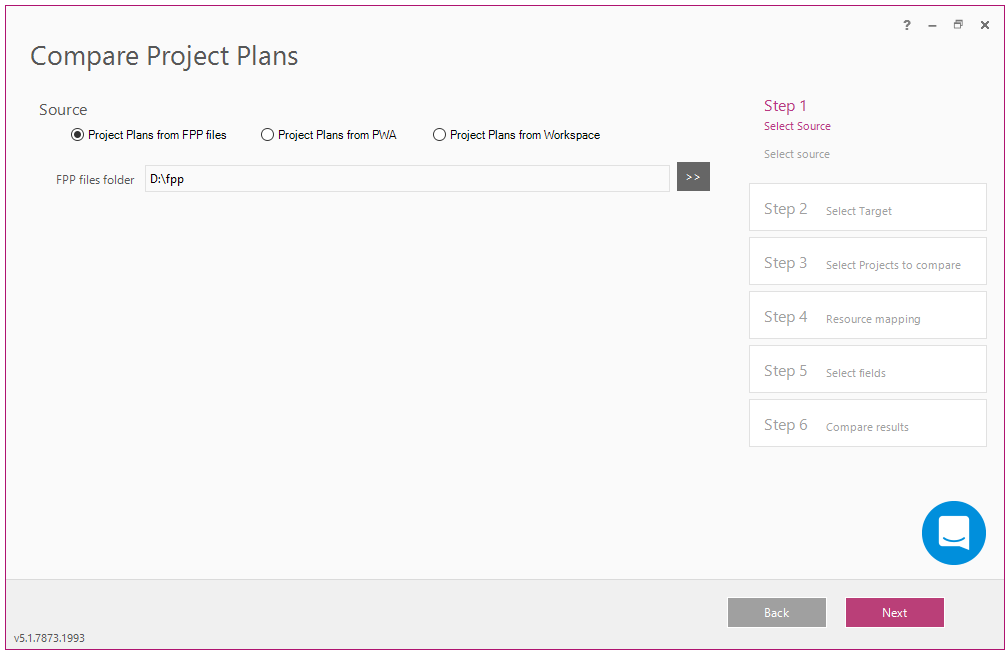
2. Select Project Plans from FPP files option as a source. This option allows to compare project plans from the FPP files previously saved to the machine, where FluentBooks is installed.
Specify the path to a folder, where FPP files are located.
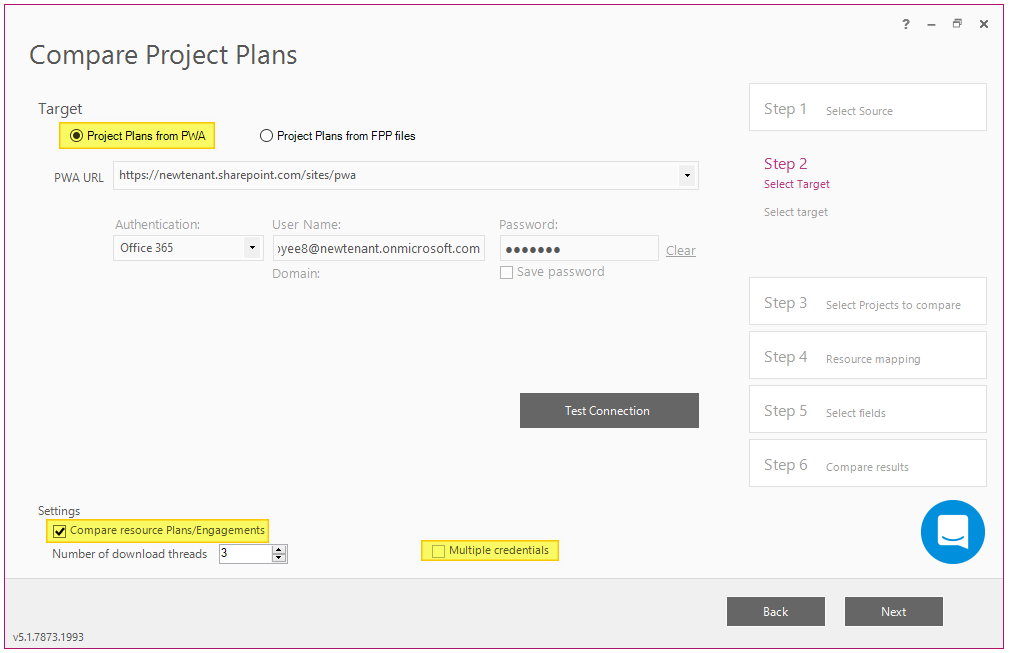
3. Select Project Plans from PWA as a target.
Specify the target PWA URL, Authentication Type and Credentials. Specify additional settings, if necessary:
- Compare resource Plans/Engagements
- Multiple credentials - check this checkbox if you have a big number of Projects to compare and you have several accounts with the required permissions. When the checkbox is checked, you can add up to 5 accounts that will be used to compare projects.
Note: Multiple credentials option is not available for Custom (Browser) authentication type.
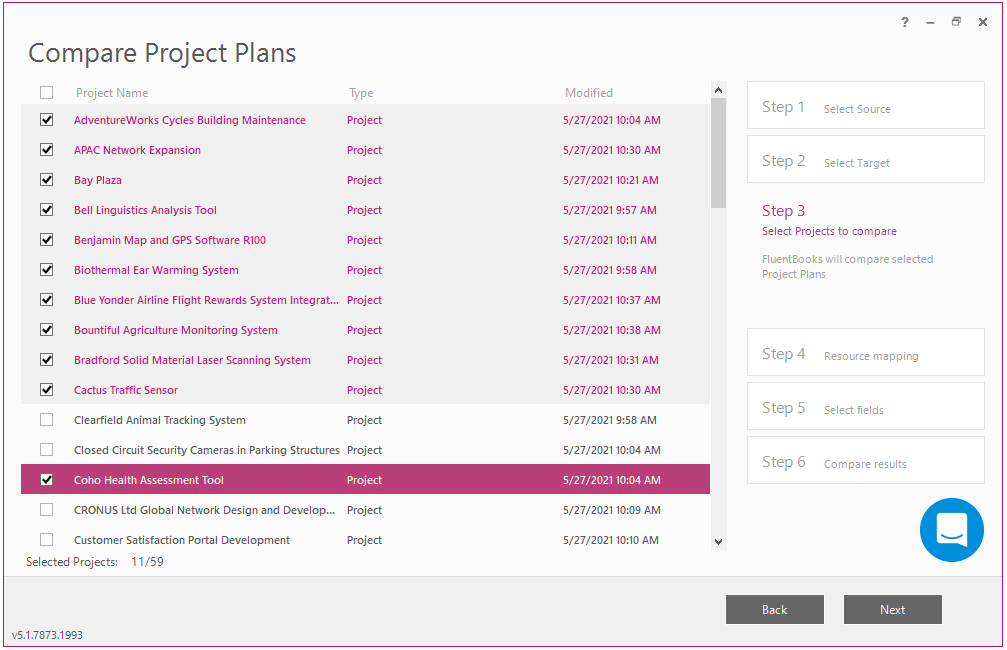
4. Select Projects.
FluentBooks will load the list of projects from the source. Select the necessary projects and click Next.
5. Resource Mapping.
In the next step FluentBooks will load the resources from the source project plans. It would be needed to perform mapping with the target resources.
Click Load option and specify the path to the previously saved Resource mapping file that you used to upload projects.
Verify mapping:
If there is no corresponding resource on the target PWA, then the line with such resource will be highlighted in red. Uncheck the checkbox of such resource, to prevent the “Unresolved resource mapping found” error.
If FluentBooks found an incomplete correspondence for some of the resources, their names will be marked with yellow. Pay attention to such lines and correct the mapping if need.
If there was a complete correspondence found, such resource will not be marked with any color.
FluentBooks marks Status Managers accounts with brown color.
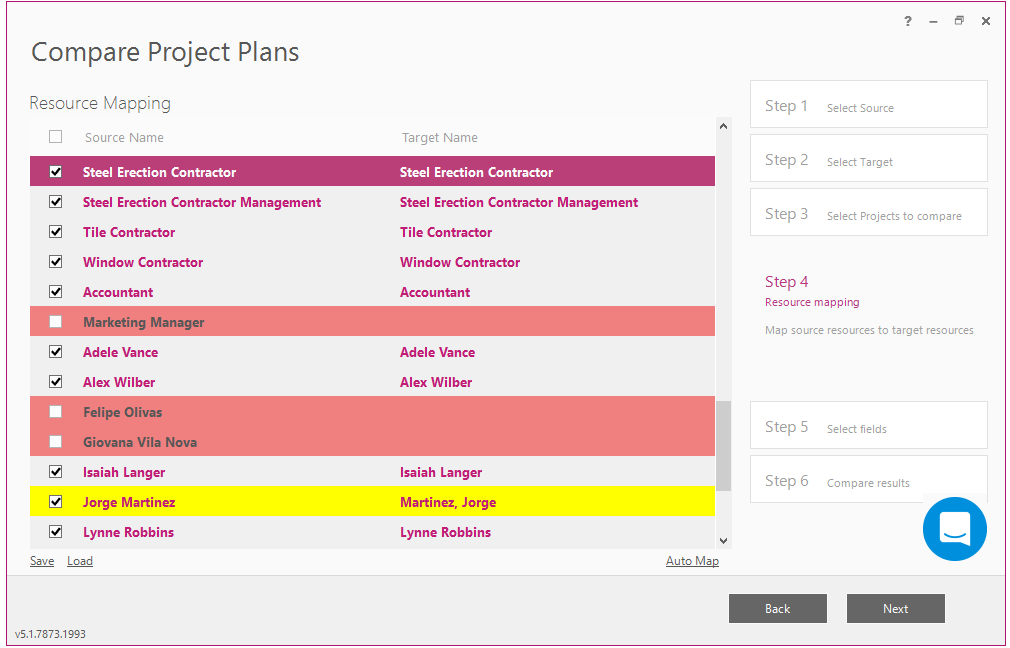
Update the mapping if needed. Target account can be edited manually, to do this double-click the target account name and it will become editable, click Enter key to confirm the changes.
Make sure not to map invalid resources and resources where type does not match, e.g., mapping Cost resource to Work or Generic to non-Generic will result in an error.
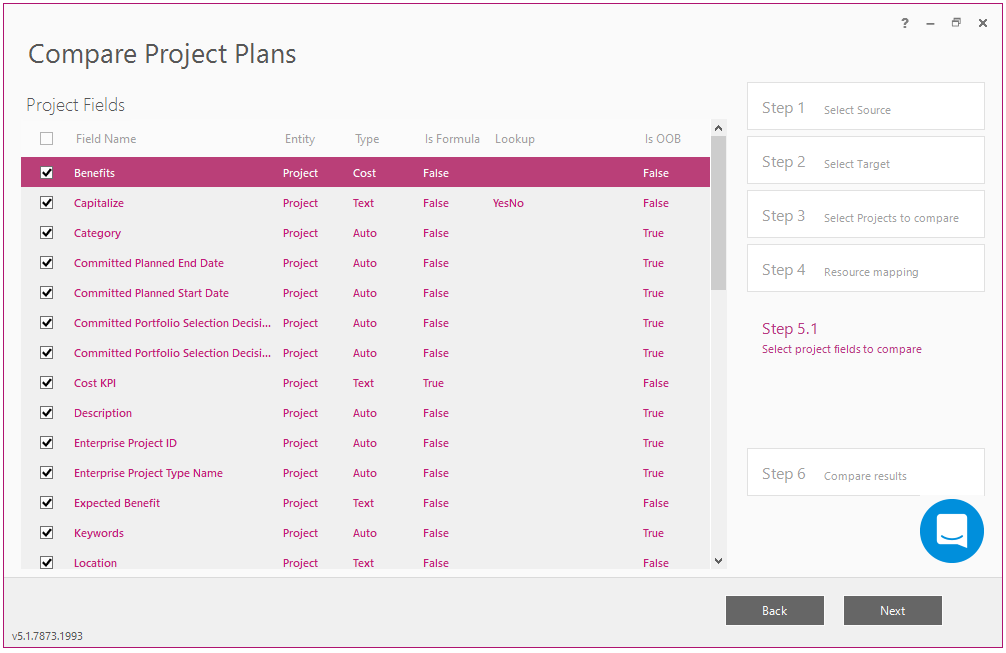
6. Select Custom Fields for comparison.
In the next screen FluentBooks will load Project Custom Fields. Here it is possible to choose the custom fields which values need to be compared.
In each column values may be sorted by clicking on the column name
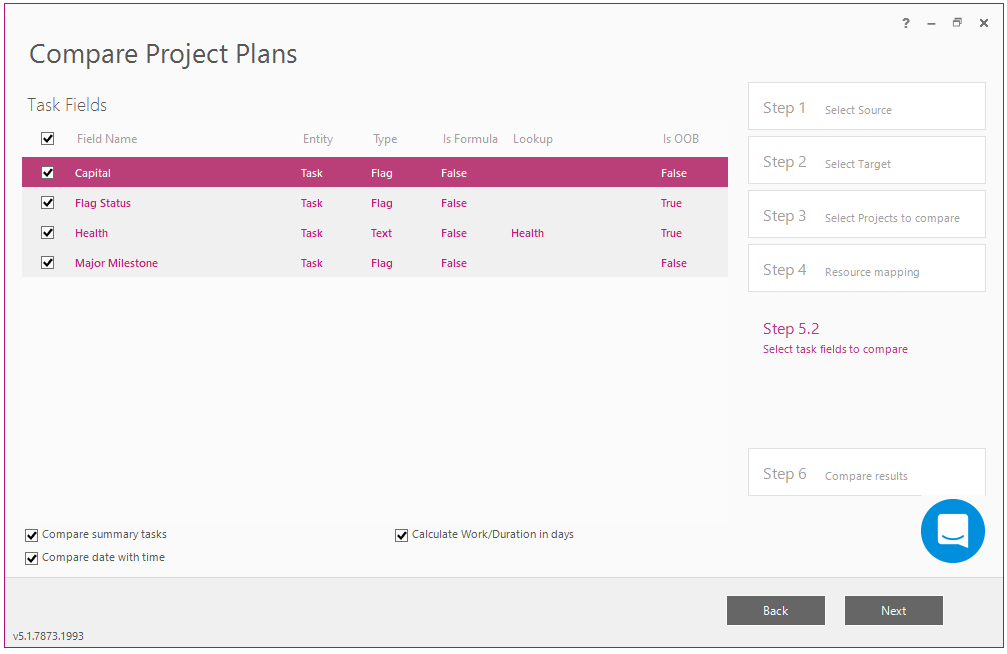
Next screen will display Task Custom Fields. As in the previous screen, select the fields which values will be compared:
7. Compare Summary.
The Summary screen
displayed in the end will show a short summary of the compare
process:
Project Name area displays the list of compared projects. The names highlighted in yellow have differences in source and target versions.
Project Status area displays the list of Project fields, which have different values in source and target versions for the currently selected project.
Task displays the list of project tasks. The names of the tasks which have differences in source and target versions will be highlighted in yellow.
Tasks Status will display the list of fields which values differ in the source and target for the currently selected task.
Select Export to Excel option to save the compare summary to an Excel file.
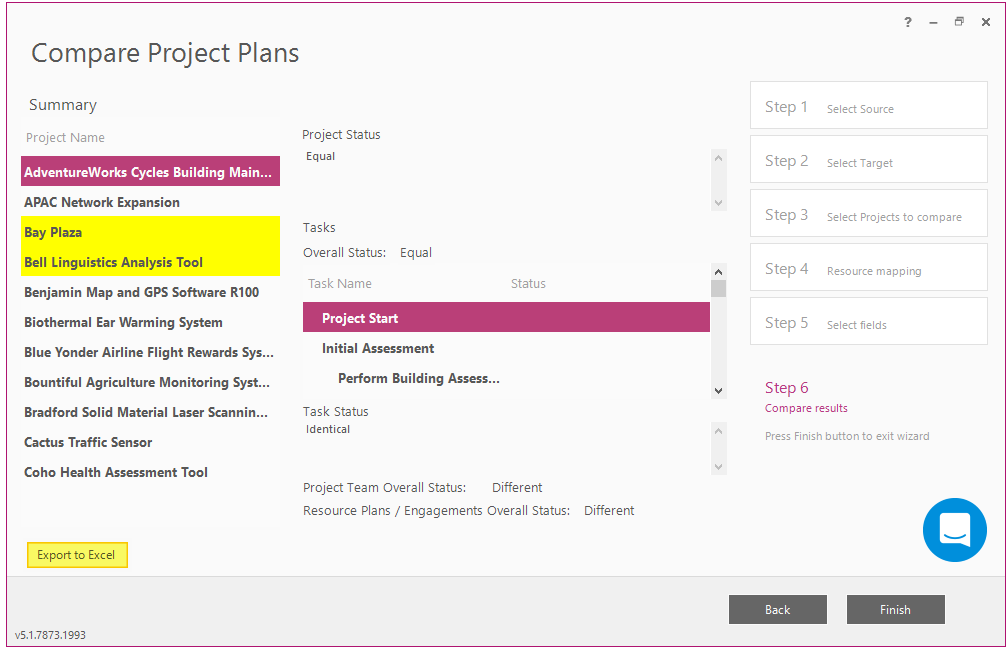
Click Finish to close the wizard.
8. Comparison Report.
Comparison Report file consists of several sheets: Summary and separate sheets for each of the compared projects Tasks and Team:
In the Summary it is possible to review the list of the compared projects and the status of the Project fields, which values were compared: Different, Equal or Missing.

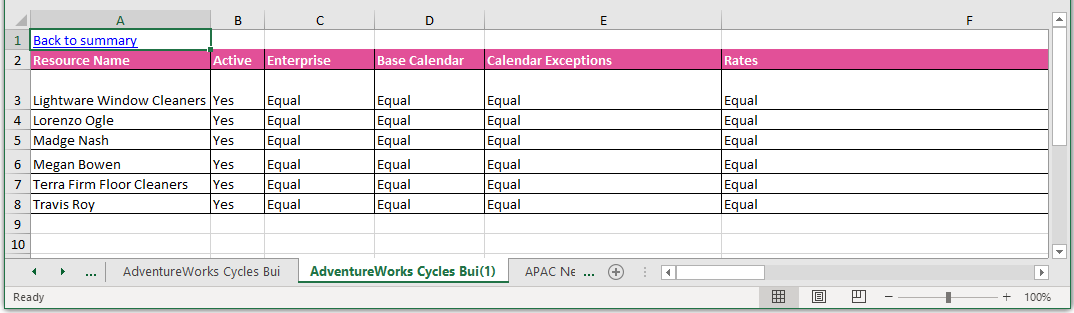
2. For each compared project there will be 2 sheets created - Tasks and Team, which display comparison status for tasks and project team correspondingly.
There is a limitation of the number of characters in the Excel sheet name - 31 characters. If the project name exceeds the limit, the (1) will be added to the shortened project name instead of 'Tasks' or 'Team'.
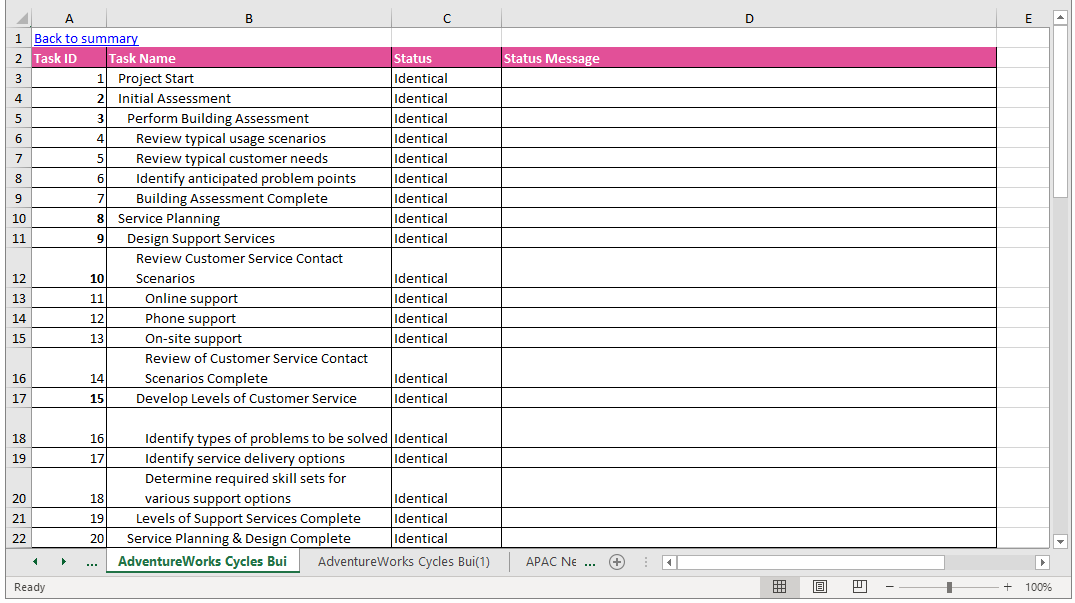
Analyze the comparison report and proceed to the next step – Partial re-upload of PWA Configuration.