
This article describes how to disable or permanently stop integration scenarios in Integration Hub from being executed if needed.
There are two ways to disable synchronization of tasks in Project Online with Visual Studio Team Services (VSTS) and vice versa.
Editing the existing integration scenarios in Integration Hub.
It is possible to disable automatic data synchronizations performed by schedule for an integration scenario. In such a case, the data synchronization will be performed if a user initiates a manual launch of such a scenario.
1.1. In order to modify schedule settings in Integration Hub, please navigate to Integration Hub. On the opened page either click the Active Integrations tile or the Scenarios button.

1.2 The next page displays the active integration scenarios available for your Environment. Please choose which scenario you would like to edit. For this, click the downward arrow next to the needed scenario and choose the Edit option from the drop-down menu.

1.3. As soon as you click the Edit option, please proceed to the Schedule screen by clicking the Next button. On the Schedule wizard screen in the Schedule Settings menu click the downward arrow and chose On-demand in the drop-down menu.

1.4. Confirm the selection by clicking the Done button.

If both of integration scenarios need to be stopped, please ensure to perform the same modifications for the remaining one in accordance with the abovementioned recommendations.

Please note: Data synchronization will not be performed until you click Run Now in the drop-down menu of an integration scenario. This applies to both “Sync Project Online tasks with VSTS work items” and “Sync VSTS work items with Project Online tasks” scenarios. The same action is required to be performed for all the scenarios which you would like to disable scheduled data sync for.
Disabling data sync between a project in Project Online and VSTS work items.
If it is required to stop data synchronization between a project in Project Online and a project in VSTS, the field “Sync To VSTS” value should be set to “No” in Project Online for as many tasks as needed.
2.1. In order to perform it, please choose the project and click Open either “In-Browser for Editing” or “In Microsoft Project for Editing” on the ribbon.

2.2.1. Once the project is opened for editing, please change values for the fields “Sync To VSTS” to “No” for those tasks which you would like to prevent from synchronization. On finishing to edit the project, please press the Save button on the ribbon.

2.2.2. If the project is opened for editing in Microsoft Project, please perform the changes and Save the project.
Please note: Microsoft Project should be installed on your machine if the Open In Microsoft Project for Editing option is chosen.

2.3. Once you perform the required modifications, please make sure to publish the project in Project Online.
If the integration scenario is performed by schedule, no additional actions are required from your side and the link in Integration Hub cache will be updated automatically. However, please pay attention to the schedule sync time specified on the Schedule wizard screen in Integration Hub to plan accordingly.
Please note: The next synchronization will update tasks from Project Online to VSTS for the last time and further synchronizations will not be performed.
Disabling data sync between VSTS work items and a project in Project Online.
If work items need to be disabled in VSTS, the custom field “SyncToPO” flag should be set to “False” for every Work Item type in Integration Hub group.
3.1. In VSTS navigate to Queries to see all work items. Please make sure that you have created the Query that displays all work items. If not, please click +New query. If you have this query created, please proceed to section 3.3.

3.2. On the next step, please add only one clause – "Work Item Type = [Any] and click the Save query button". If you have any additional clauses present, please delete them.

In the opened page, choose a name and a folder for the new query in VSTS and click OK. If the destination folder is not changed, the query will be created in the My Queries folder.
3.3. Now, you can click the created query and see all available work items for your project in VSTS. In order to update the list, please click Run query.
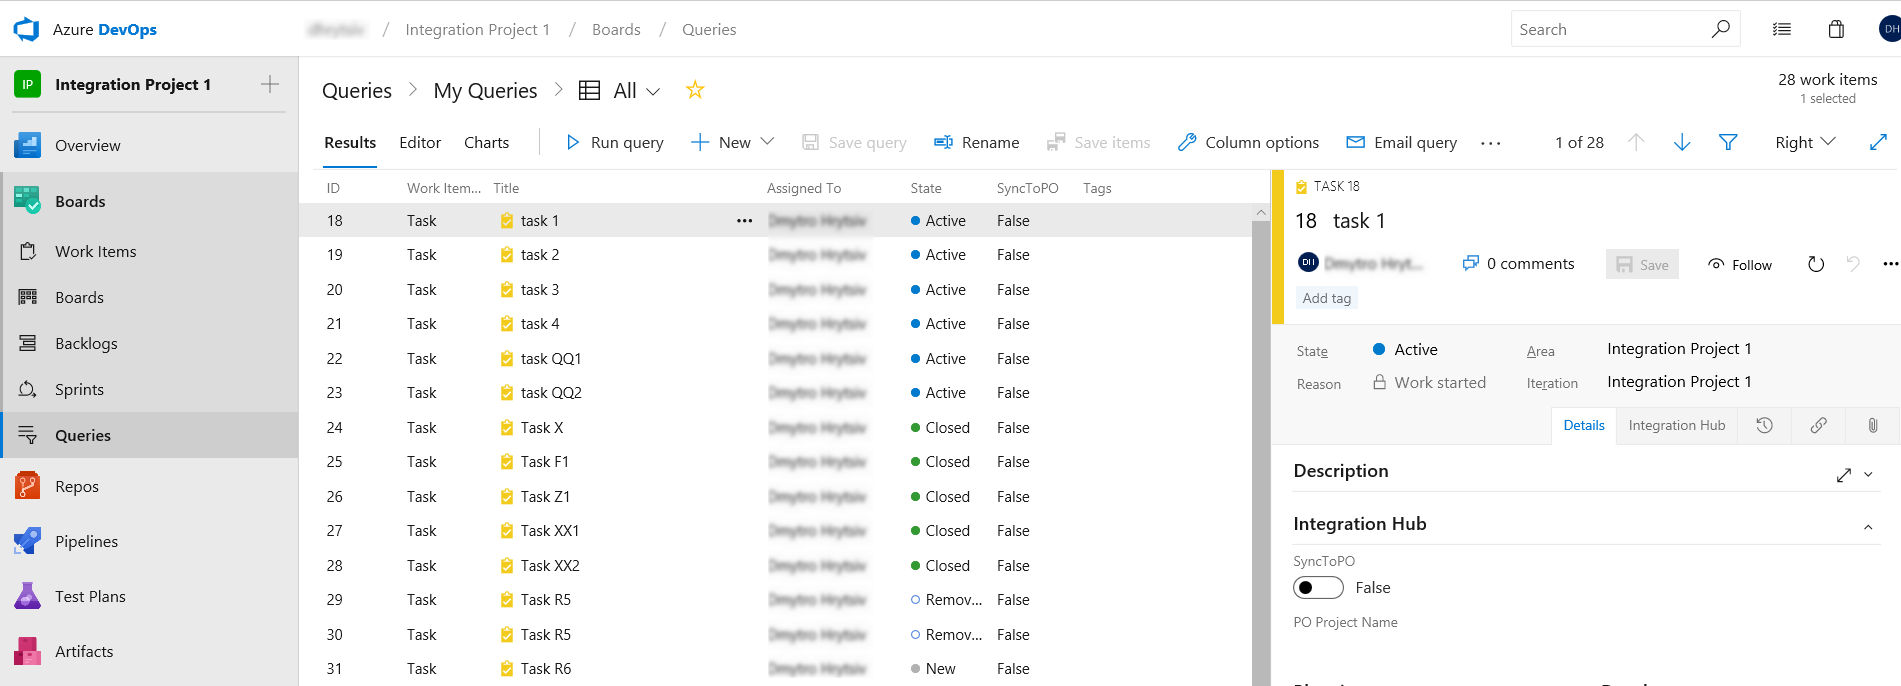
3.4. For your convenience, you can set up displayed Columns by clicking Column options and adding the column “SyncToPO” to the page. When the column is added, you can drag it in order to change the displayed column order. As soon as you finish editing Column options, press the OK button.

3.5. Once it is done, you will be able to see what values are set for “SyncToPO” for Work Items – True or False. Please, modify the custom field “SyncToPO” values to “False” for those Work Items which should not be synchronized with Project Online any longer. The bold type of a Work Item displays that some modifications were performed and it is expected to confirm the changes made by pressing the Save button.

If the integration scenario is performed by schedule, no additional actions are required from your side and the link in Integration Hub cache will be updated automatically. However, please pay attention to the schedule sync time specified on the Schedule wizard screen in Integration Hub to plan accordingly.
Please note: The next synchronization will update Work Items from VSTS to Project Online for the last time and further synchronizations will not be performed.