Project Migrator provides the ability to map fields from the source and target systems in the Task/Item/Card/Column Field Mapping section before the migration starts. You can map item fields, task fields, and card fields depending on the selected systems for migration.
In this article, the task field mapping is described, but the mapping mechanism and settings are the same for other field types (item for Monday.com system, column for Smartsheet, or card for Trello system).
It is necessary to perform the task field mapping for the correct migration of their values, as the field types and names may differ between the systems. For instance, there is a predefined set of task fields in Microsoft Planner Basic that cannot be customized, while fields of various types and with different names can be added for items in such systems as Monday.com, Trello, Asana, Smartsheet etc.
Project Migrator maps some of the existing source and target task fields of compatible types by name automatically once the connection to the source and target systems is established and items to migrate are selected. In case multiple source fields, compatible with a target field, are found by name, they all are added for the mapping.
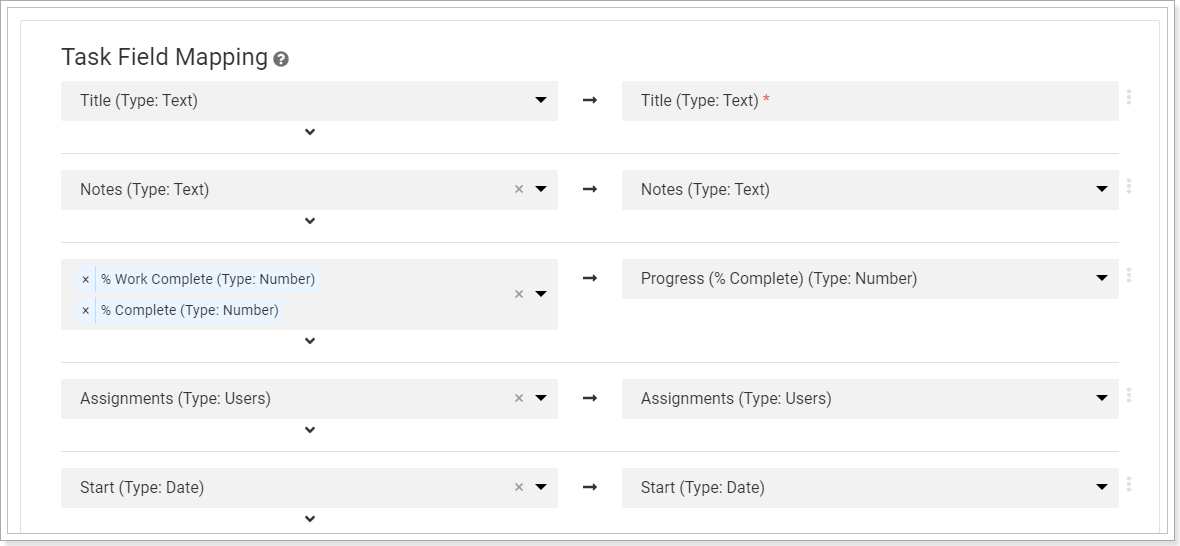
The task field mapping can be edited and adjusted to a particular migration scenario to include all needed source task fields or remove the unnecessary ones.
How to add or remove fields from the mapping
All the compatible source and target fields, available for the mapping, are listed in the drop-down menus in the Task Field Mapping. To map a necessary task field, click on the field and select an option from the drop-down menu.
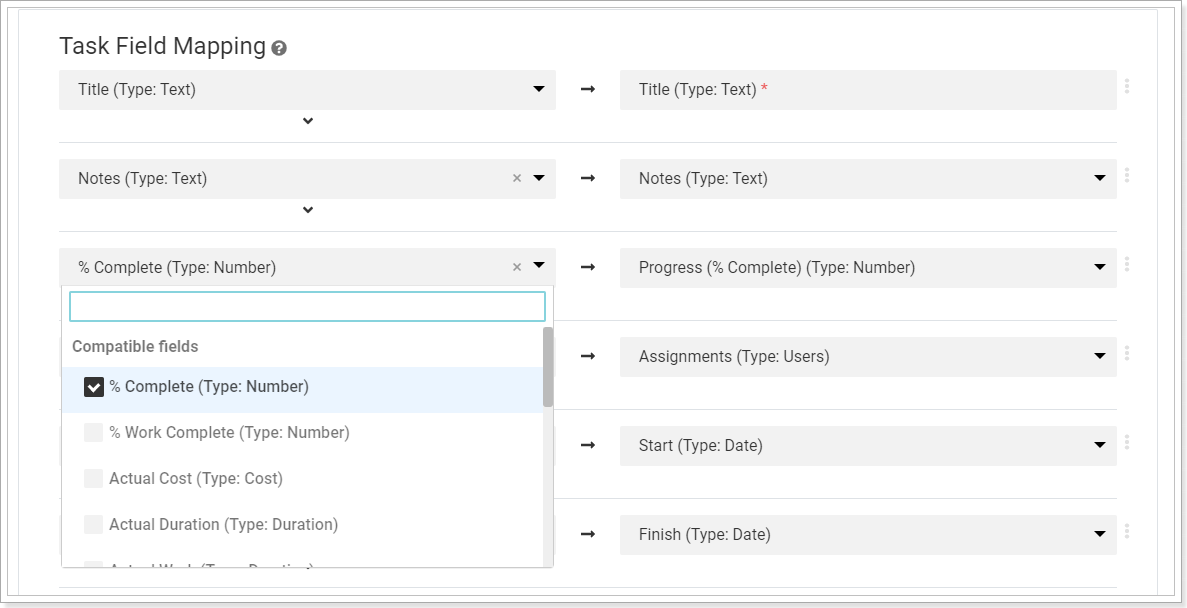
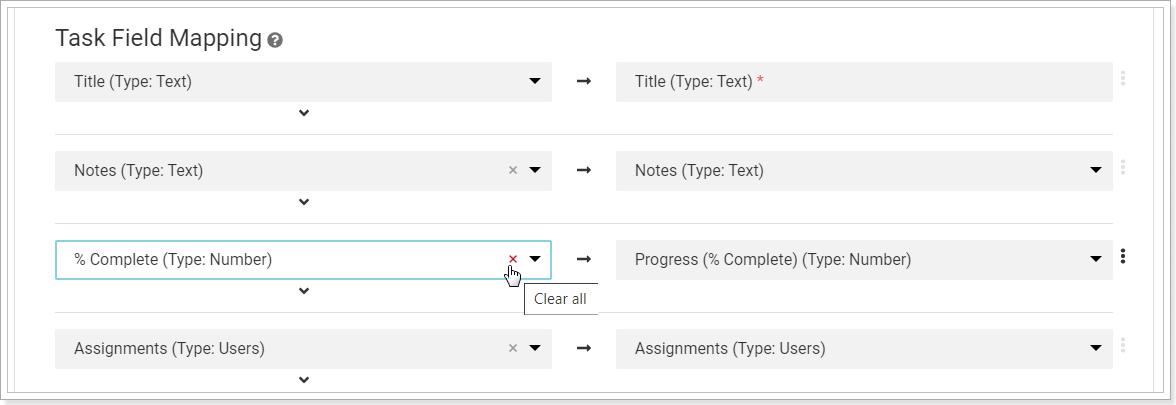
To remove the mapped source task field, click on the ‘Clear all’ icon next to the field.
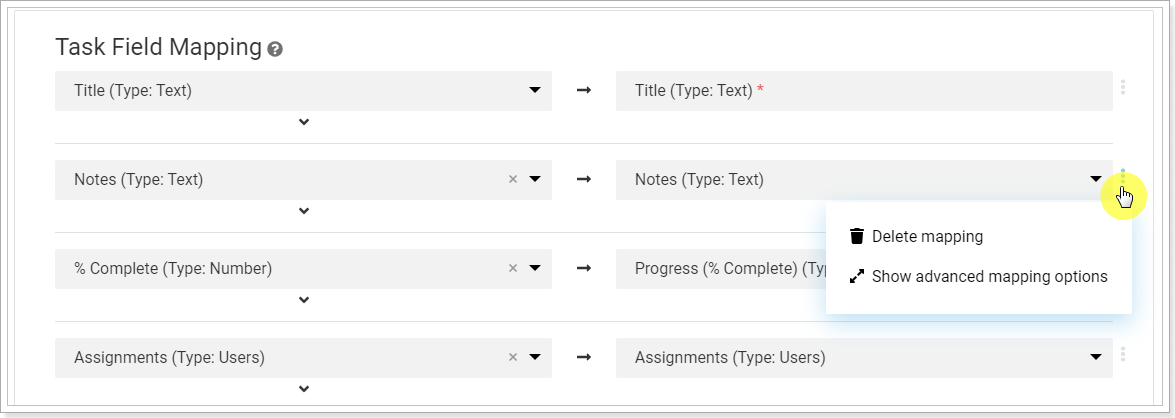
In case you don't need to map some of the target fields with the source ones, you can remove them from the mapping. To remove both the target and source fields, click on the ellipsis button next to the target field and select the 'Delete mapping' option.
In this case, the mapping for the selected field will be deleted. the field itself will not be deleted from the source or target system.
A necessary target field can be added back to the mapping by clicking on the 'Add mapping' button below and selecting the required fields.

Advanced Mapping Options
There are advanced options available for the mapping of each task field. The advanced options are recommended to use in scenarios when a few source Boards/Projects that have different sets of task fields are selected for the migration. For the data migration from task fields of different types and with different names, they all should be added for the mapping.
The Advanced Options section can be opened by clicking the ‘Show advanced options’ icon below a source field.
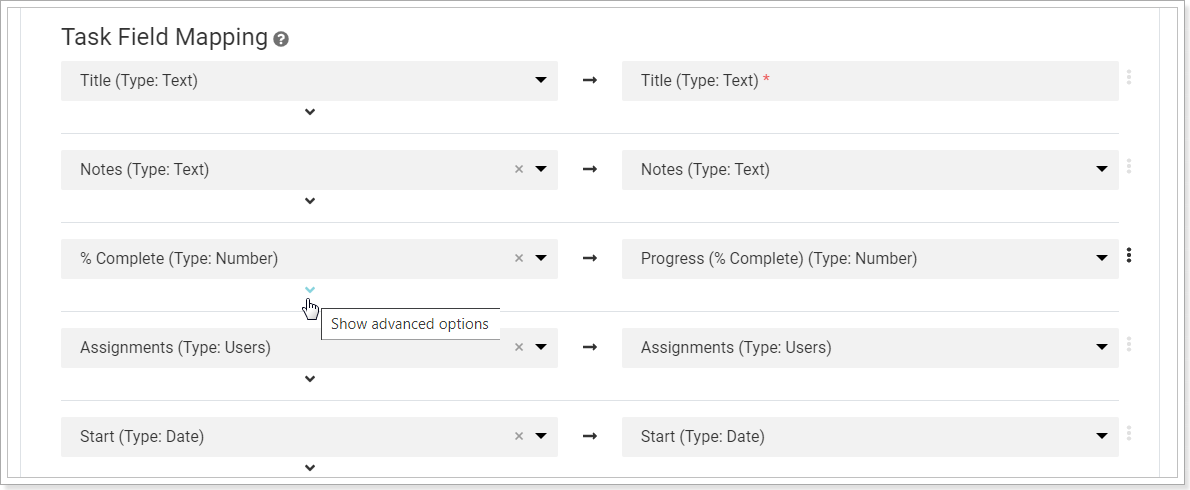
The following options are available:

Multiple – this option allows adding multiple source task fields of compatible types for the mapping with one target field. The ‘Multiple’ option is used together with either of the following settings that determine how to handle cases when two or more task fields, mapped with one target field, are found in one source Board/Project:
Use first found – if this option is selected, the values from the first mapped task field, found in the source Board/Project, will be migrated to the mapped target task field.
For instance, there are two task fields of Text type for task notes, e.g. ‘Description’ and ‘Note’ field, in one source project. Both the fields are added for the mapping with the ‘Notes’ (text) Planner task field. If the ‘Use first found’ option is selected, only values from the task field that is first found in the source project will be migrated to the target field, e.g. only text from the ‘Description’ field will be migrated to the ‘Notes’ task field in the Planner Plan.
Join values – if this option is selected, the values from all mapped source fields, found in the source Board/Project, will be migrated to the mapped target task field, i.e. the values will be joined in one field.

For example, there are three task fields of Text and Drop-down type, e.g. ‘Description’, ‘Note’ and ‘Vendor Type’, in one source project, and all three fields are mapped with the ‘Notes’ Planner task field. If the ‘Join values’ option is selected, the values from all three source fields will be migrated to the ‘Notes’ target field, and they will be separated with a line break there.
Please note: The ‘Join values’ option will work only for those target fields that allow adding multiple values, e.g. such Planner task fields as ‘Assignments’, ‘Notes’, ‘Attachments’, ‘Labels’. If the ‘Join values’ option is selected for the fields that cannot have multiple values, the values from the first mapped task field, found in the source Board/Project, will be migrated to the mapped target task field as if the ‘Use first found’ option was selected.
Use custom lookup – this option allows mapping particular values of a source task field with values of a target field.
The ‘Use custom lookup’ option is recommended to use for mapping values of such task fields as ‘Progress (Percent Complete)’ and ‘Priority’ that have a set of predefined values which may differ between the source and target systems.
Once the ‘Use custom lookup’ option is enabled, the additional fields for specifying which source field values (‘From’ fields) should correspond to which field values in the target system (‘To’ fields) appear.
To add more fields for the mapping click on the ‘Add’ icon next to the target field.
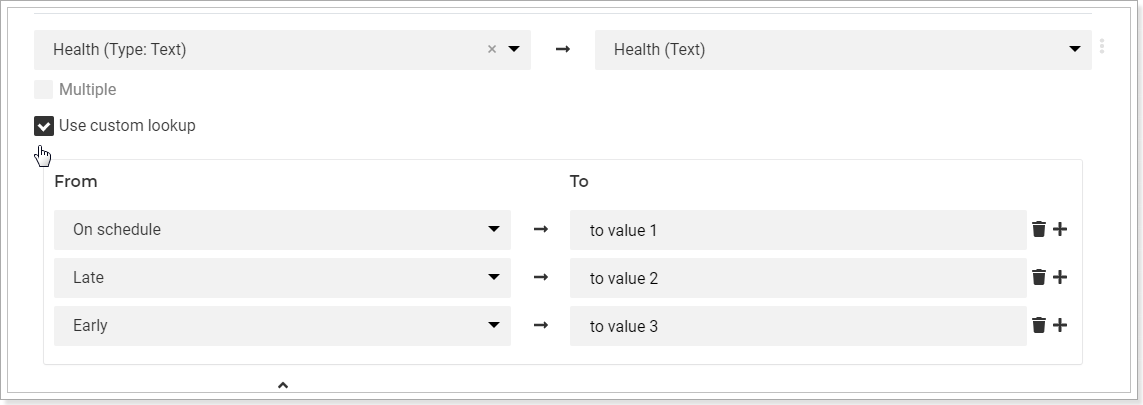
In case you don't need some of the fields, they can be removed by clicking on the ellipsis button next to the field and selecting the 'Delete mapping' option.
By default, the ‘Use custom lookup’ option is selected for the mapped ‘Progress (Percent Complete)’ and ‘Priority’ fields. There is a predefined set of mapped source and target values for those fields that can be adjusted to a particular migration scenario.
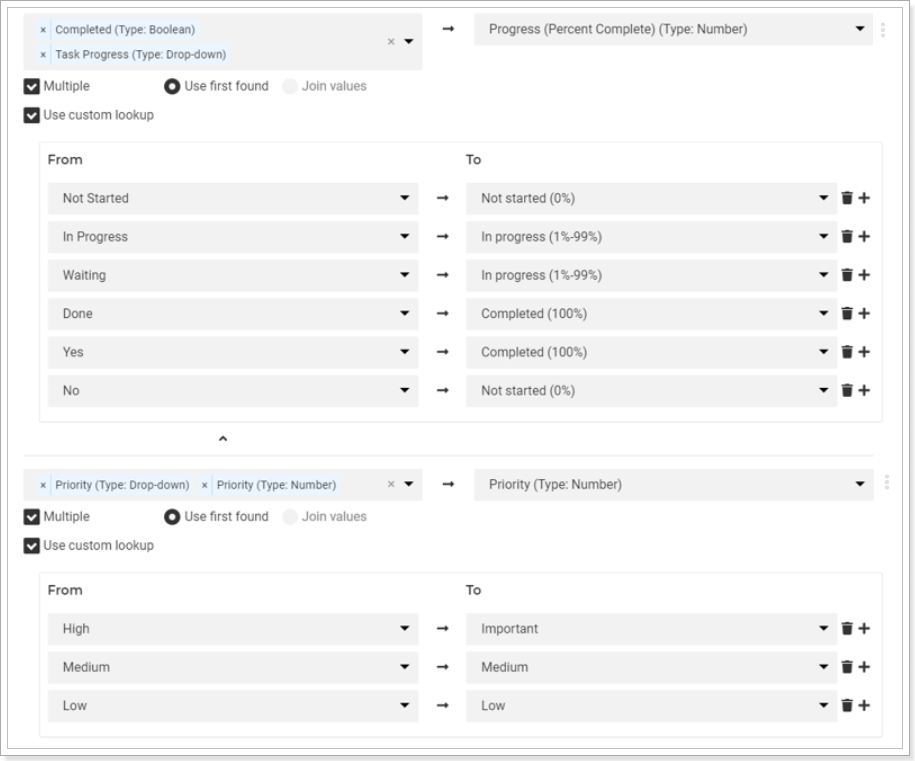
In case there are a few source Boards/Projects to migrate where such task fields have different sets of values, e.g. values ‘Stuck’, ‘Working on it’, ‘Done’ for the Progress/Status field in one project, and values ‘Not Started’, ‘In progress’, ‘Completed’ for such a field in another project, all of them should be mapped to the corresponding target field values using the Custom Lookup option for their correct migration.
Field values can be selected from the field drop-down menu that contains the values loaded from the source.
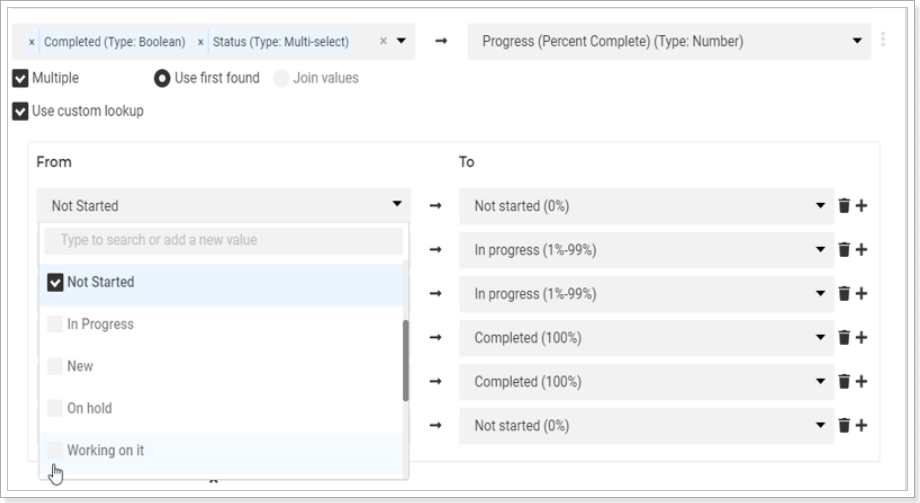
Also, new values can be entered into the source field drop-down for the mapping. To add a new value, type it in the search field in the drop-down and press Enter.
